cross-posted from: https://lemmy.blahaj.zone/post/24224747

<astronaut meme>
Wait, it's all a crisis?
Always has been.
Tech debt
I've never heard this term before. It makes perfect sense for what it represents. Sorry it sounds like you speak from experience 😅
cross-posted from: https://lemmy.blahaj.zone/post/24224747
Touch it, feel it, try those pants.
I really wish I could have. I never buy clothes that I haven't already tried on, but I needed something specific for work, and as you've already guessed, the line of pants I settled on aren't listed at any of their local-to-me retailers.
Though, full transparency, I took it a step further to make things worse by ordering the correct size through Amazon, since they'll come in tomorrow rather than a week from now...
my kids found them
I'm picturing a man staring into a shipping container filled to the brim with sardines, and saying, "they must never know"
Looks like she's ripping a dab rig, too. Hell yeah Nicole.
Yeah, I really should've been more adamant about it. I was on my break at work and didn't want to spend the whole time on the phone. I probably could've got a manager to cancel it or something. Probably still can. Oh well.
Carhartt.
As soon as I read "Chewy" I knew it was going to be a much more reasonable response. Sorry you had to go through that little reminder, though.
My thoughts exactly! Like if it were one of a hundred orders sitting in a pallet I'd get it. But I'm just imagining a cartoonish situation where the person on the phone is going, "these pants? This order right here? Ahh, yeah, I am physically incapable of not sending it out, but I can put a return label on it for you!"
Republican: Never thought I'd die voting side by side with a lib-tard.
Democrat: What about side by side with a comrade?
Double check the settings in your printer and slicer that "screen brightness", "screen power", "max power" or something to that effect is set to 100%. I've seen some default to 70%-80%, the theoretical reason being that reducing power to the screen can lengthen its lifespan.. however, afaik these claims have not been backed up by data, and the logical counterargument is that any lifespan gains will be offset by the increased length of time the screen is on. Even if you can squeeze a few extra prints out of the screen before it dies, you're making all your prints take way longer than necessary.

For reference, this is the recommended printing settings chart provided by anycubic for their standard gray resin; the recommended exposure time for your printer at default layer height is 2.5 seconds. If you're using 100% power, you're more than doubling the normalexposure.
This is one of the characters from Valandar's second Player Character pack. His weapon made me think of mer-people, so I wanted to paint this guy with an aquatic theme. About halfway through I realized the color scheme wasn't going in the direction I wanted, so I abandoned the aquatic theme and just picked colors that I thought would look good together.
After applying the final wash, I felt the model looked too dark and monotone, so I decided now was a good time to give edge highlighting a try, something I've always been too lazy or impatient to try. Holy crap, does a tiny bit of white make a difference! You can see that my blending and edge selection leaves plenty to be desired, but for a first time, I think some parts of his robe look really cool.
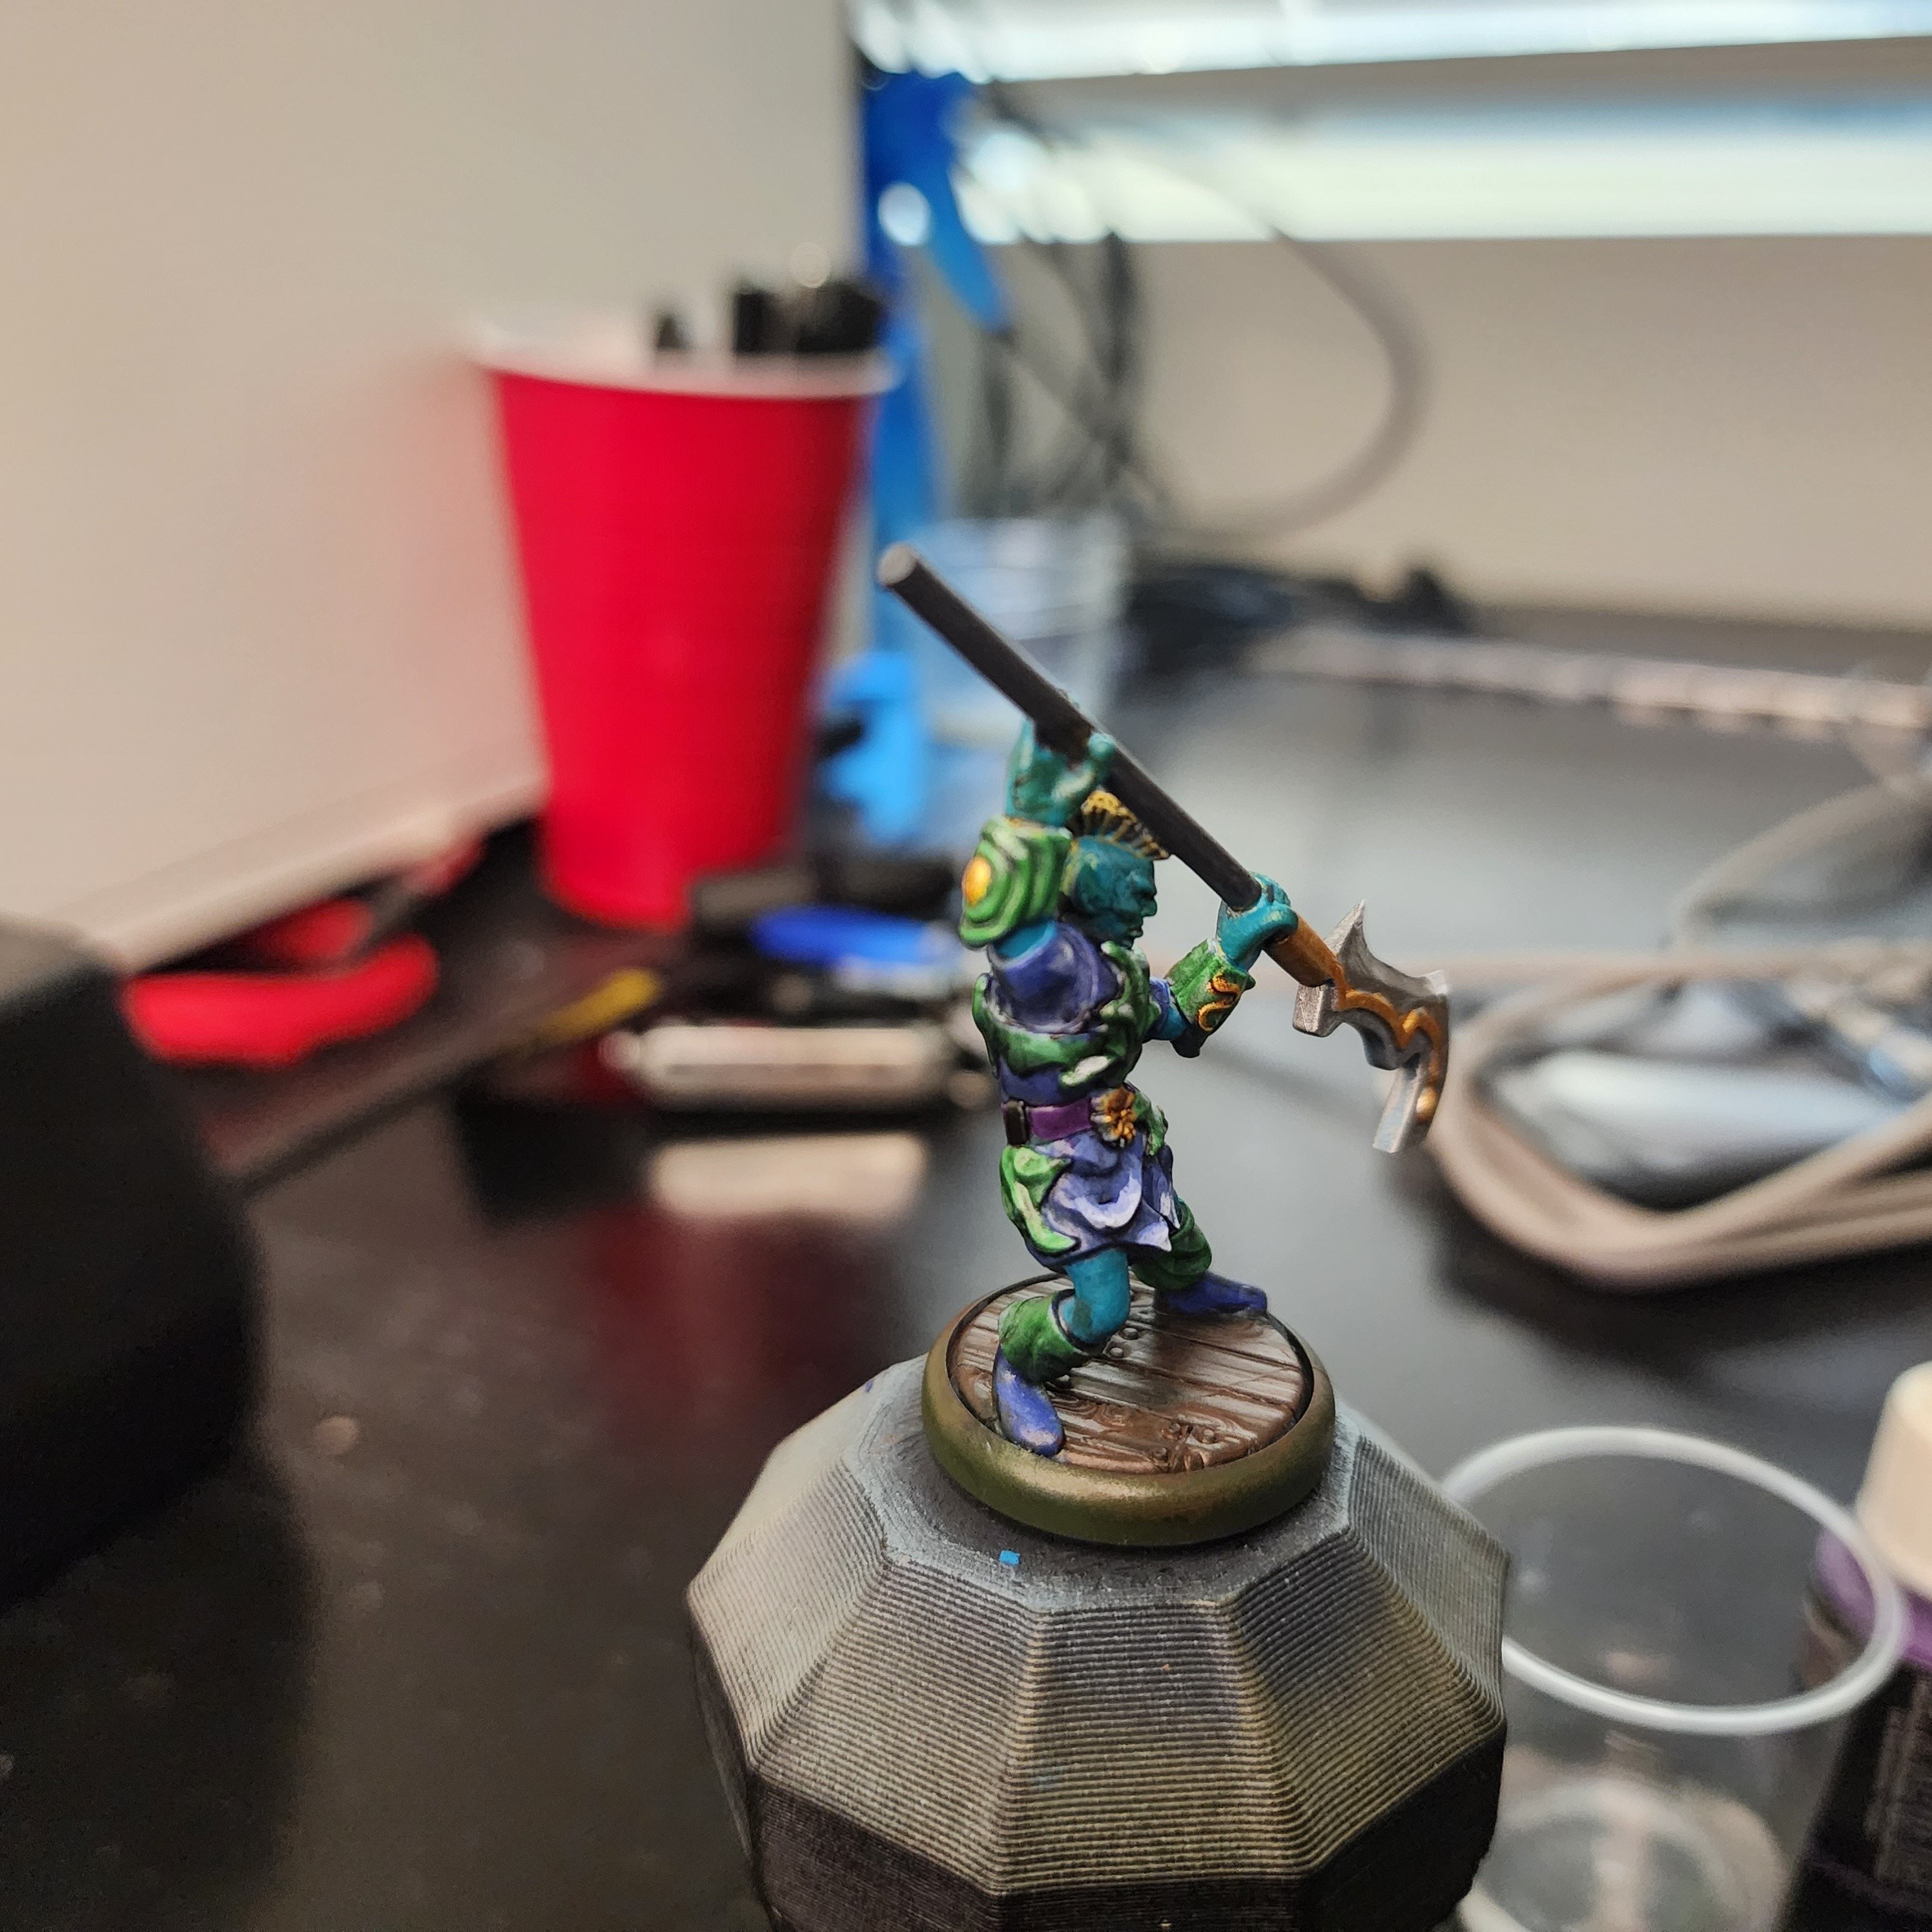
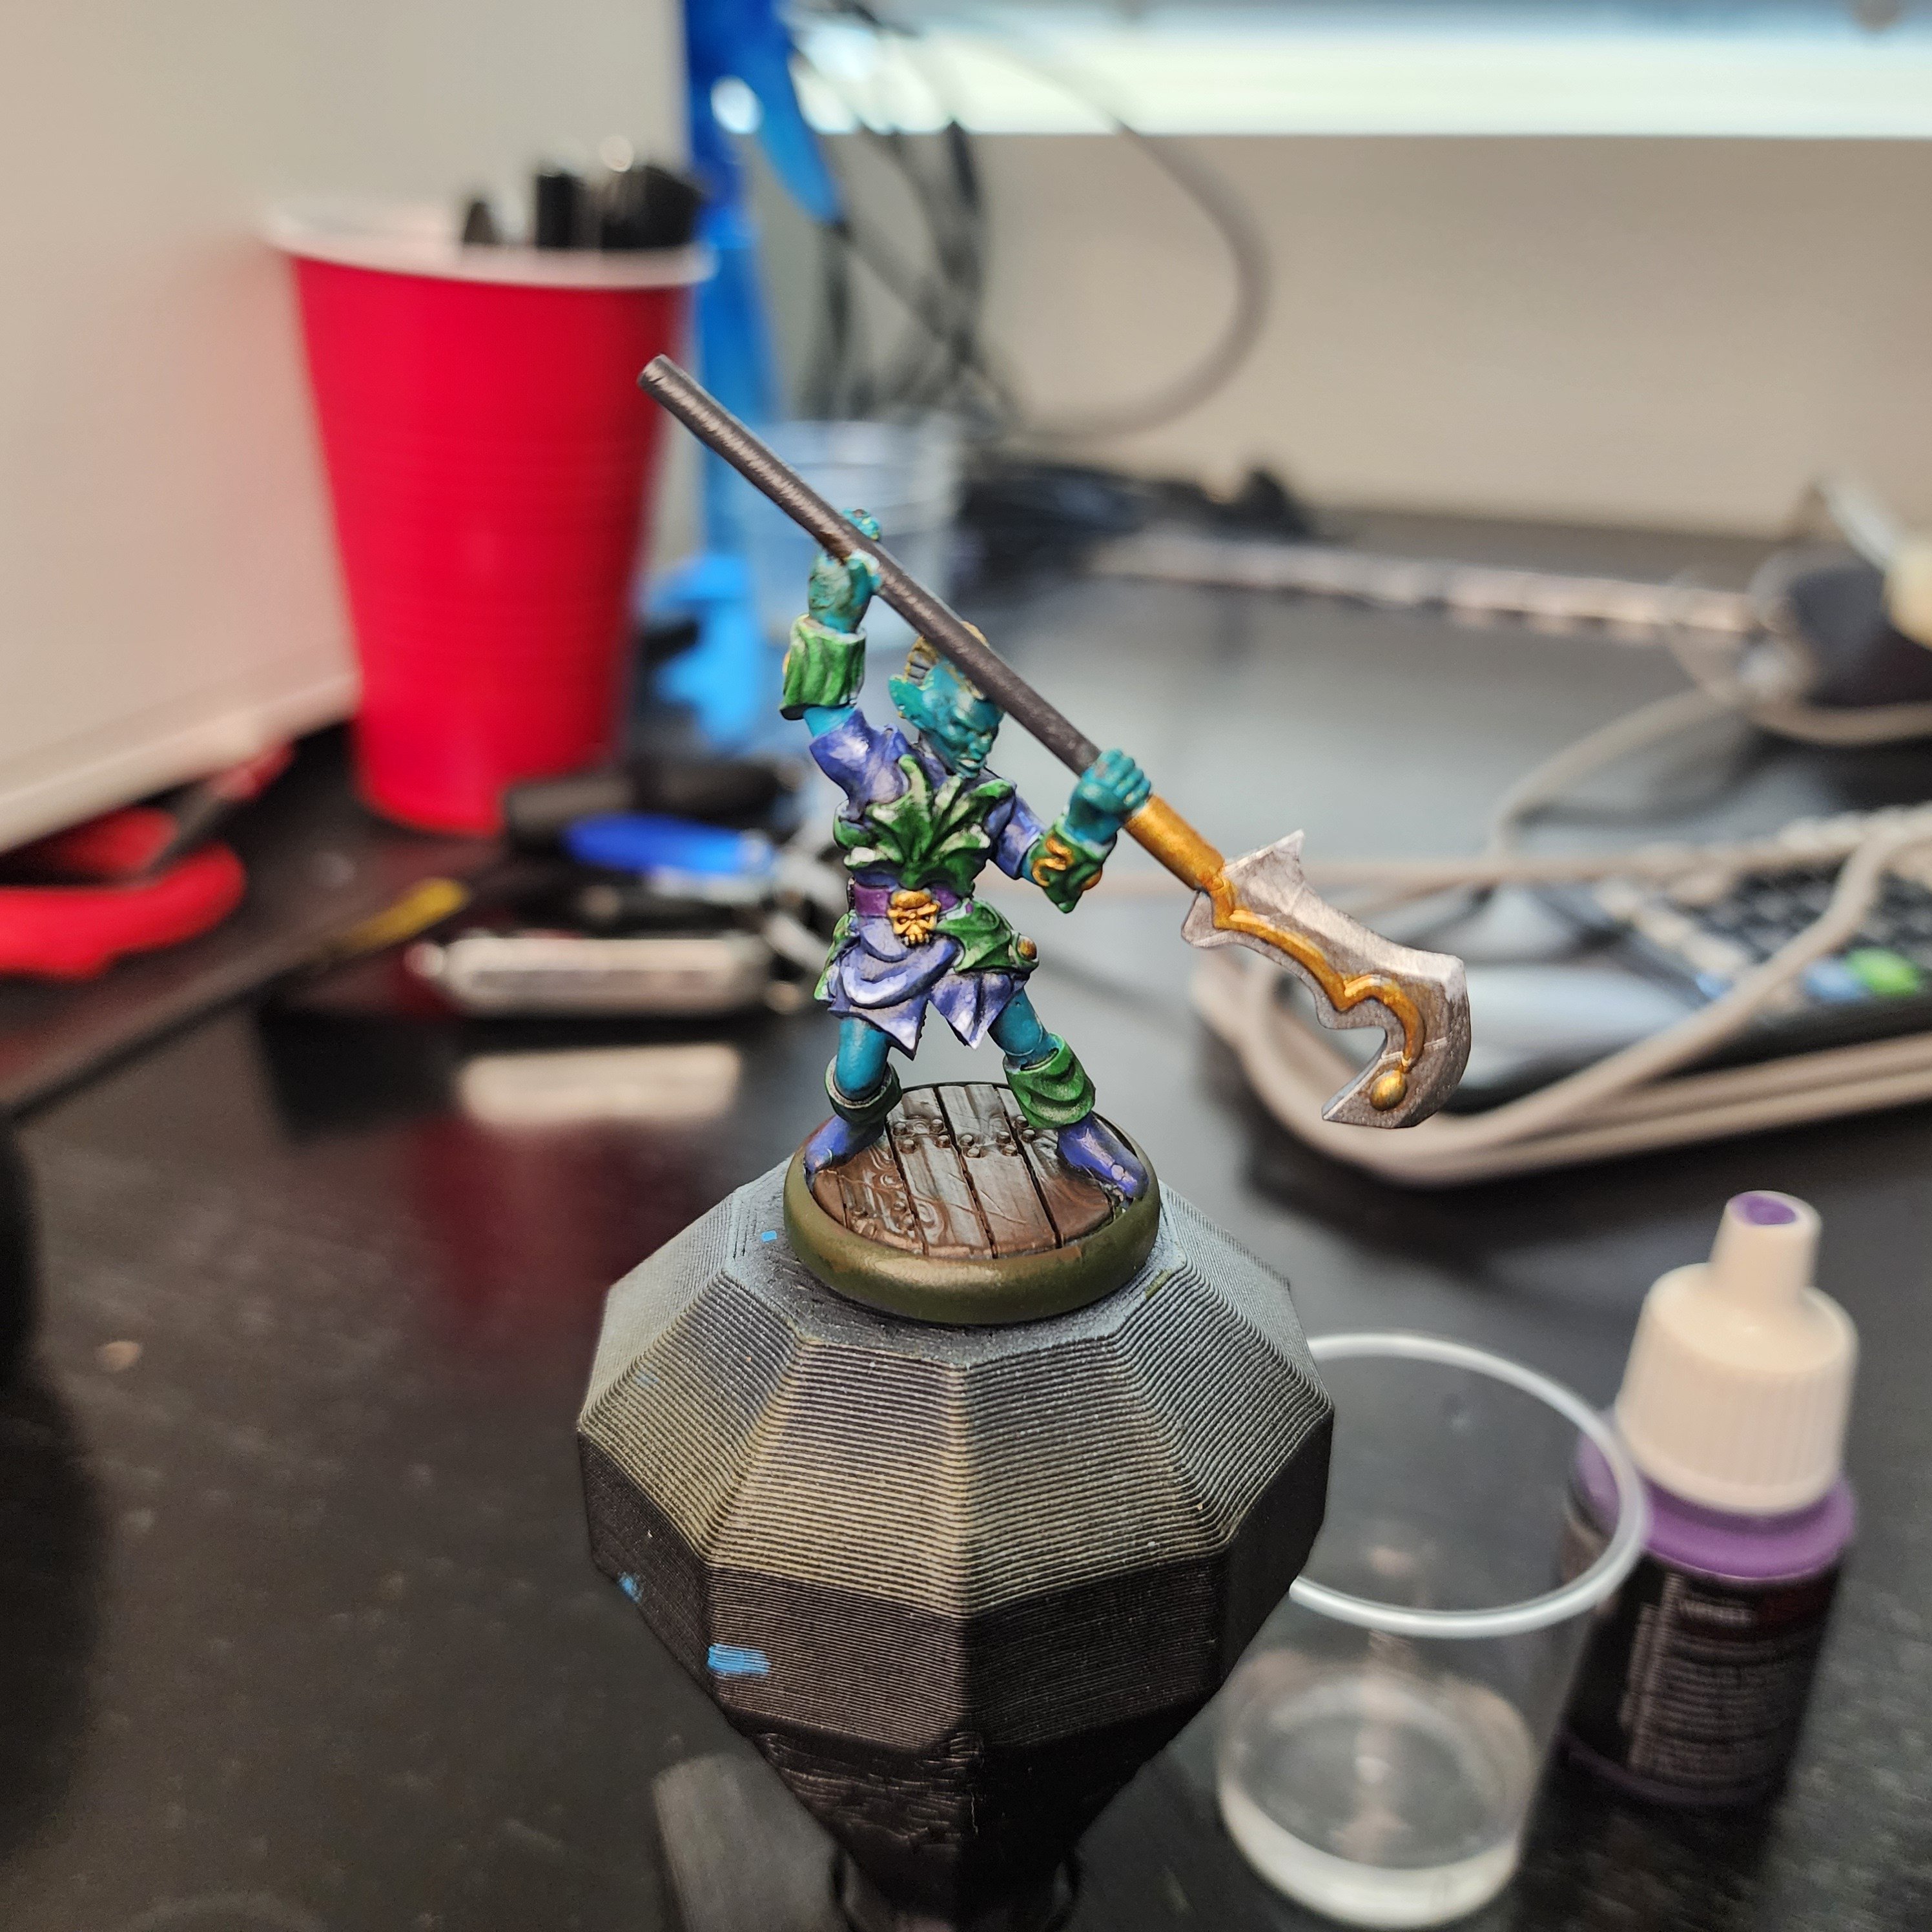
As always, here are a few more angles:
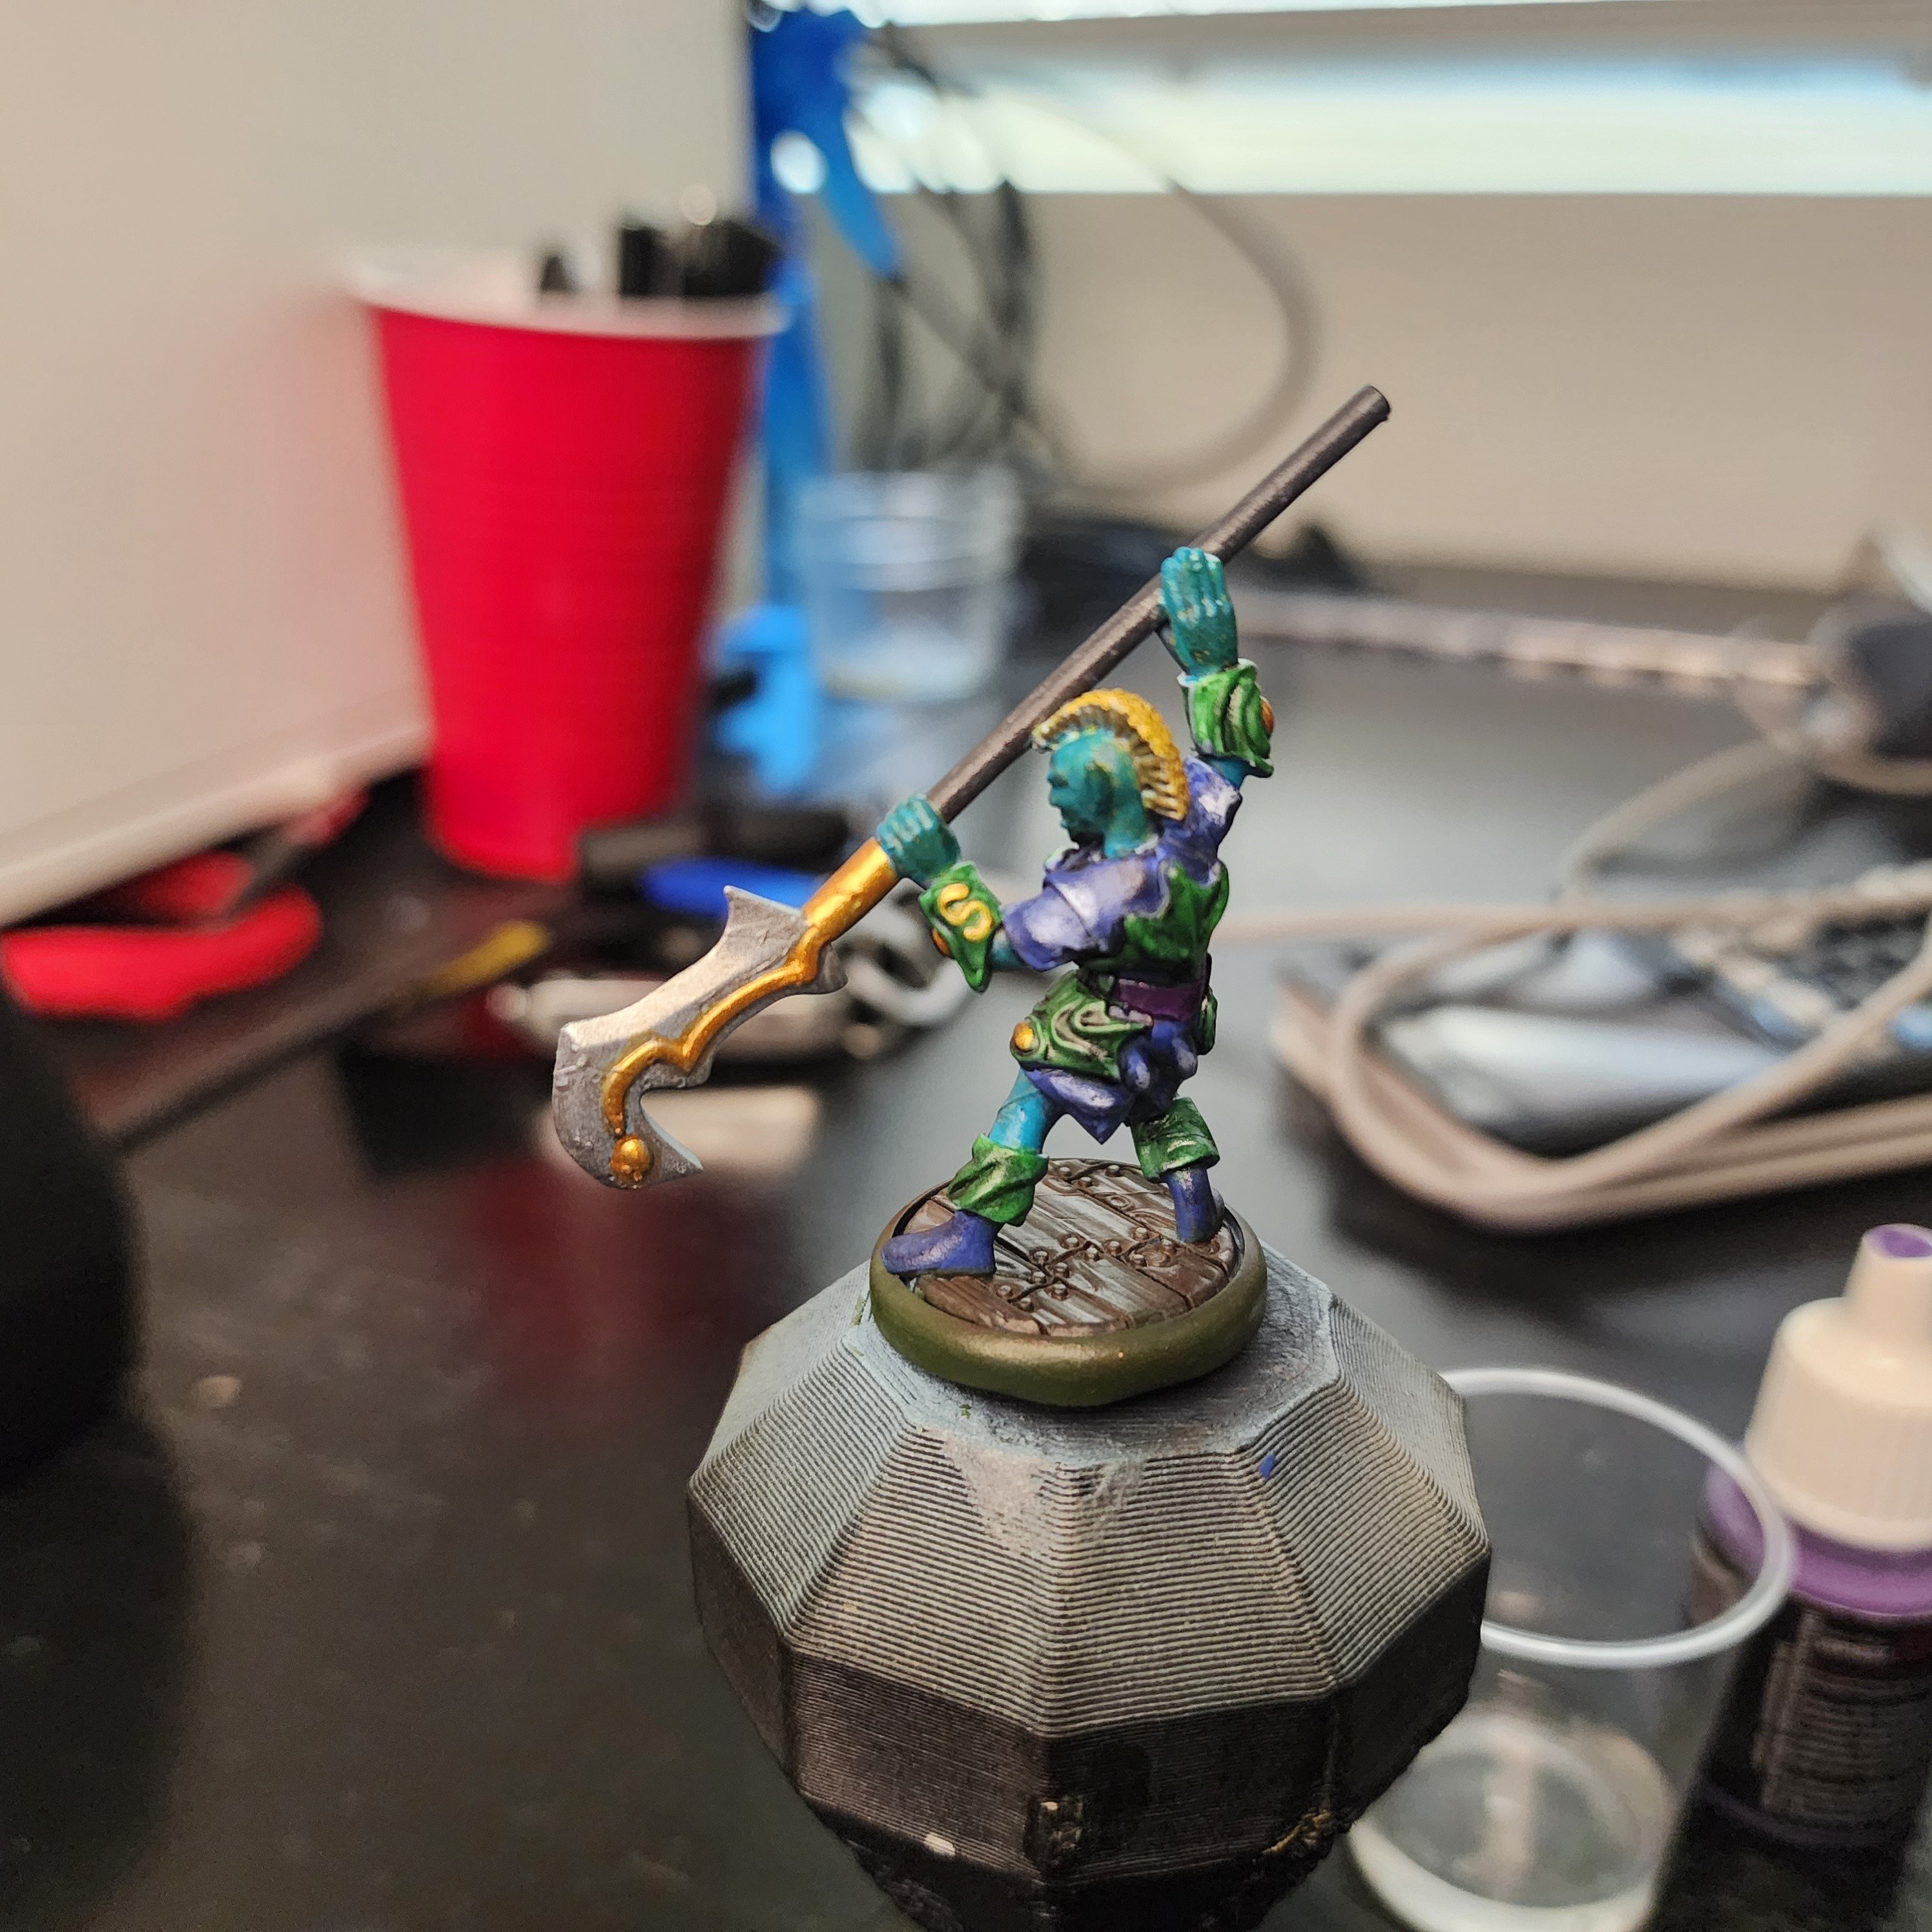
If anyone has any advice or pointers for color selection, I'm all ears. For this guy, I started with the color I knew I wanted to make a bulk of the model (blue/ aquamarine), picked a few nearby colors (green and purple) for the secondary bits, then jumped across the color wheel (yellow and gold) for the highlights. I think the model has good contrast, and the colors look ok together, it just doesn't have the look I was going for. I'm sure I'll get a better eye for color selection as I continue to paint, but if there are any places to start looking I'm open to pointers.
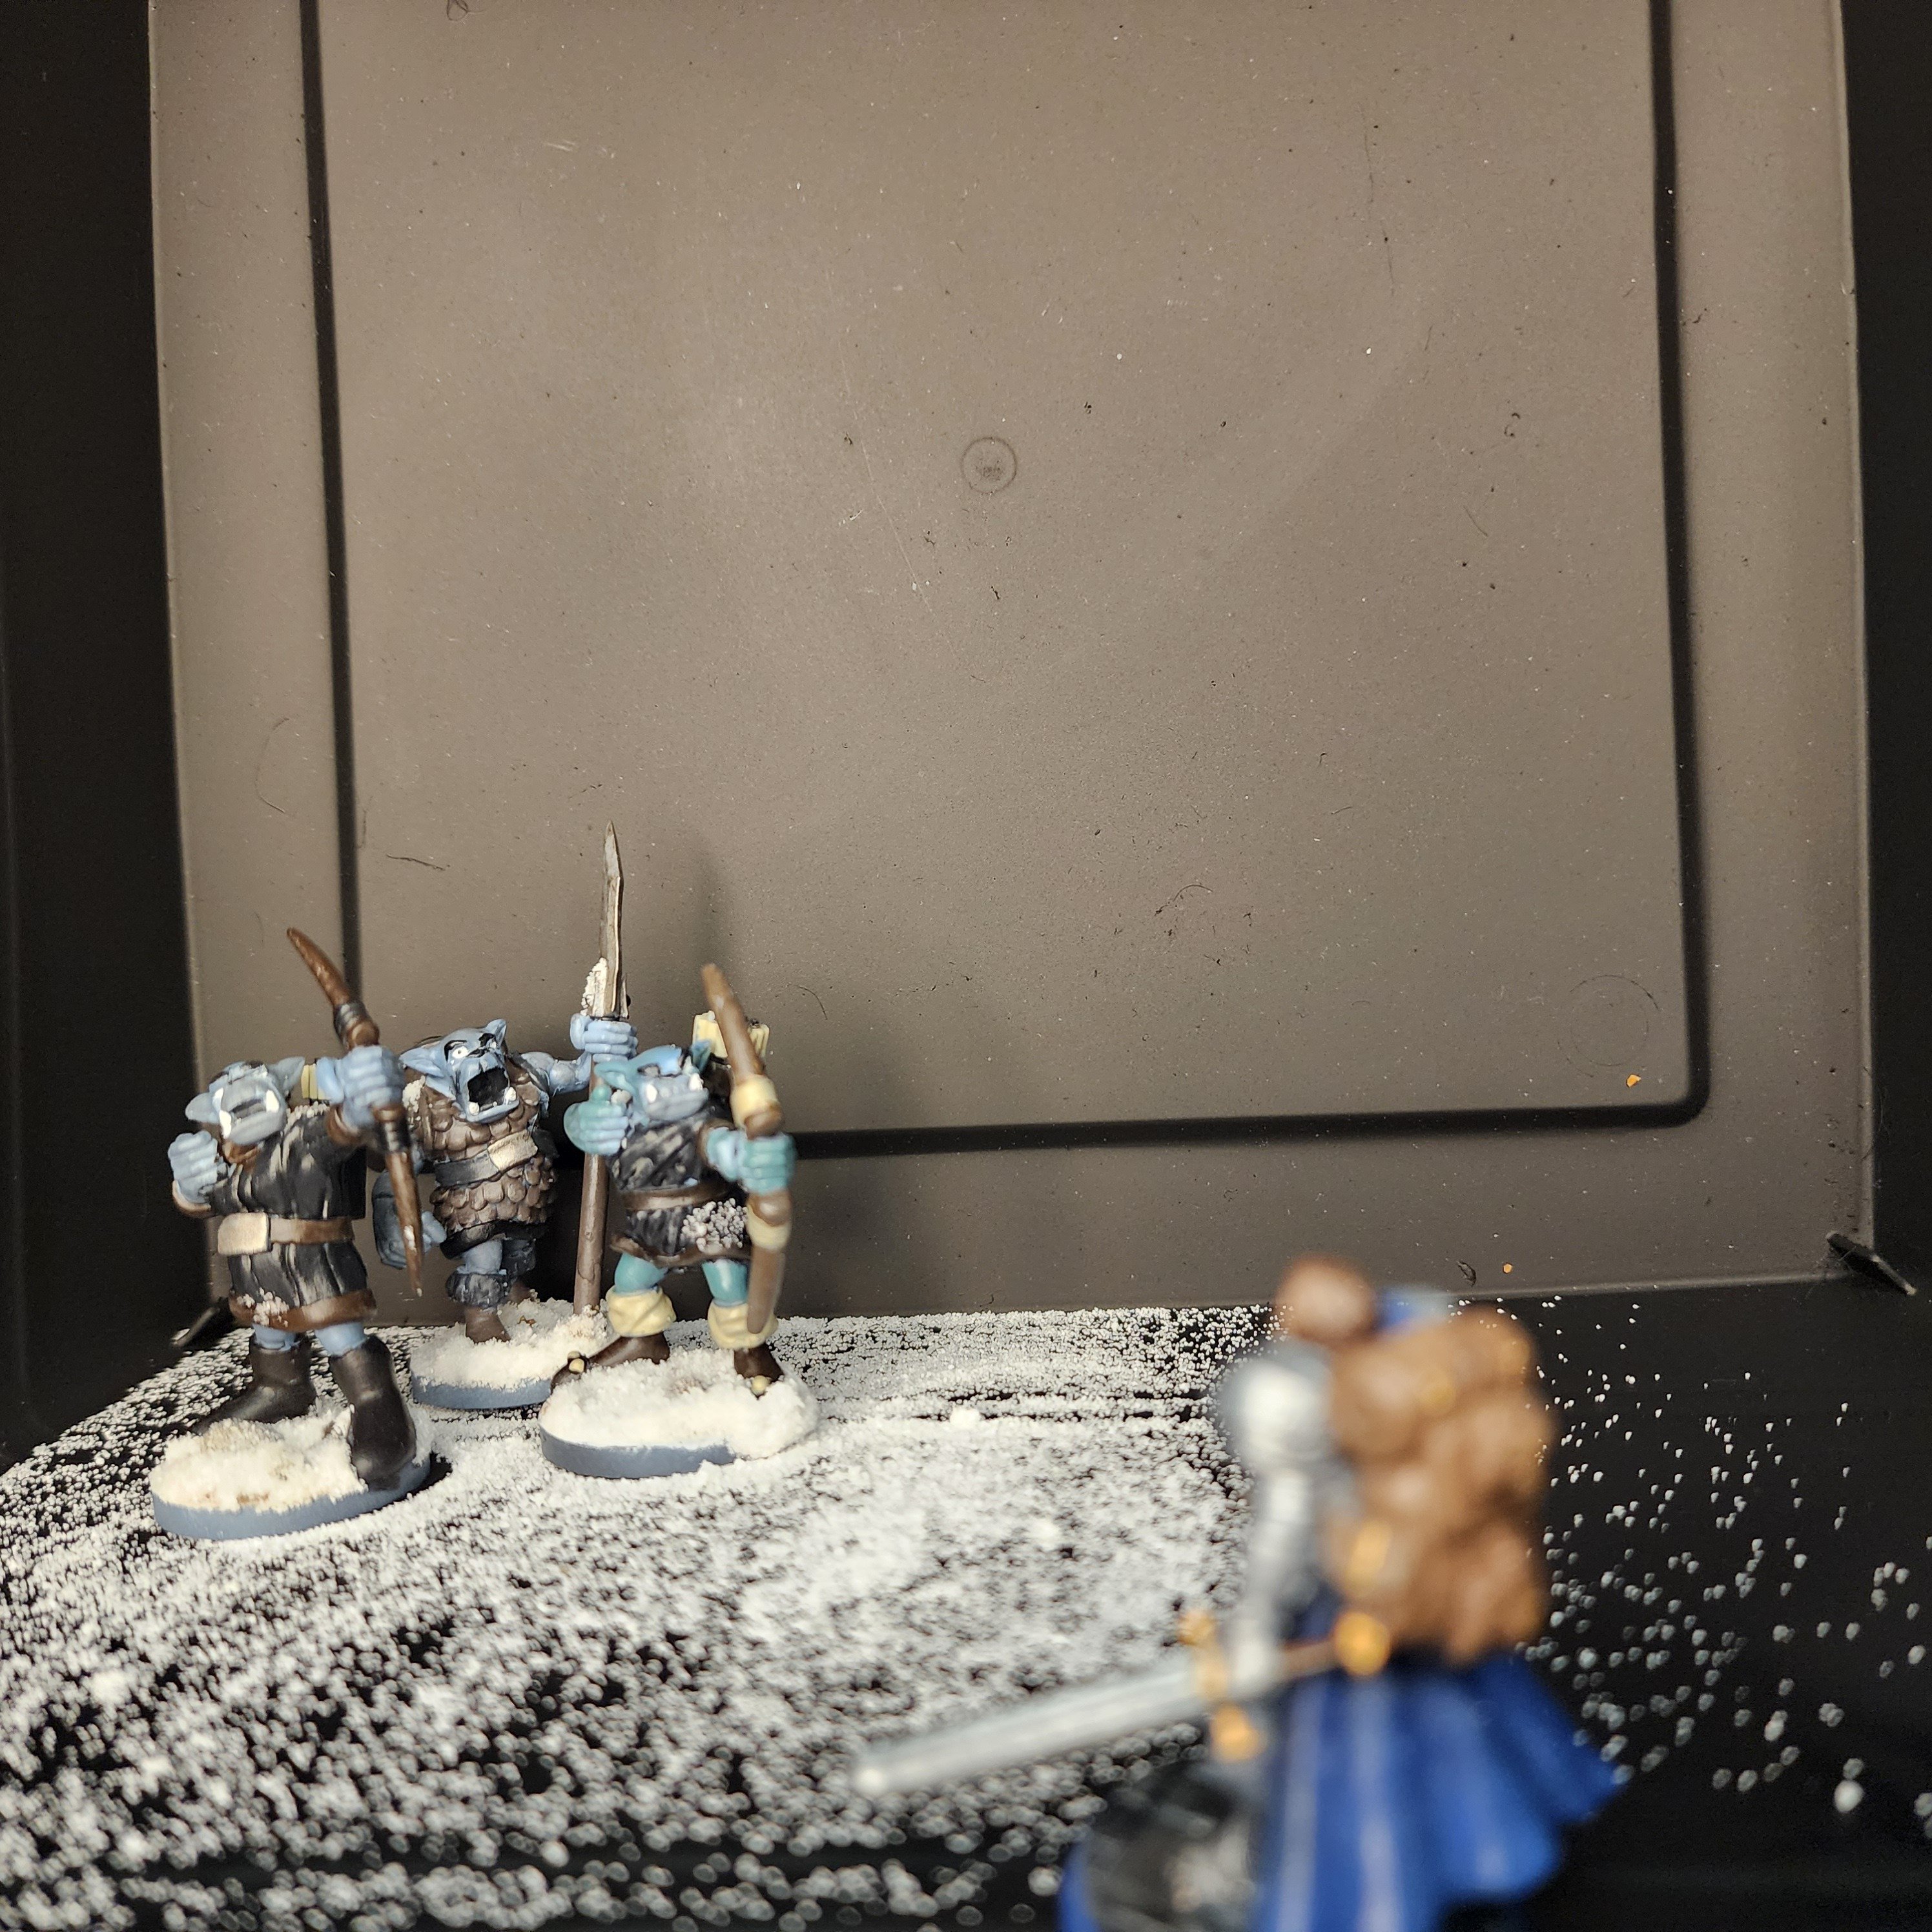
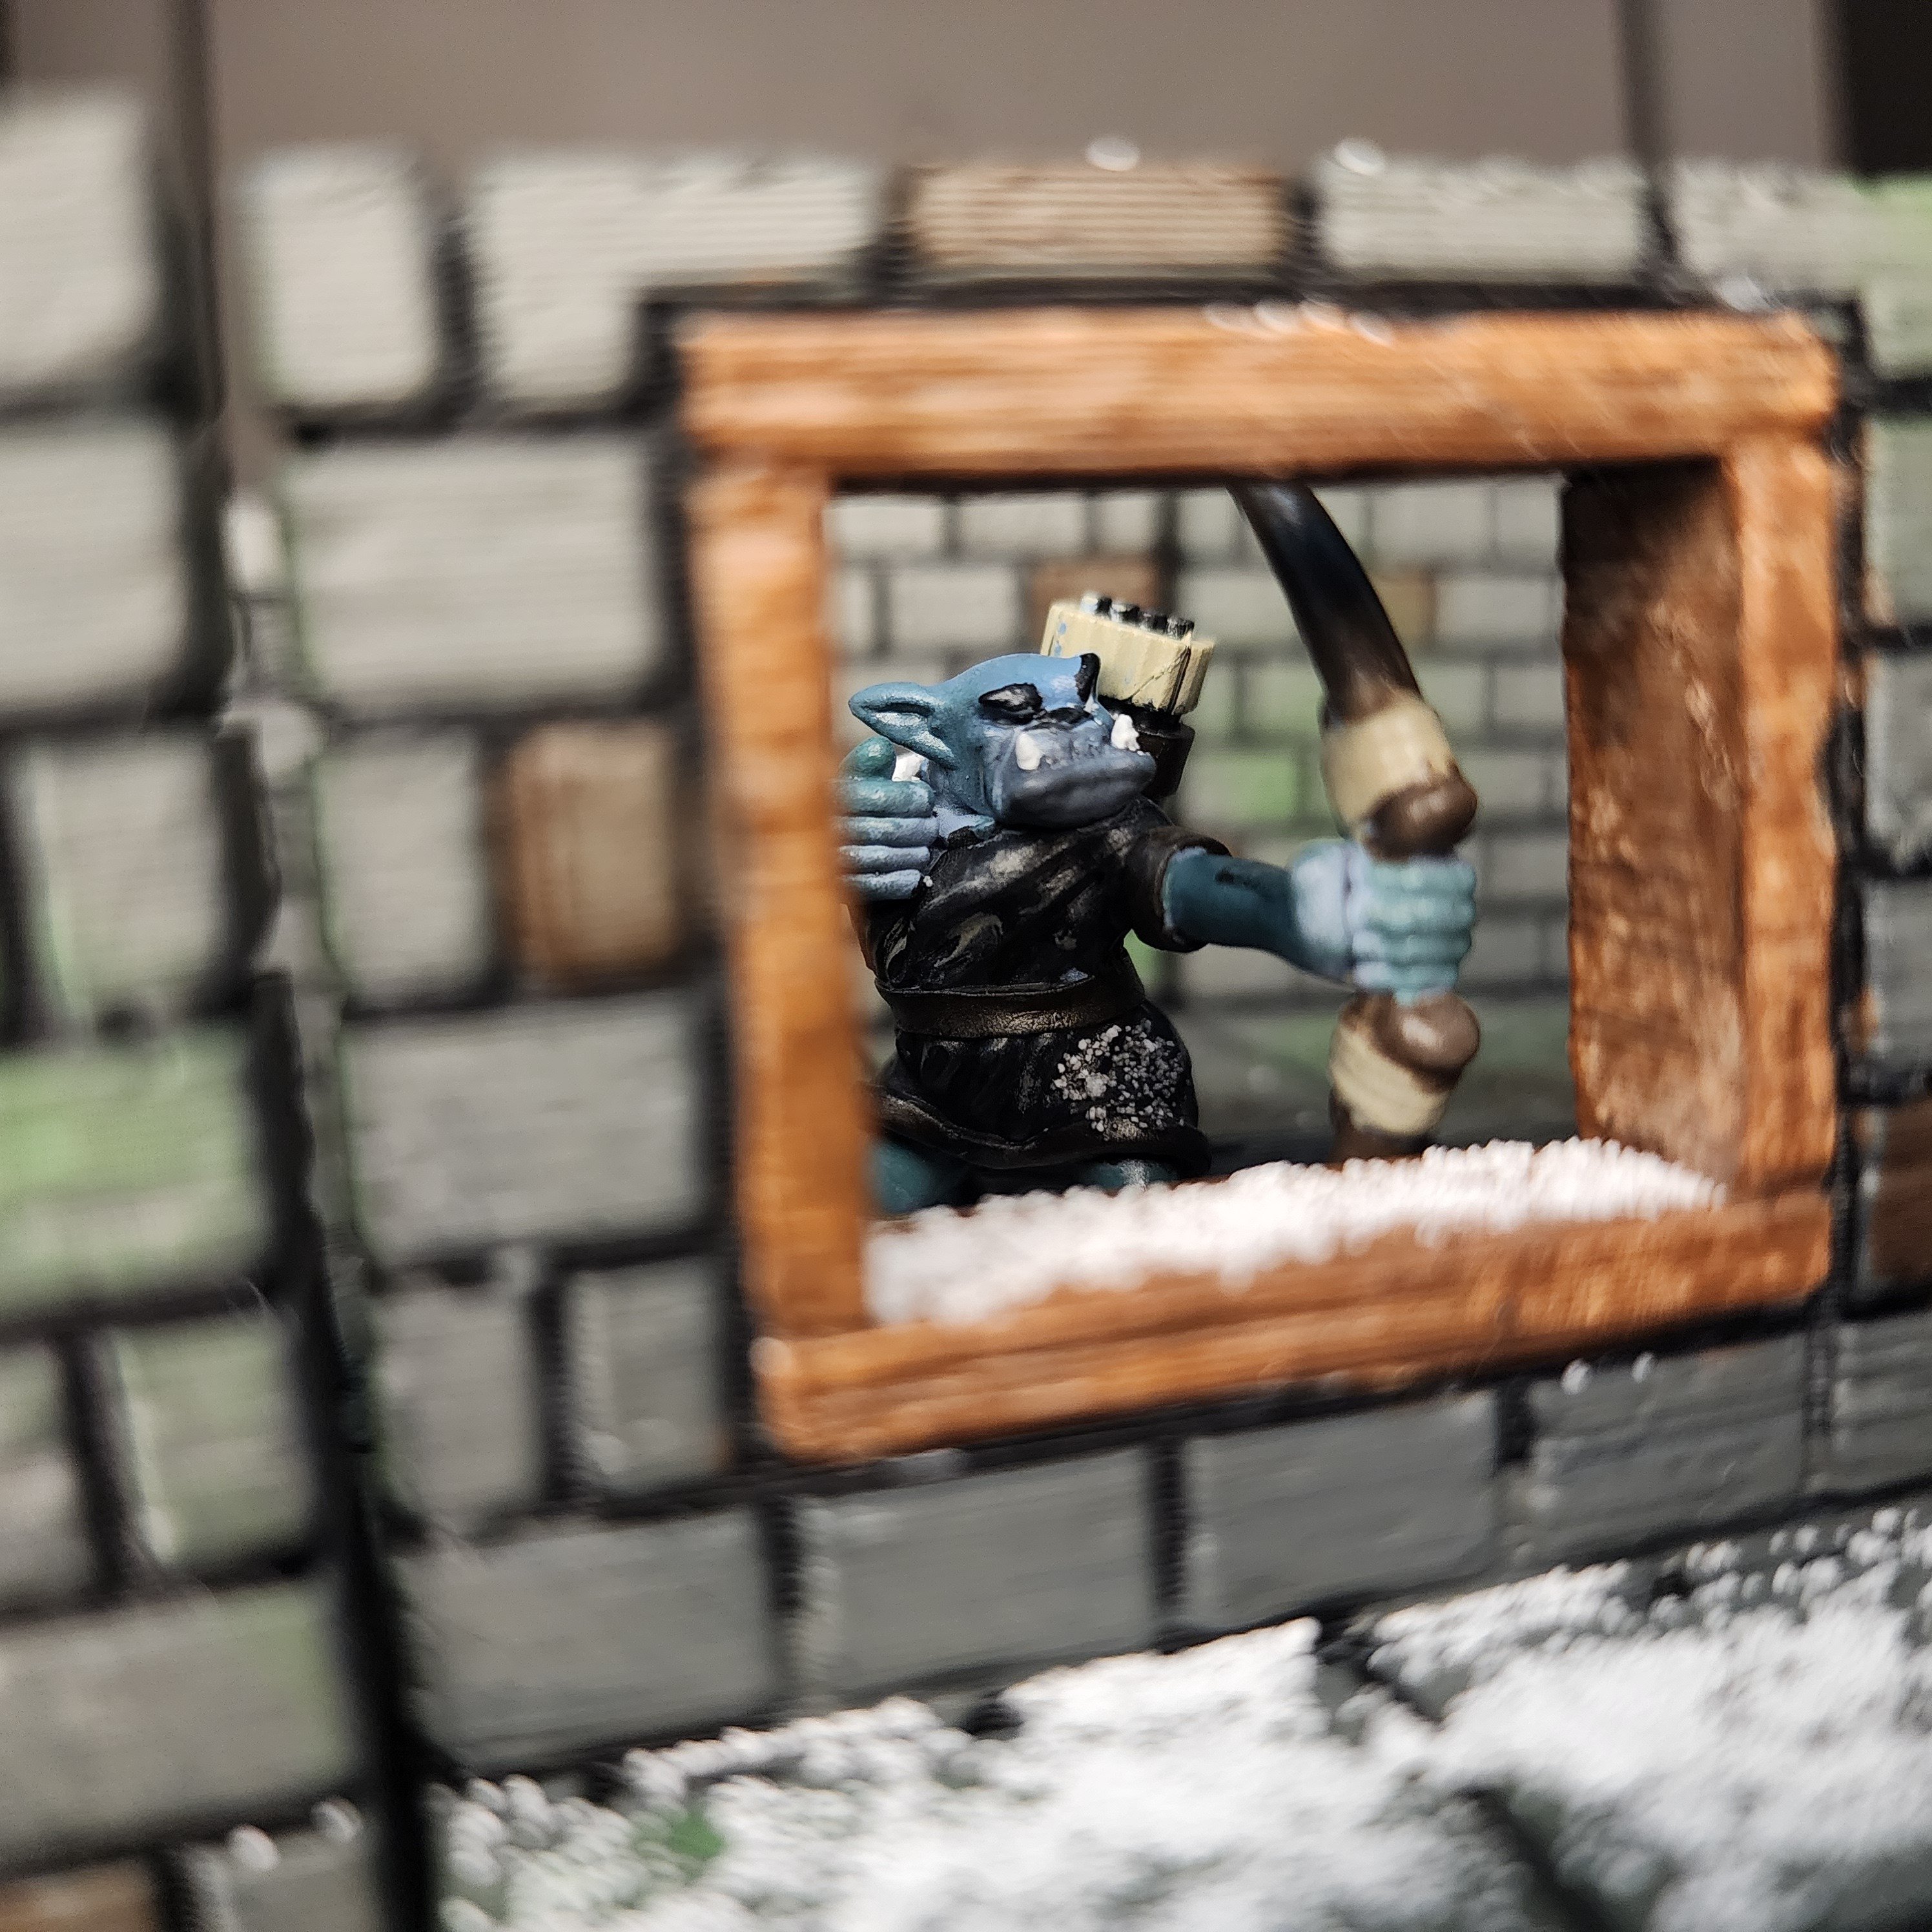
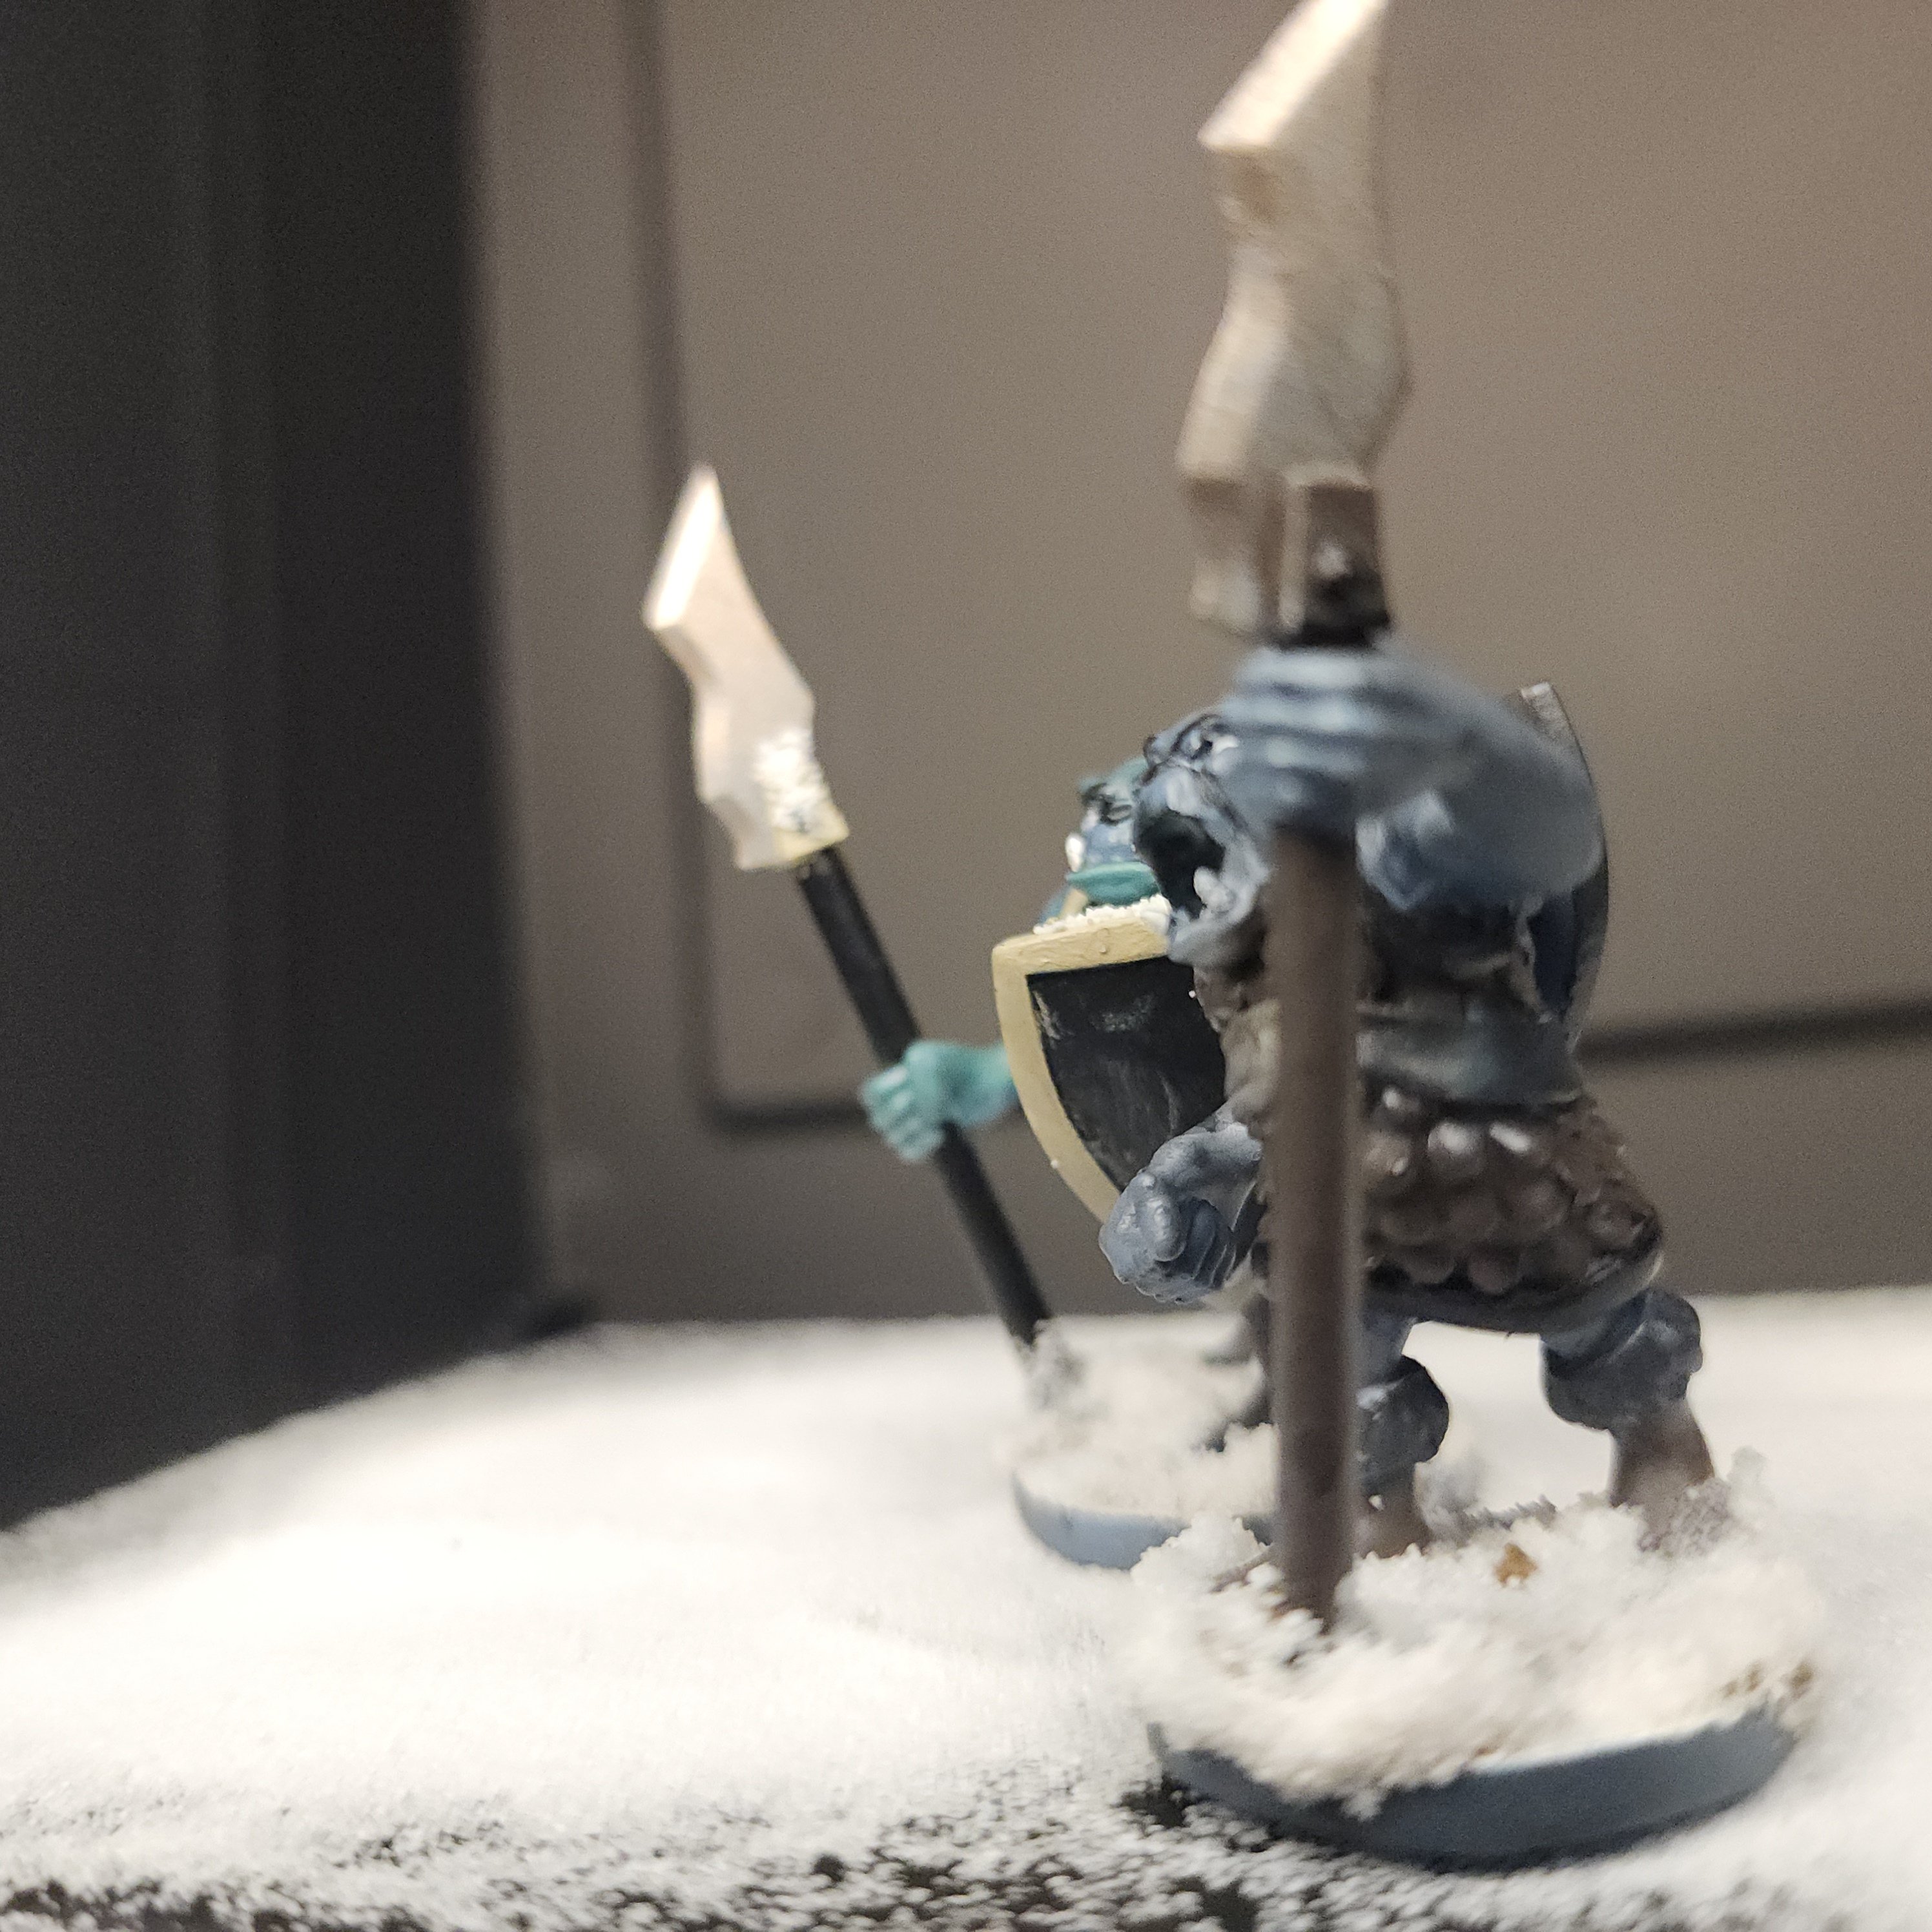
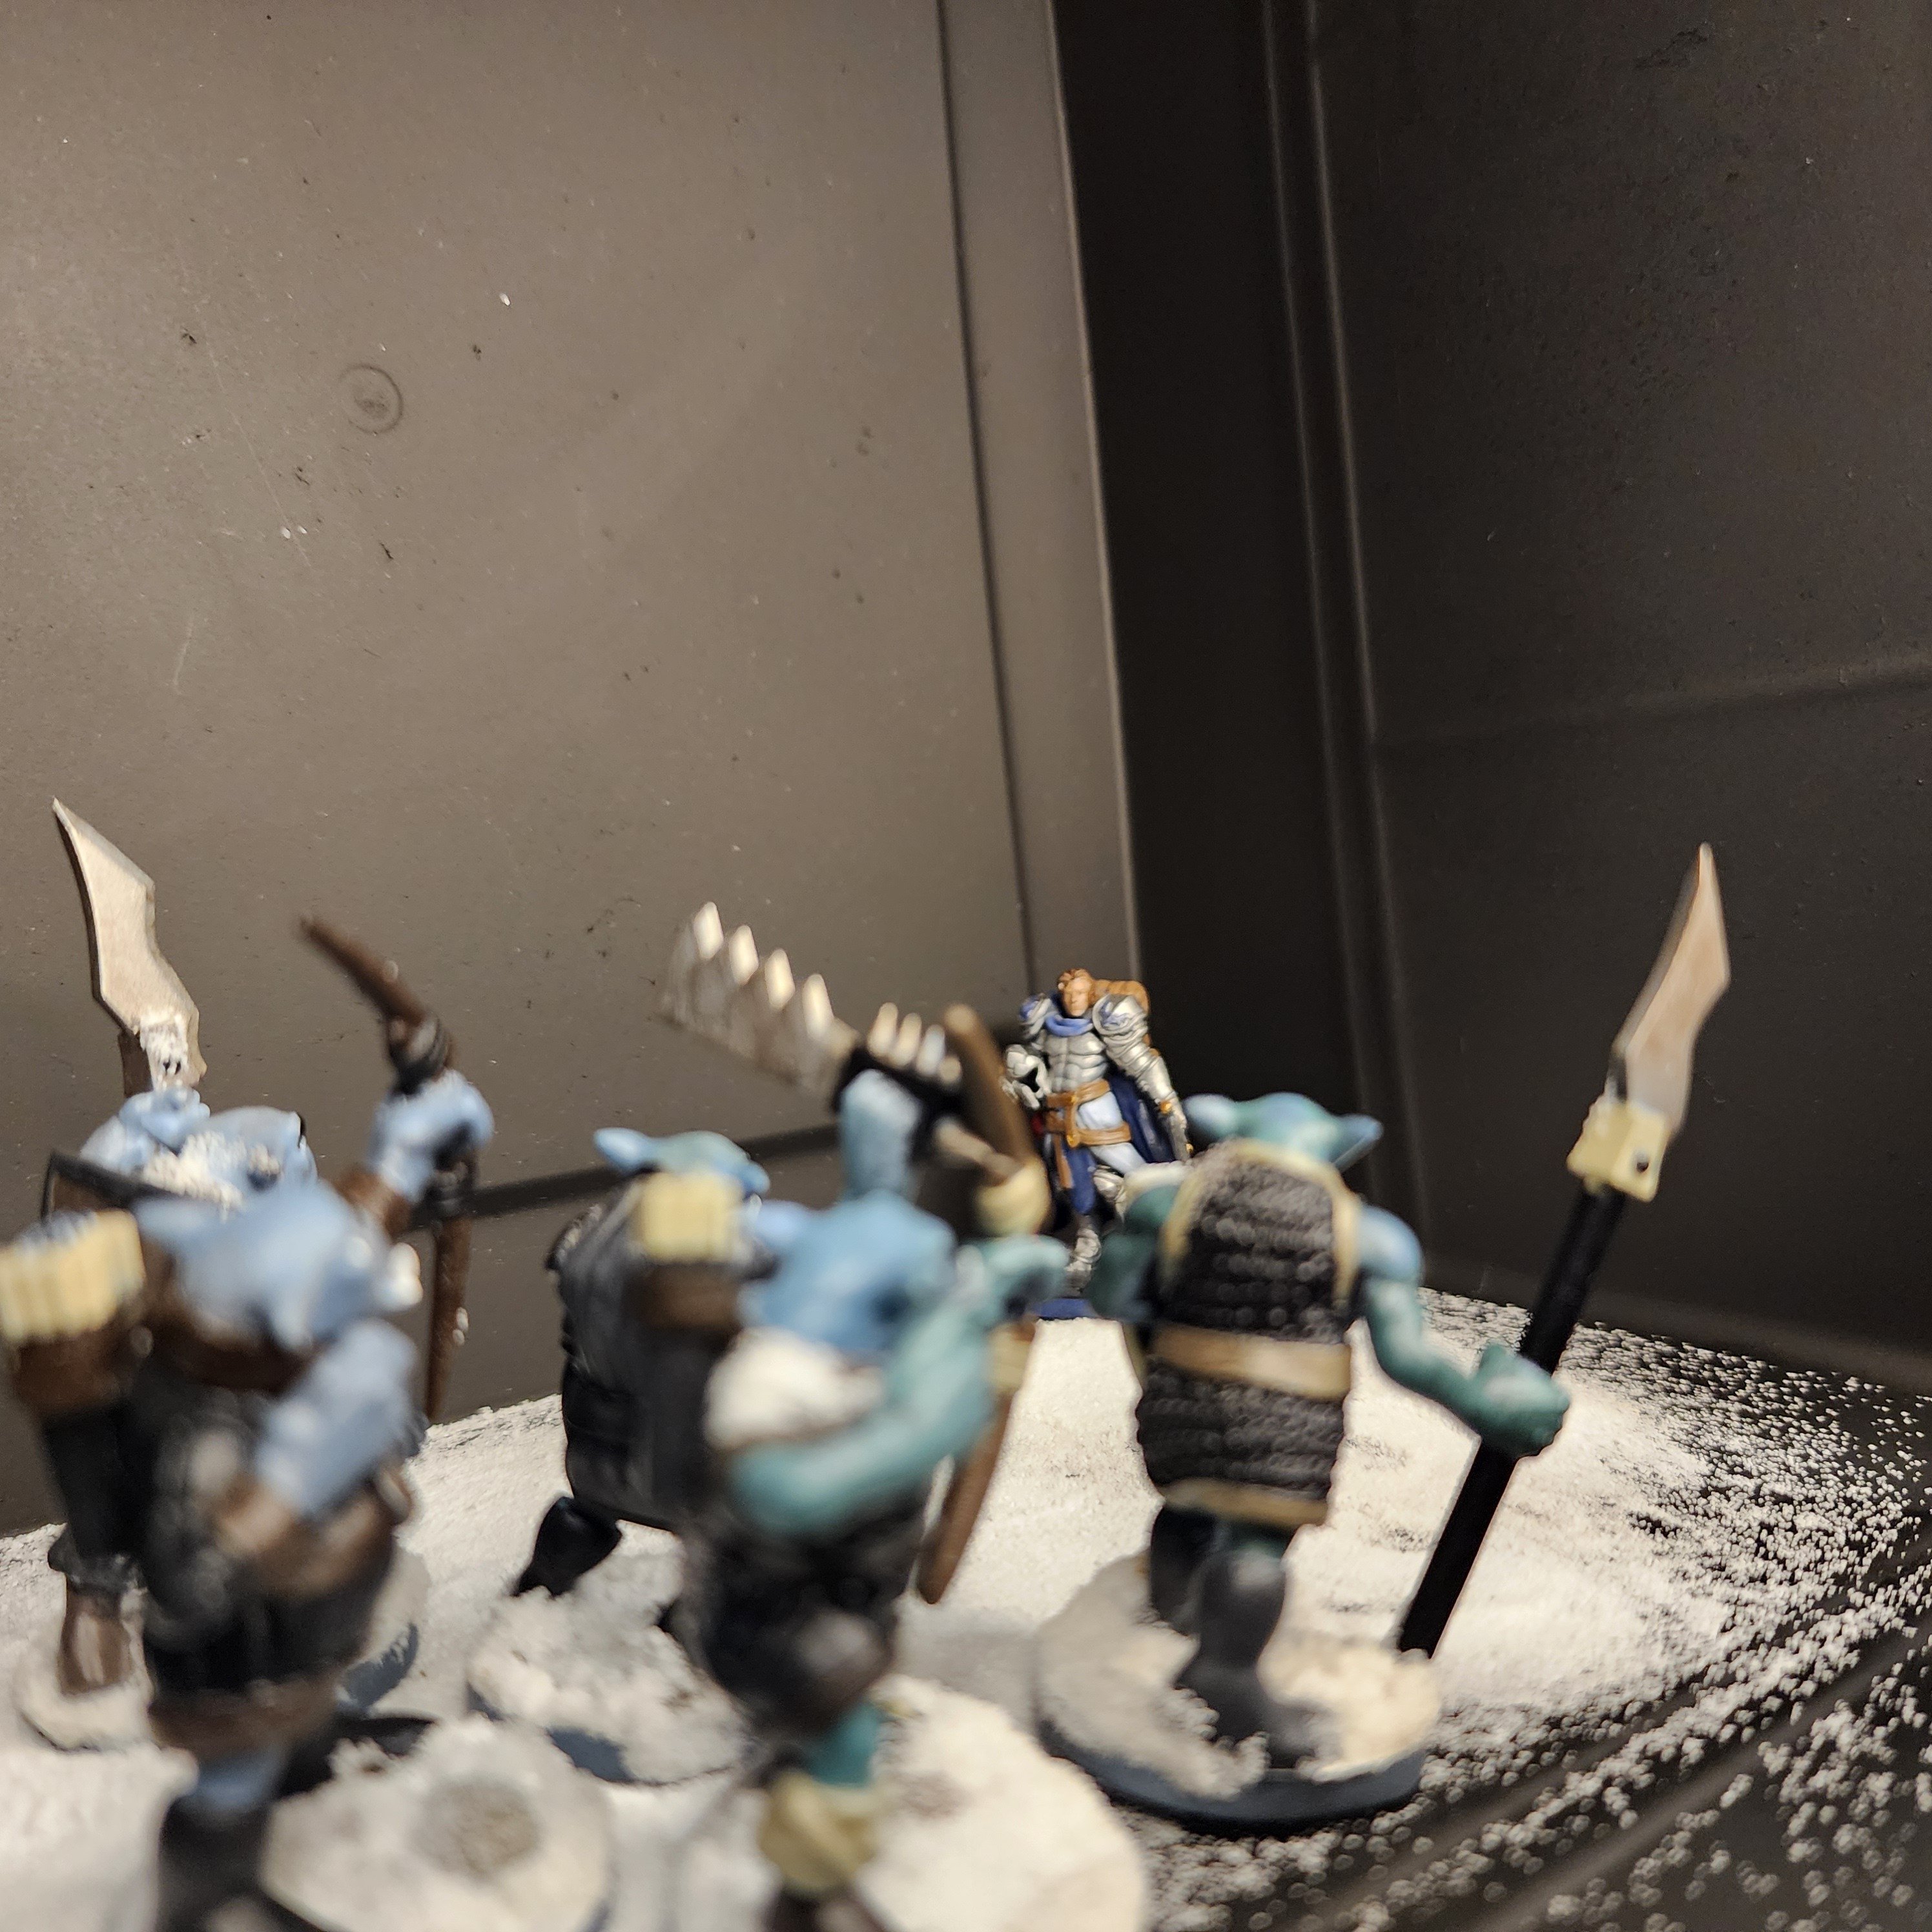
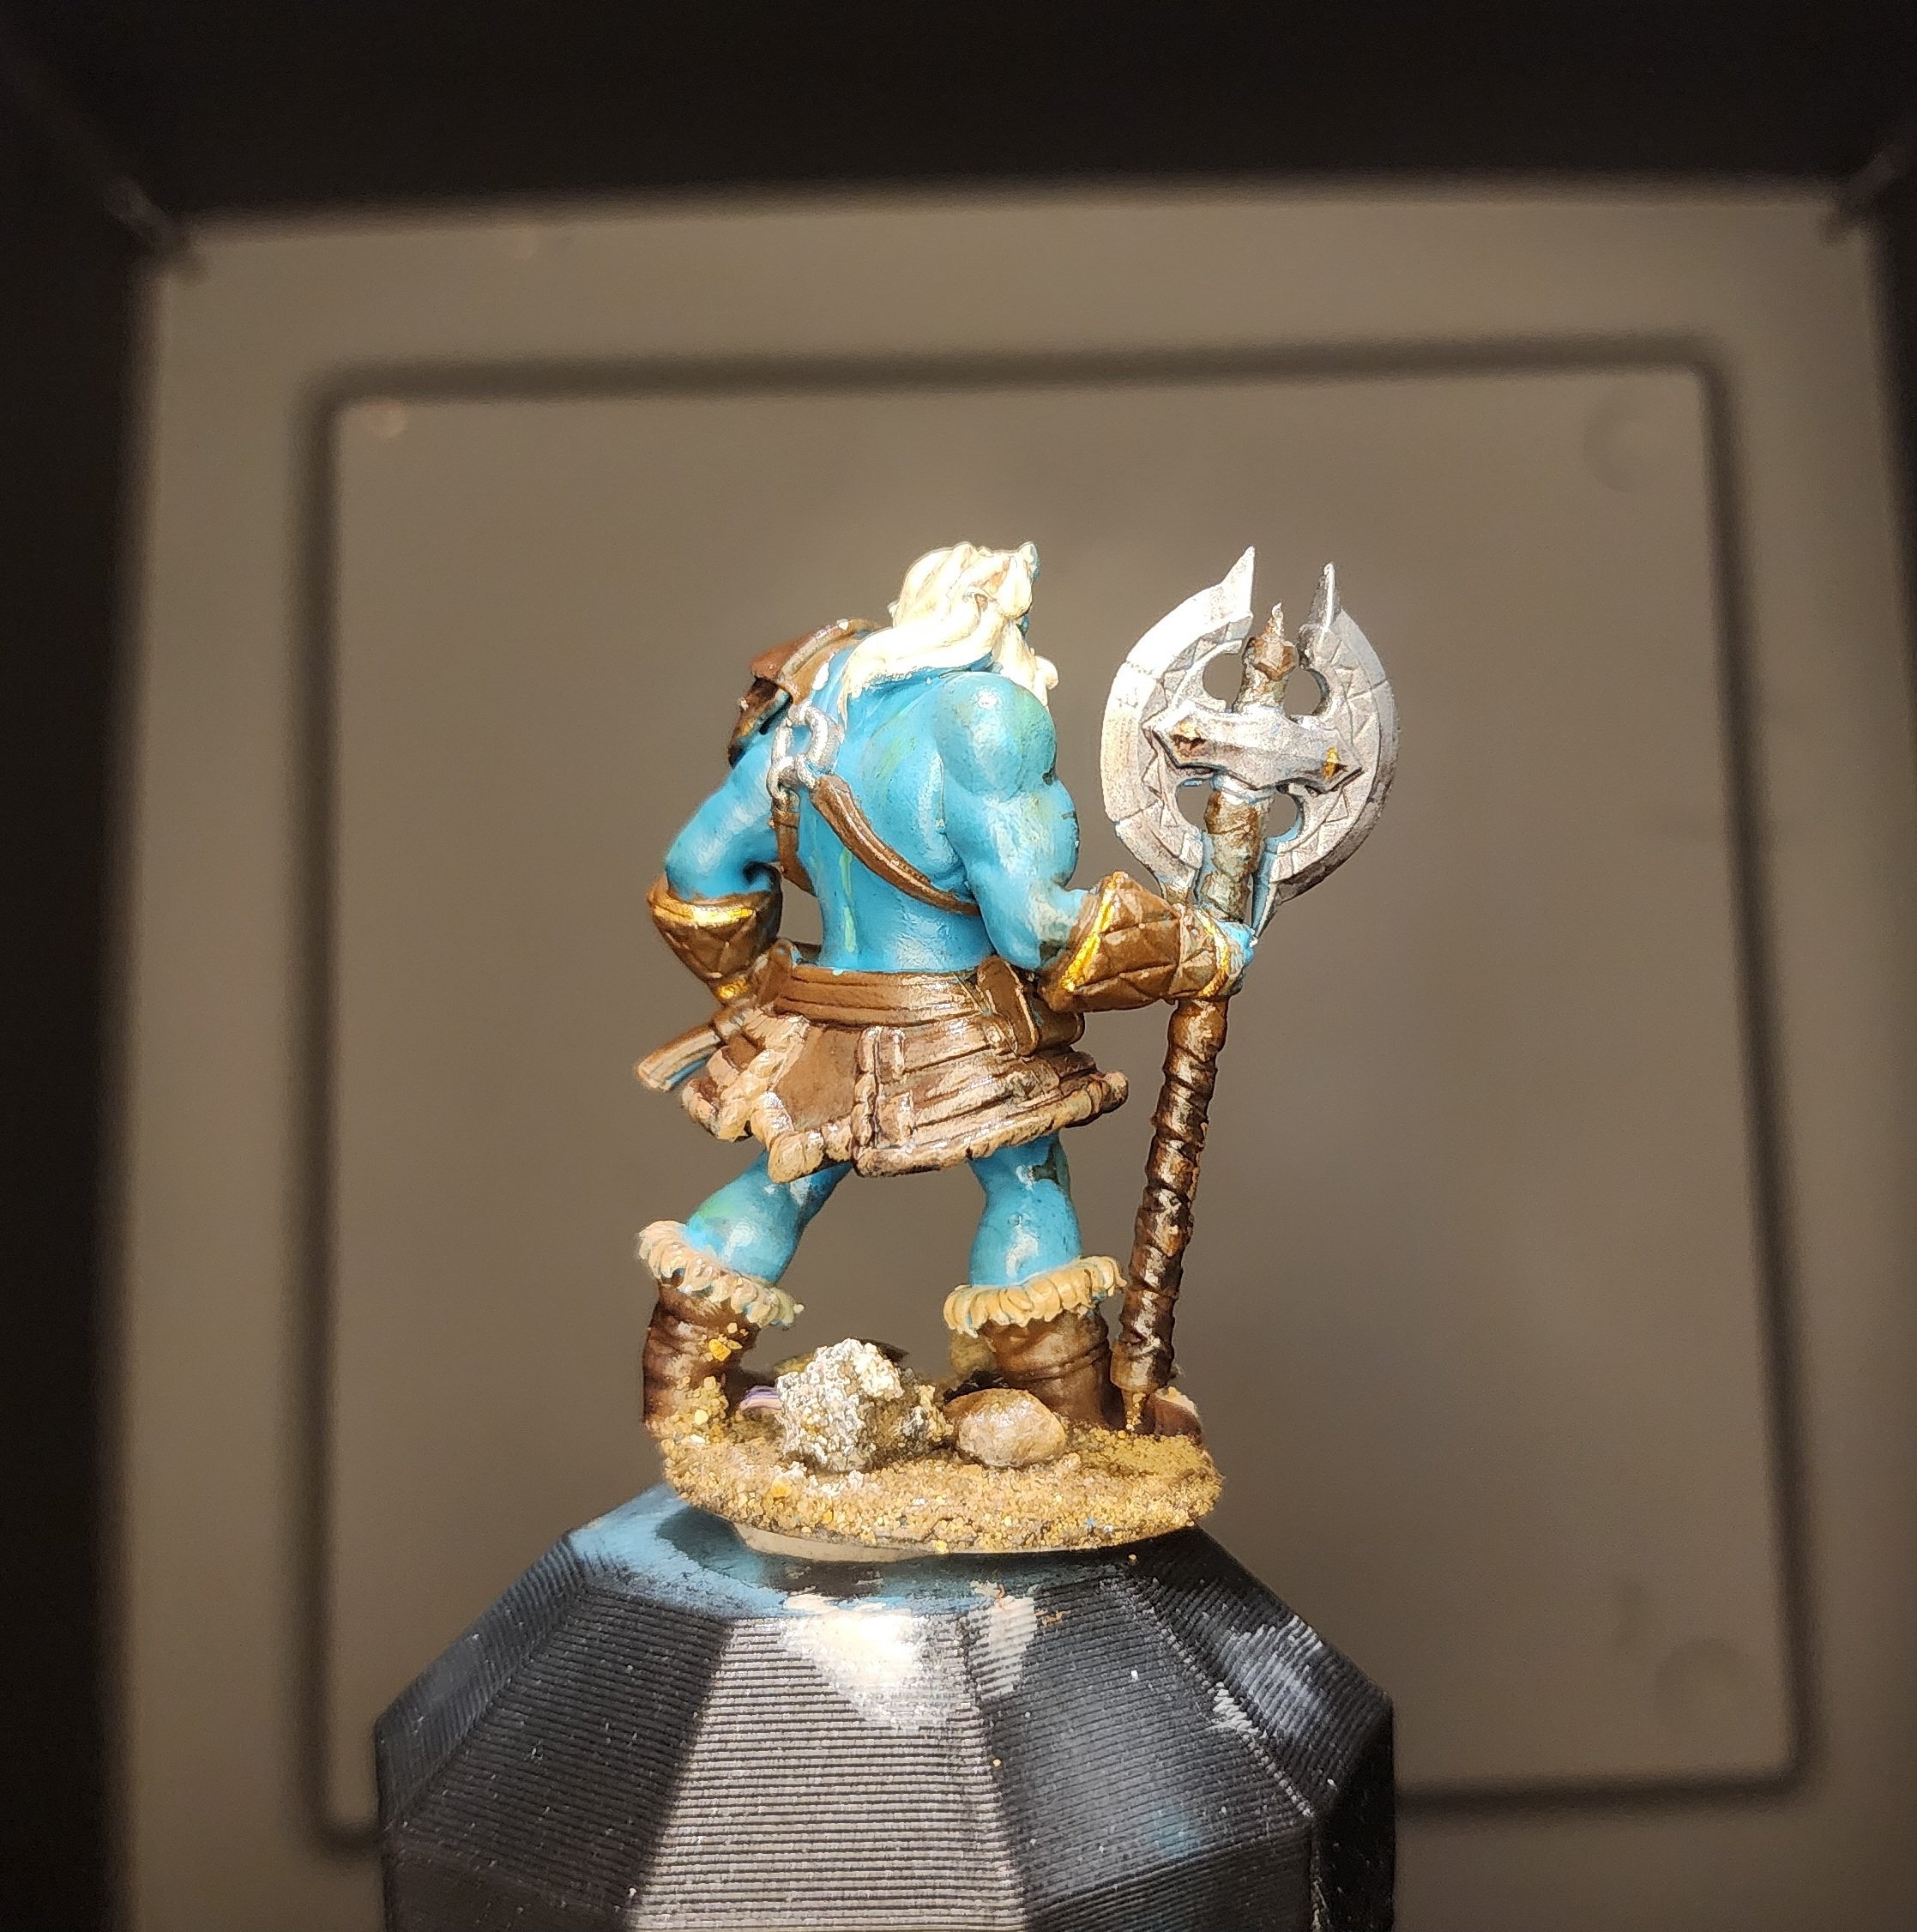
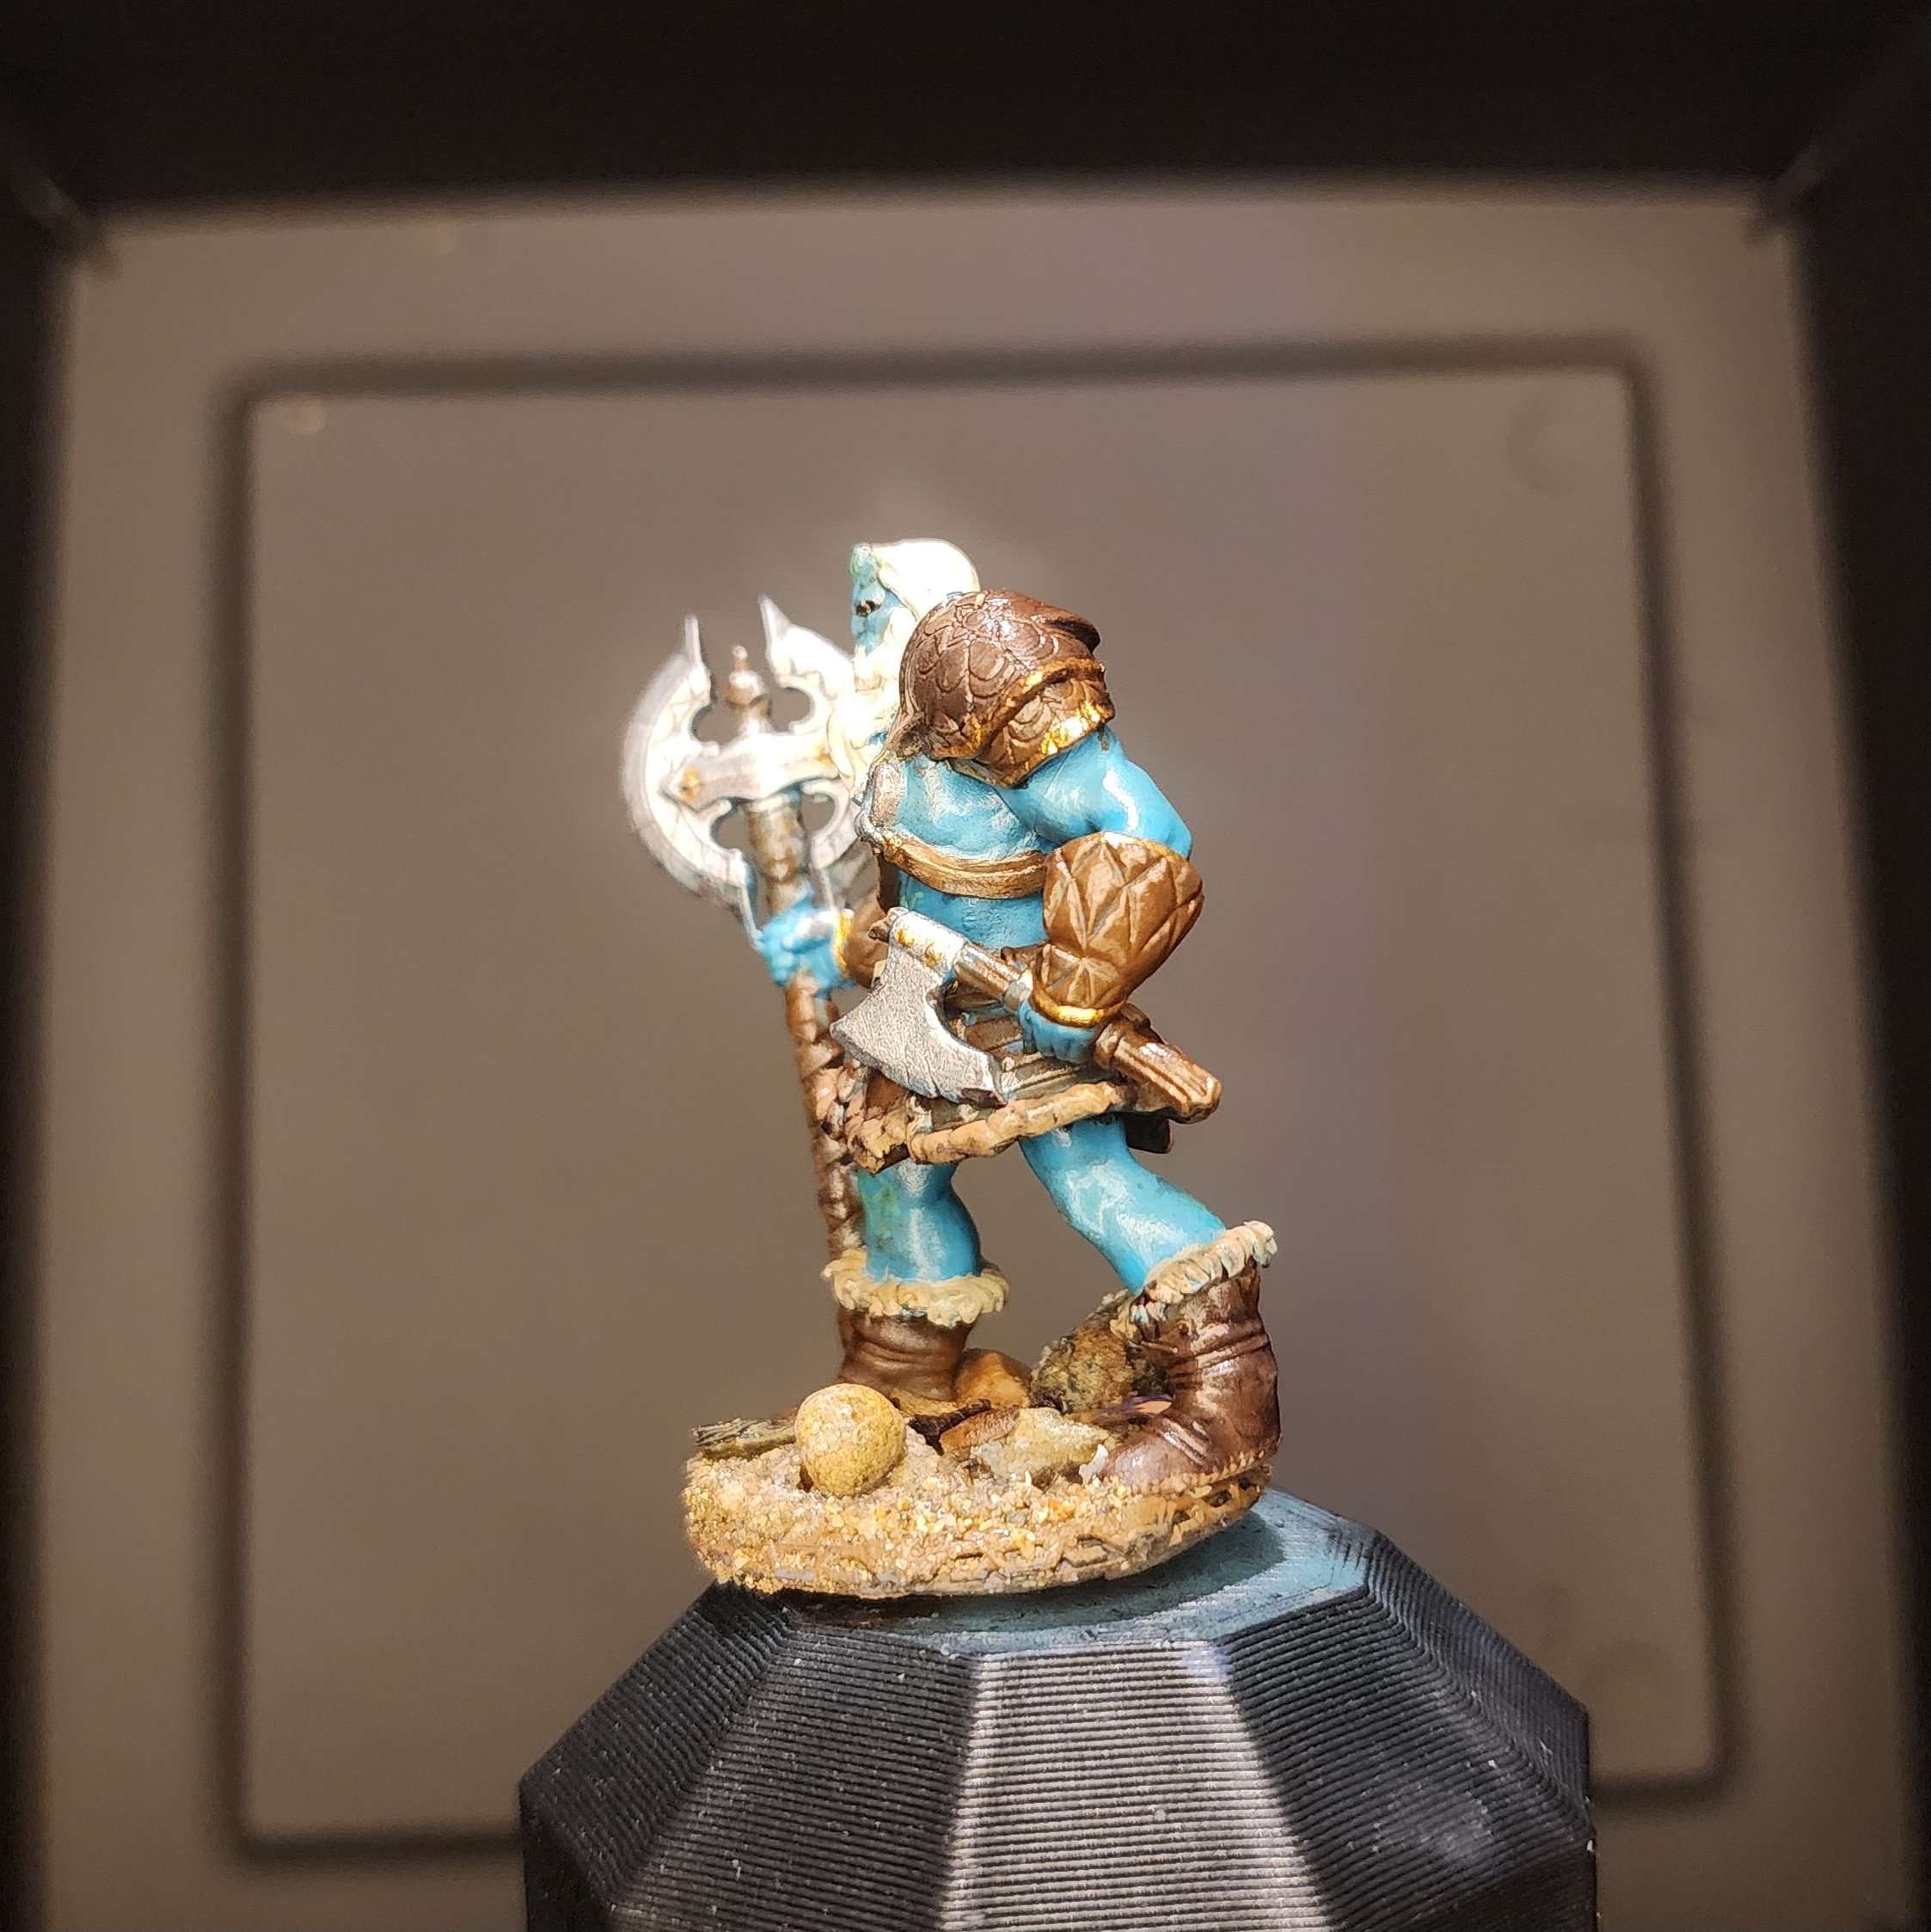
I realized that I never posted my complete army of Ice Orcs that I'd posted a WIP a little bit ago.
Here they are! Some of them definitely turned out better than others, but I had a lot of fun painting them up and I'm happy with how they look as a whole. I've only ever painted one other "army" of minis, and I used the same color scheme for all of them, thinking I needed to in order to make them look like a cohesive unit. It worked, but just as they were cohesive, they were boring.
I tried a different approach here, picking out a general list of colors (black, brown, tan, and gray) that fit the theme I was going for. For each orc's armor, I mainly stuck to the selected colors, but threw them on wherever I thought it would look good, not caring if the previous model was brown with black accents, black with tan accents, etc. I figured as long as they all used them same colors overall, the colors would tie themselves together.
The skin came out a little wonky, but if you've seen my other posts or comments, you'll know that was kind of expected. I'm pretty ass at painting skin tones, and used the orcs as a playground to hone the skill a bit. They still don't look great, but I'm getting better at things like highlighting muscles and shading skin folds and the like.
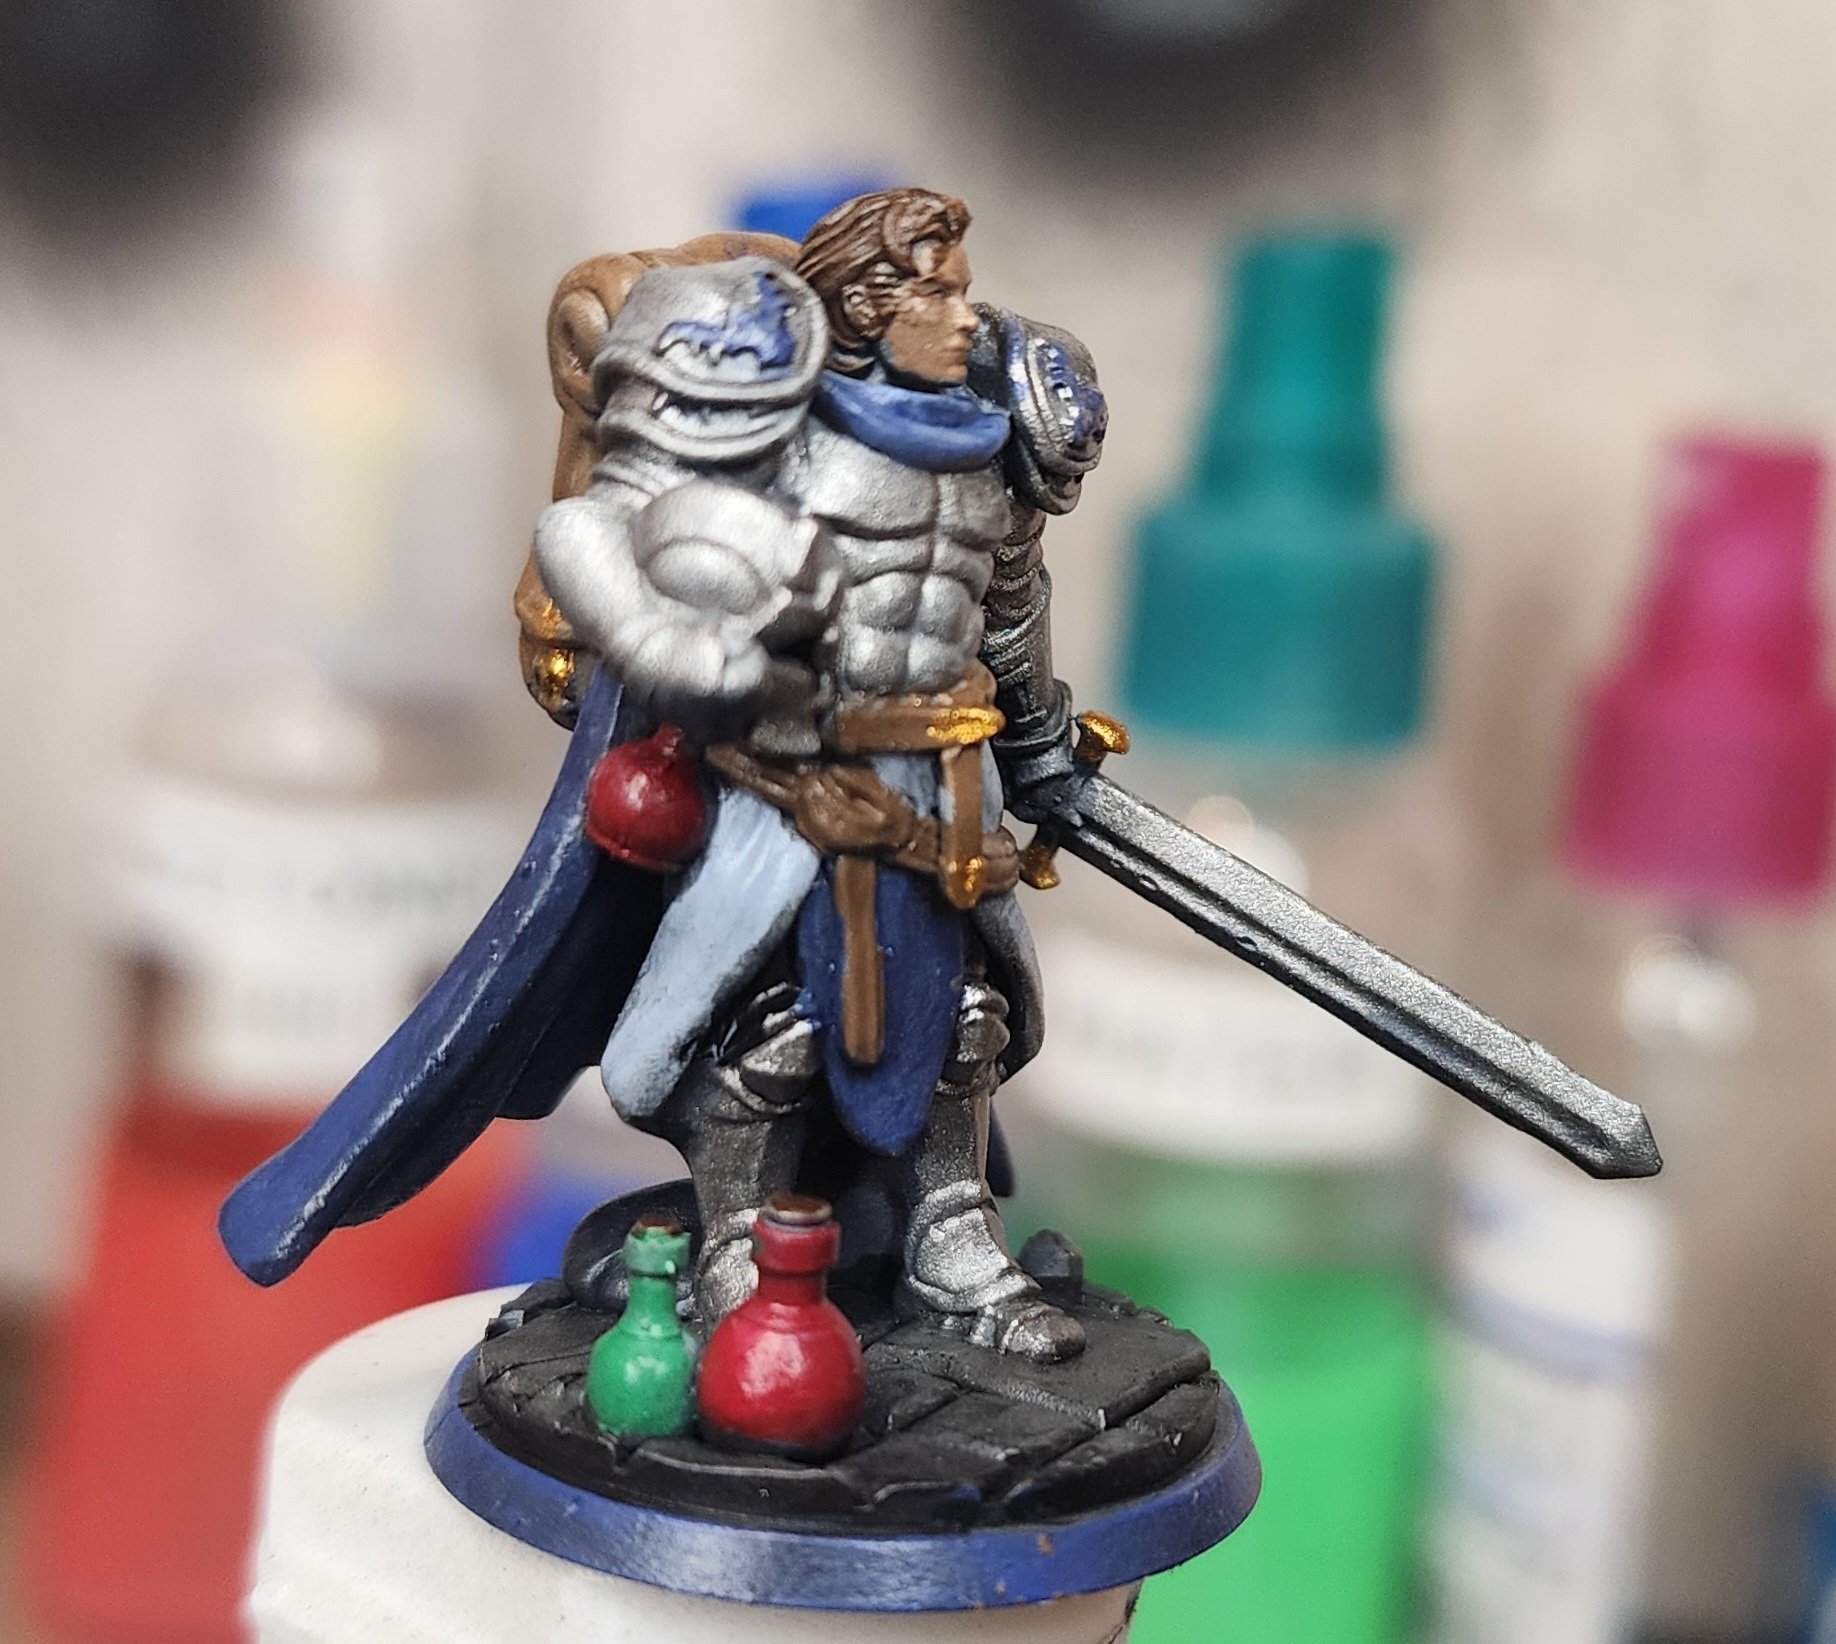
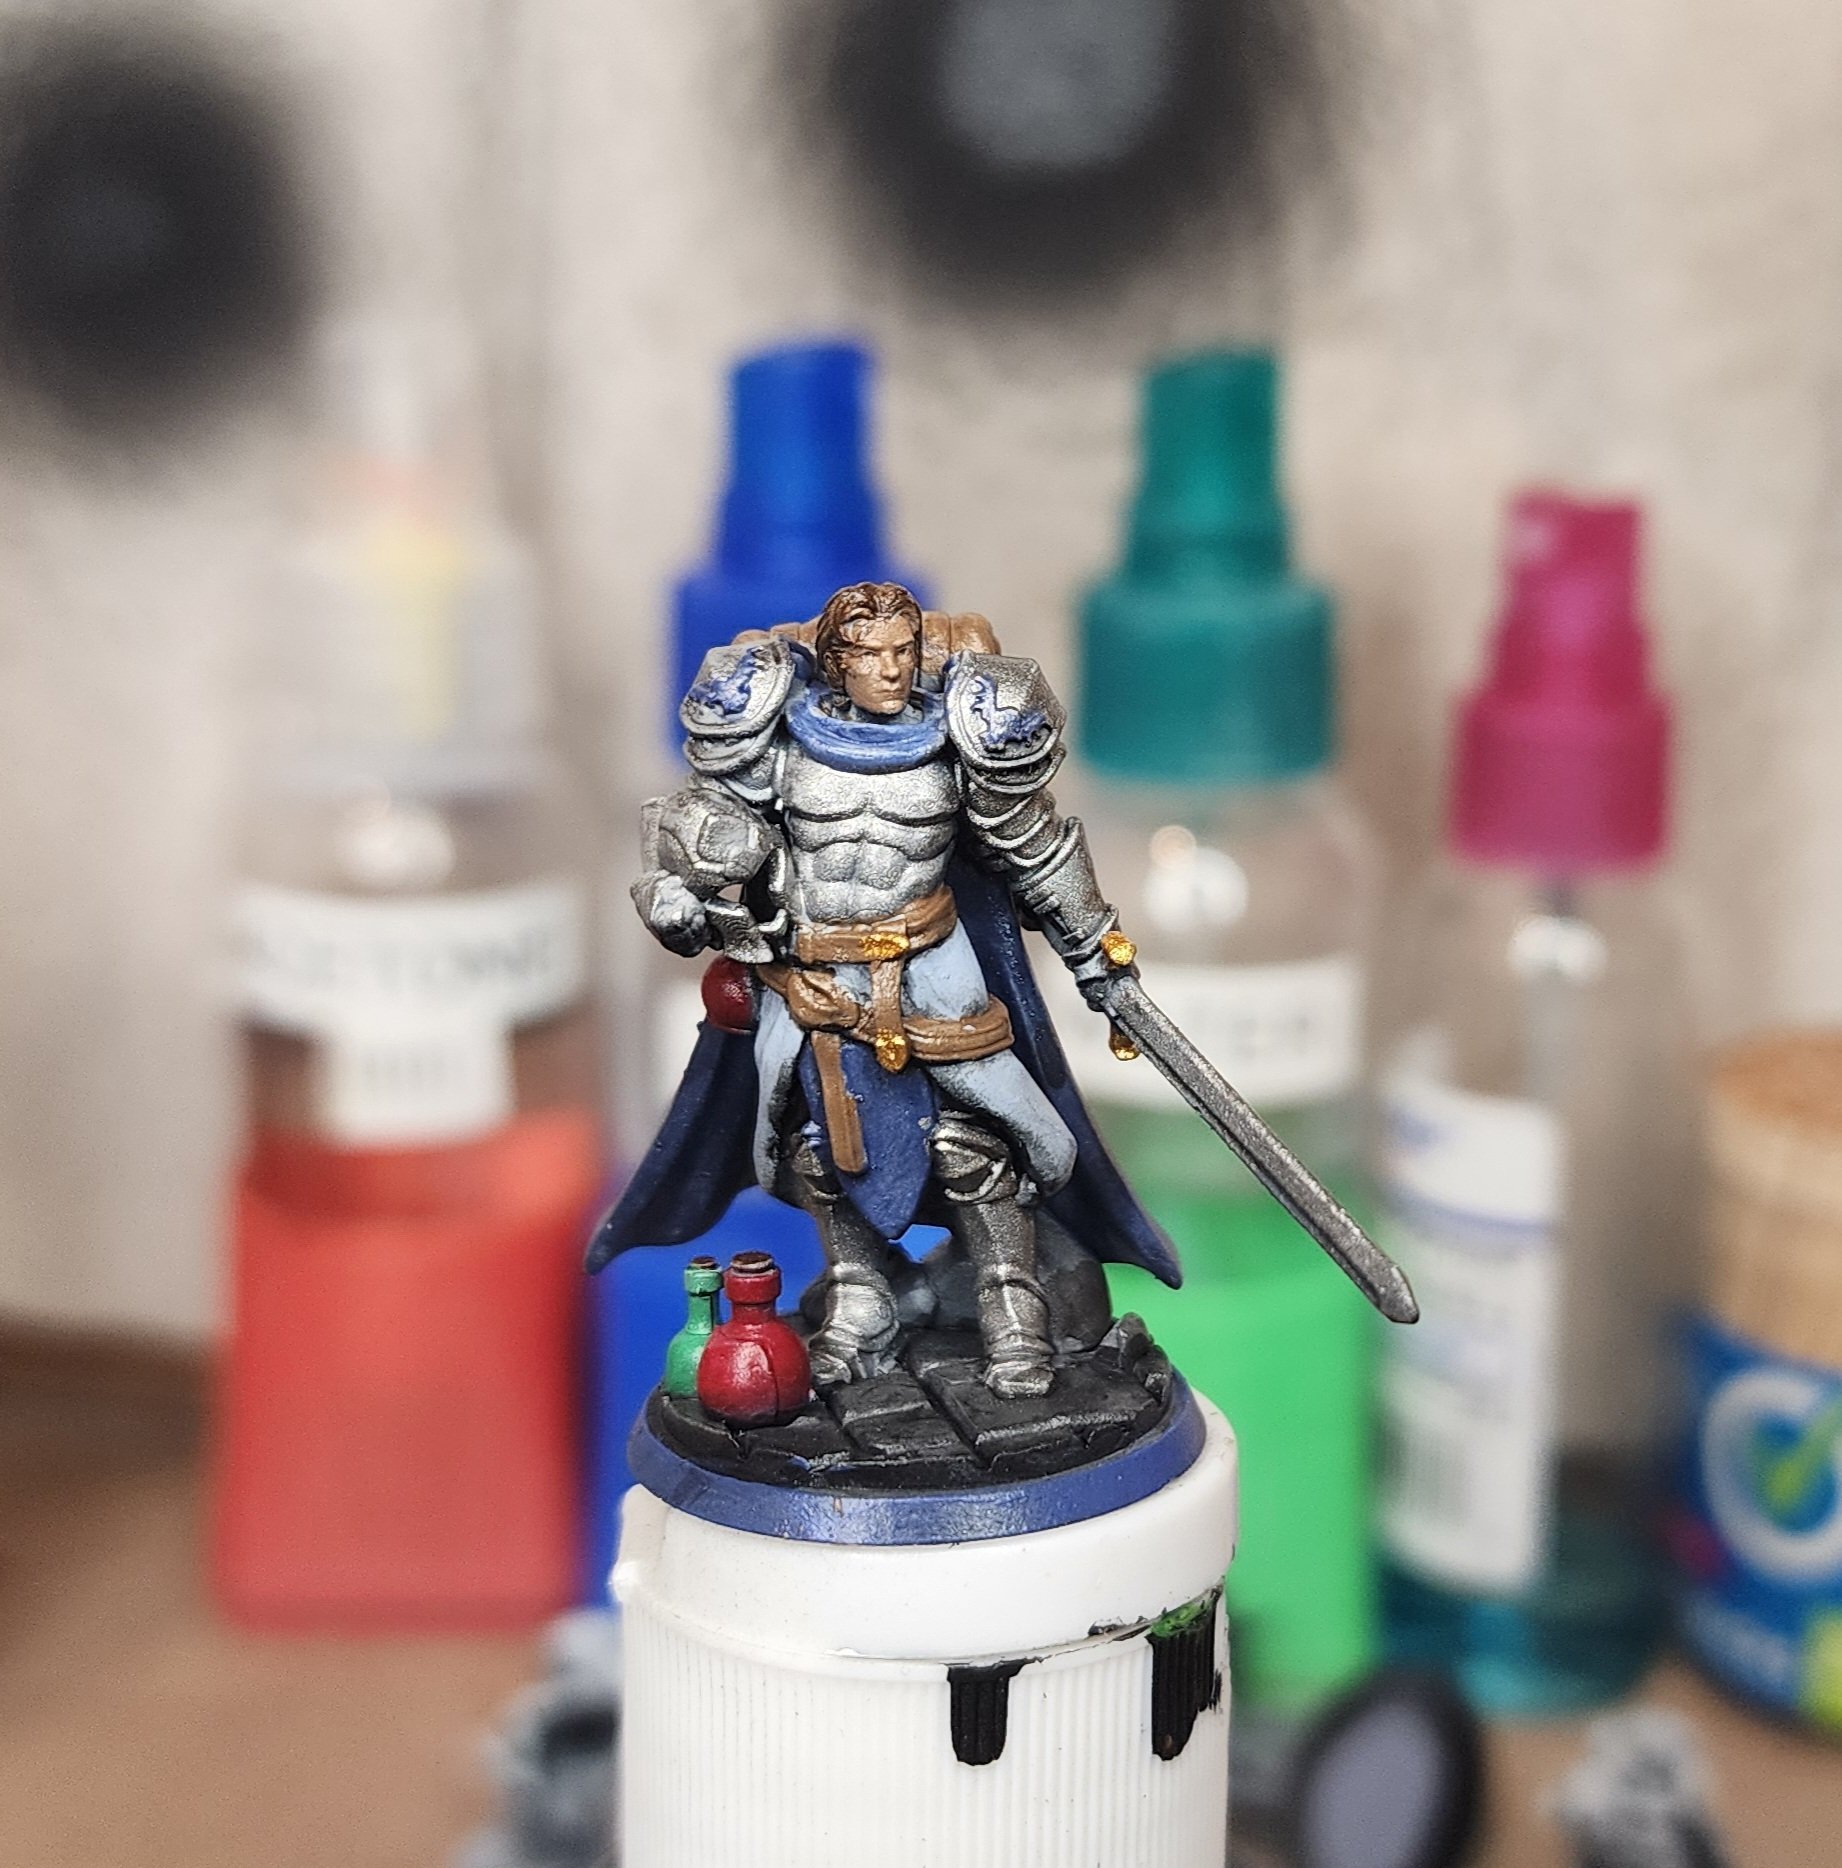
Anyways, sorry for the giant wall of text. Here's a few glamor shots, featuring my paladin from a few weeks ago.

You looked, didn't you.
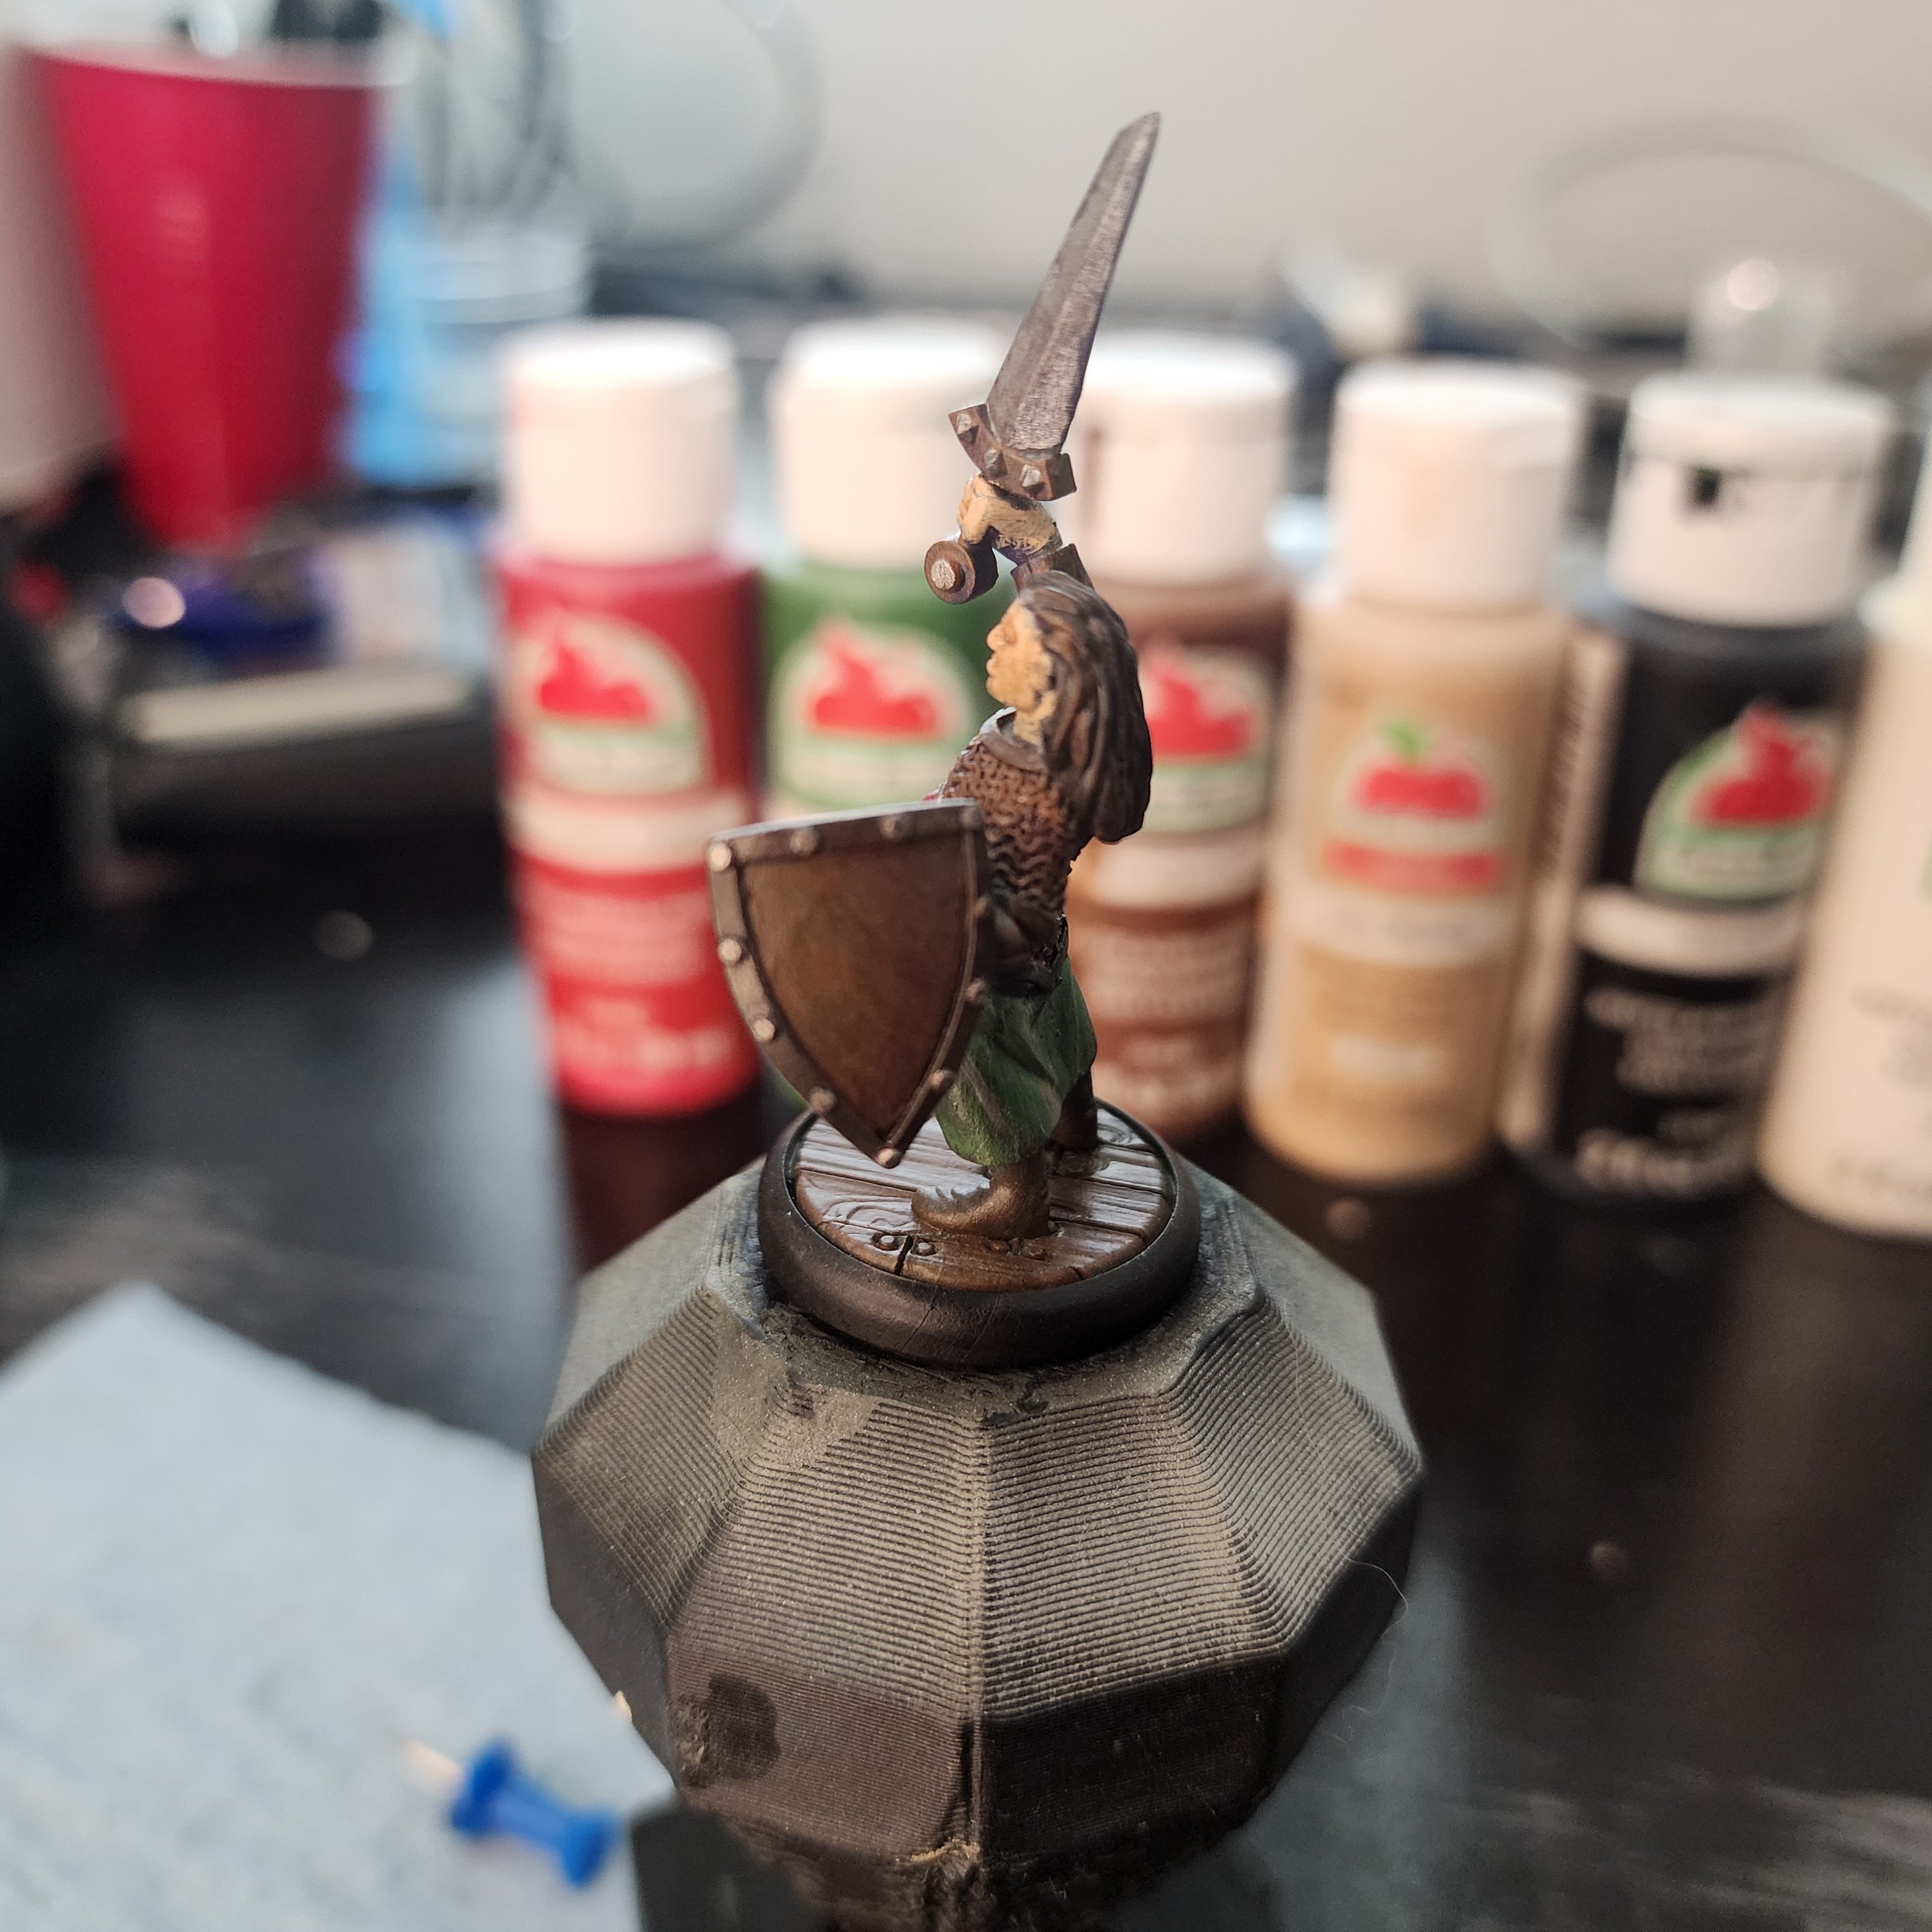
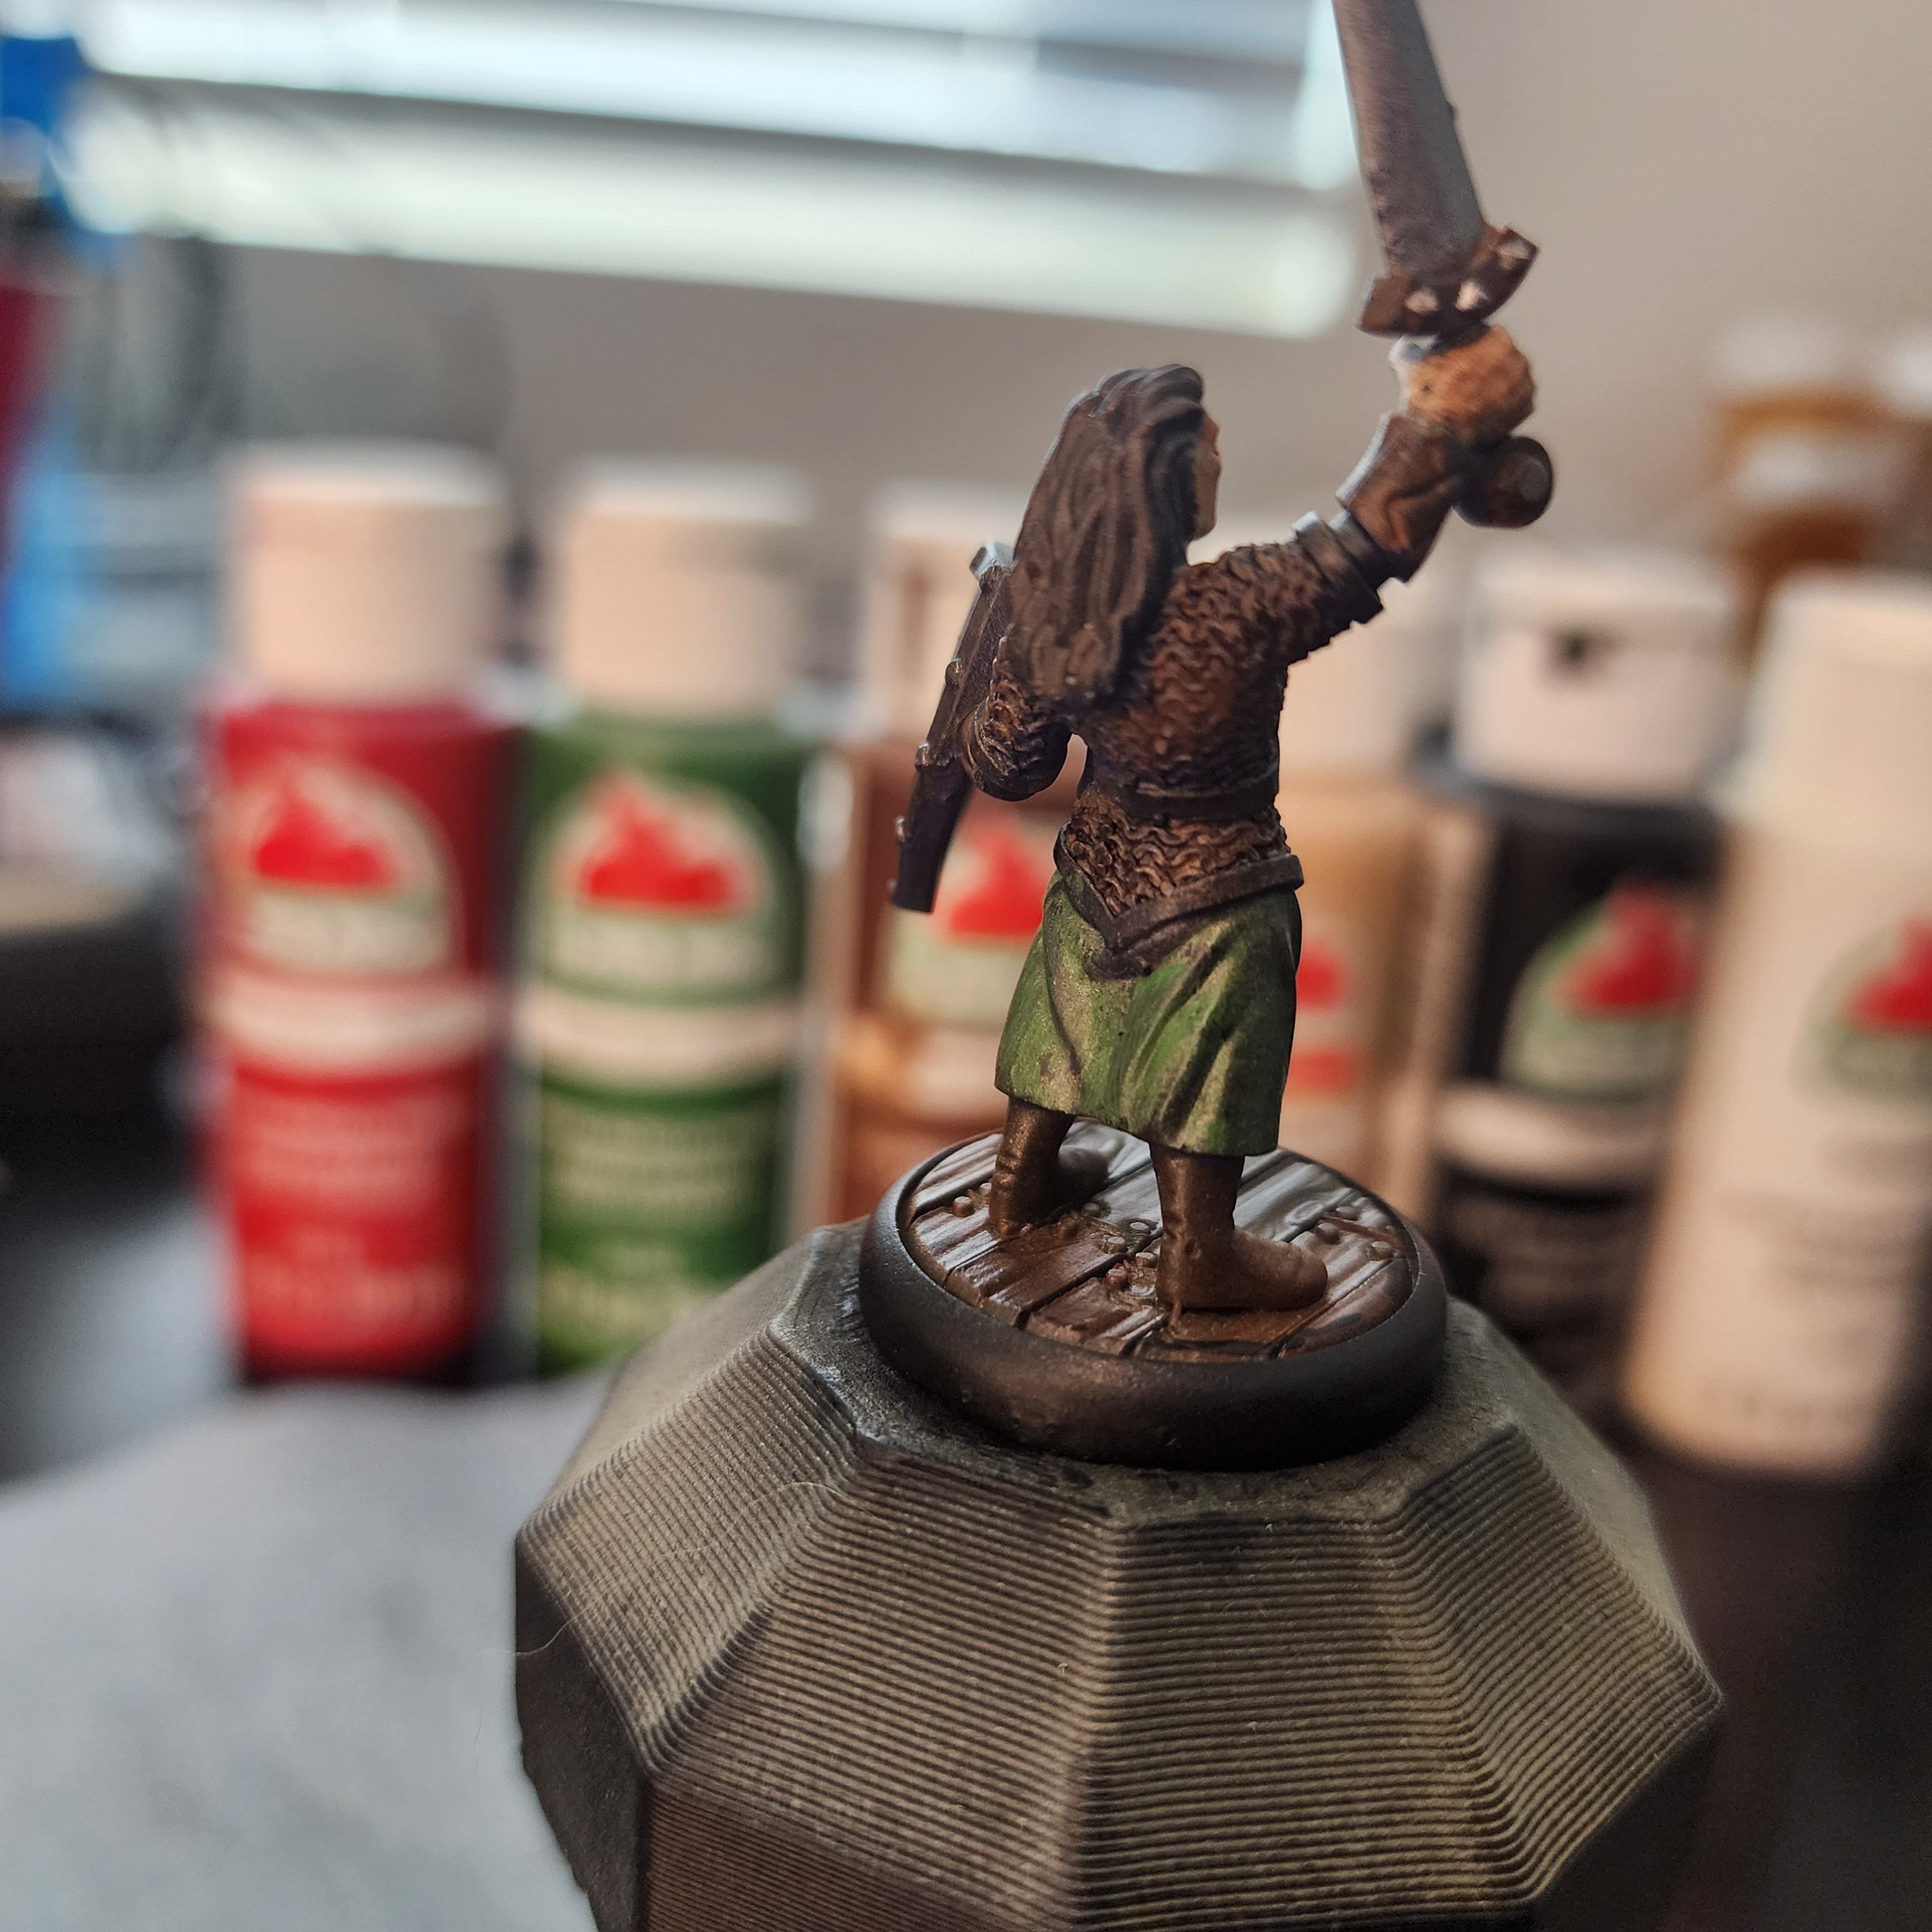
This is slightly different than my normal paint jobs. As evidenced by the background of the picture, he was painted using only cheap craft paints (save for the sword and other metallic highlights). The reason for this is that I plan on hosting a Mini Painting Party, where I'll be providing all the supplies needed to paint up some little dudes. I want to do this without breaking the bank, but I also wanted to make sure that the cheap paints weren't going to make the experience unenjoyable. So, I put together the same kit I plan on giving everyone (#0, #1, #2 brushes, a DIY wet palette and some toothpicks) and got to work.
I've got about a dozen of this same mini. I might tweak the color scheme a bit, but the plan is to teach everyone step-by-step how to replicate the above, then bust out the assorted minis once everyone has an idea of what they're doing. Originally, I was going to pull the nice paint out after the first mini, but after seeing how well the cheap stuff held up, I think I'll save the pricey stuff for myself...
That being said, the craft paint worked much better than I was expecting. Part of it is likely due to the experience I've gained since I last used the stuff, but the only time I felt frustrated with the paint was when applying the final wash a good amount of green washed off. This happens to me a lot when applying washes so I think it's more something I'm doing than the paints fault, but it was much worse with this craft paint than the nicer stuff.
Anyways, here's a couple other angles.

This is a work in progress pic of what will eventually be an army of icy blue-gray skinned orcs. I plan on making a range of colors between pure light gray and pure baby blue, and grabbing colors from different parts for each orc so they'll all have different but similar skin tones.
The models are from Valandar's awesome Orc Horde collection on Thingiverse. These models are a ton of fun and a great balance between high-detail and printability/ paintability. I wish the bases were a little more interesting, or printed separately so I could attach my own, but a flat base allows me to add my own terrain later on.
I plan on doing a typical green-skinned orc army, as well as a fire-red army. Orcs are a fun way to play around with different armor color schemes because if something ends up looking like crap you can just say, "they're orcs! They just grabbed what's available!"

This is my friend's character for a campaign that we are in. He used AI to create the general look of his character, then designed a mini based on the outcome. I printed it out for him and used the AI image as a color reference.
Here are a few other angles:
And here is the AI generated image that the mini is based off of:
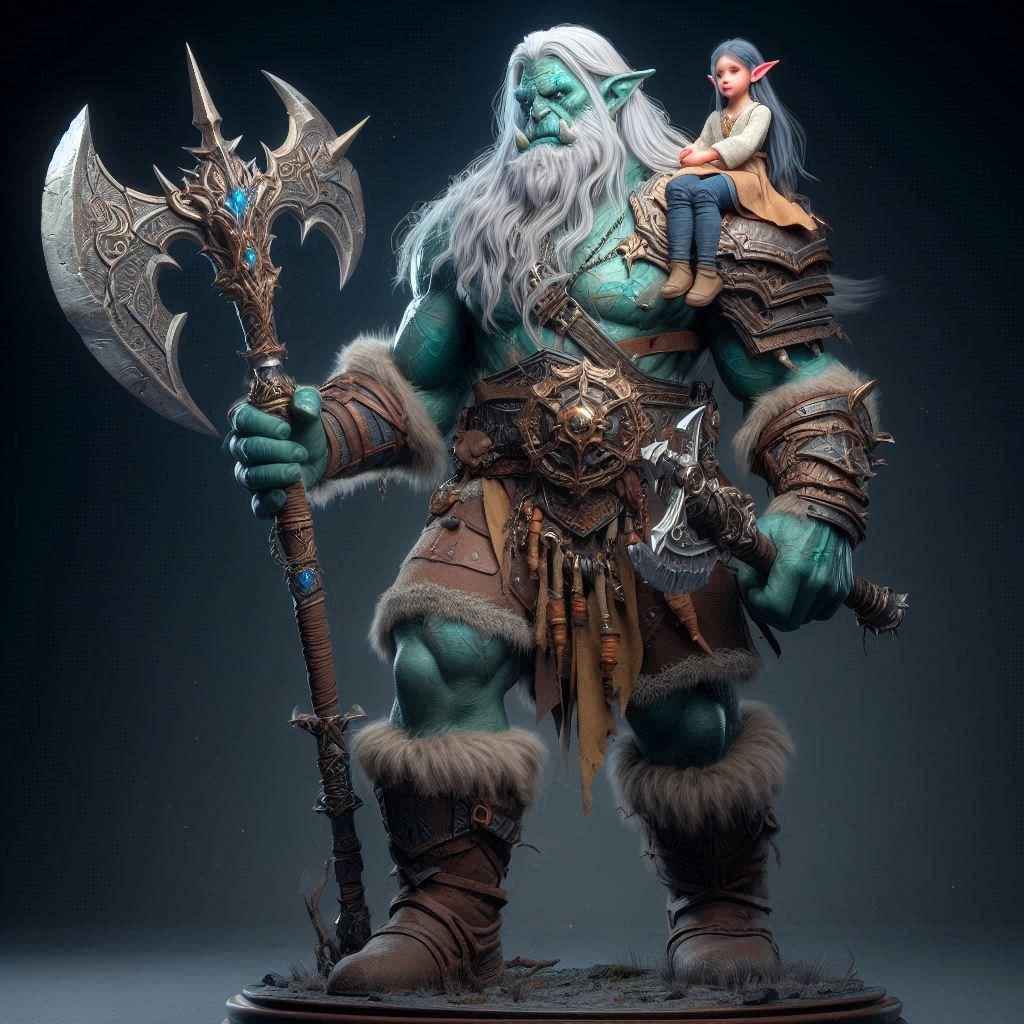
(The small girl is the character's sister.)

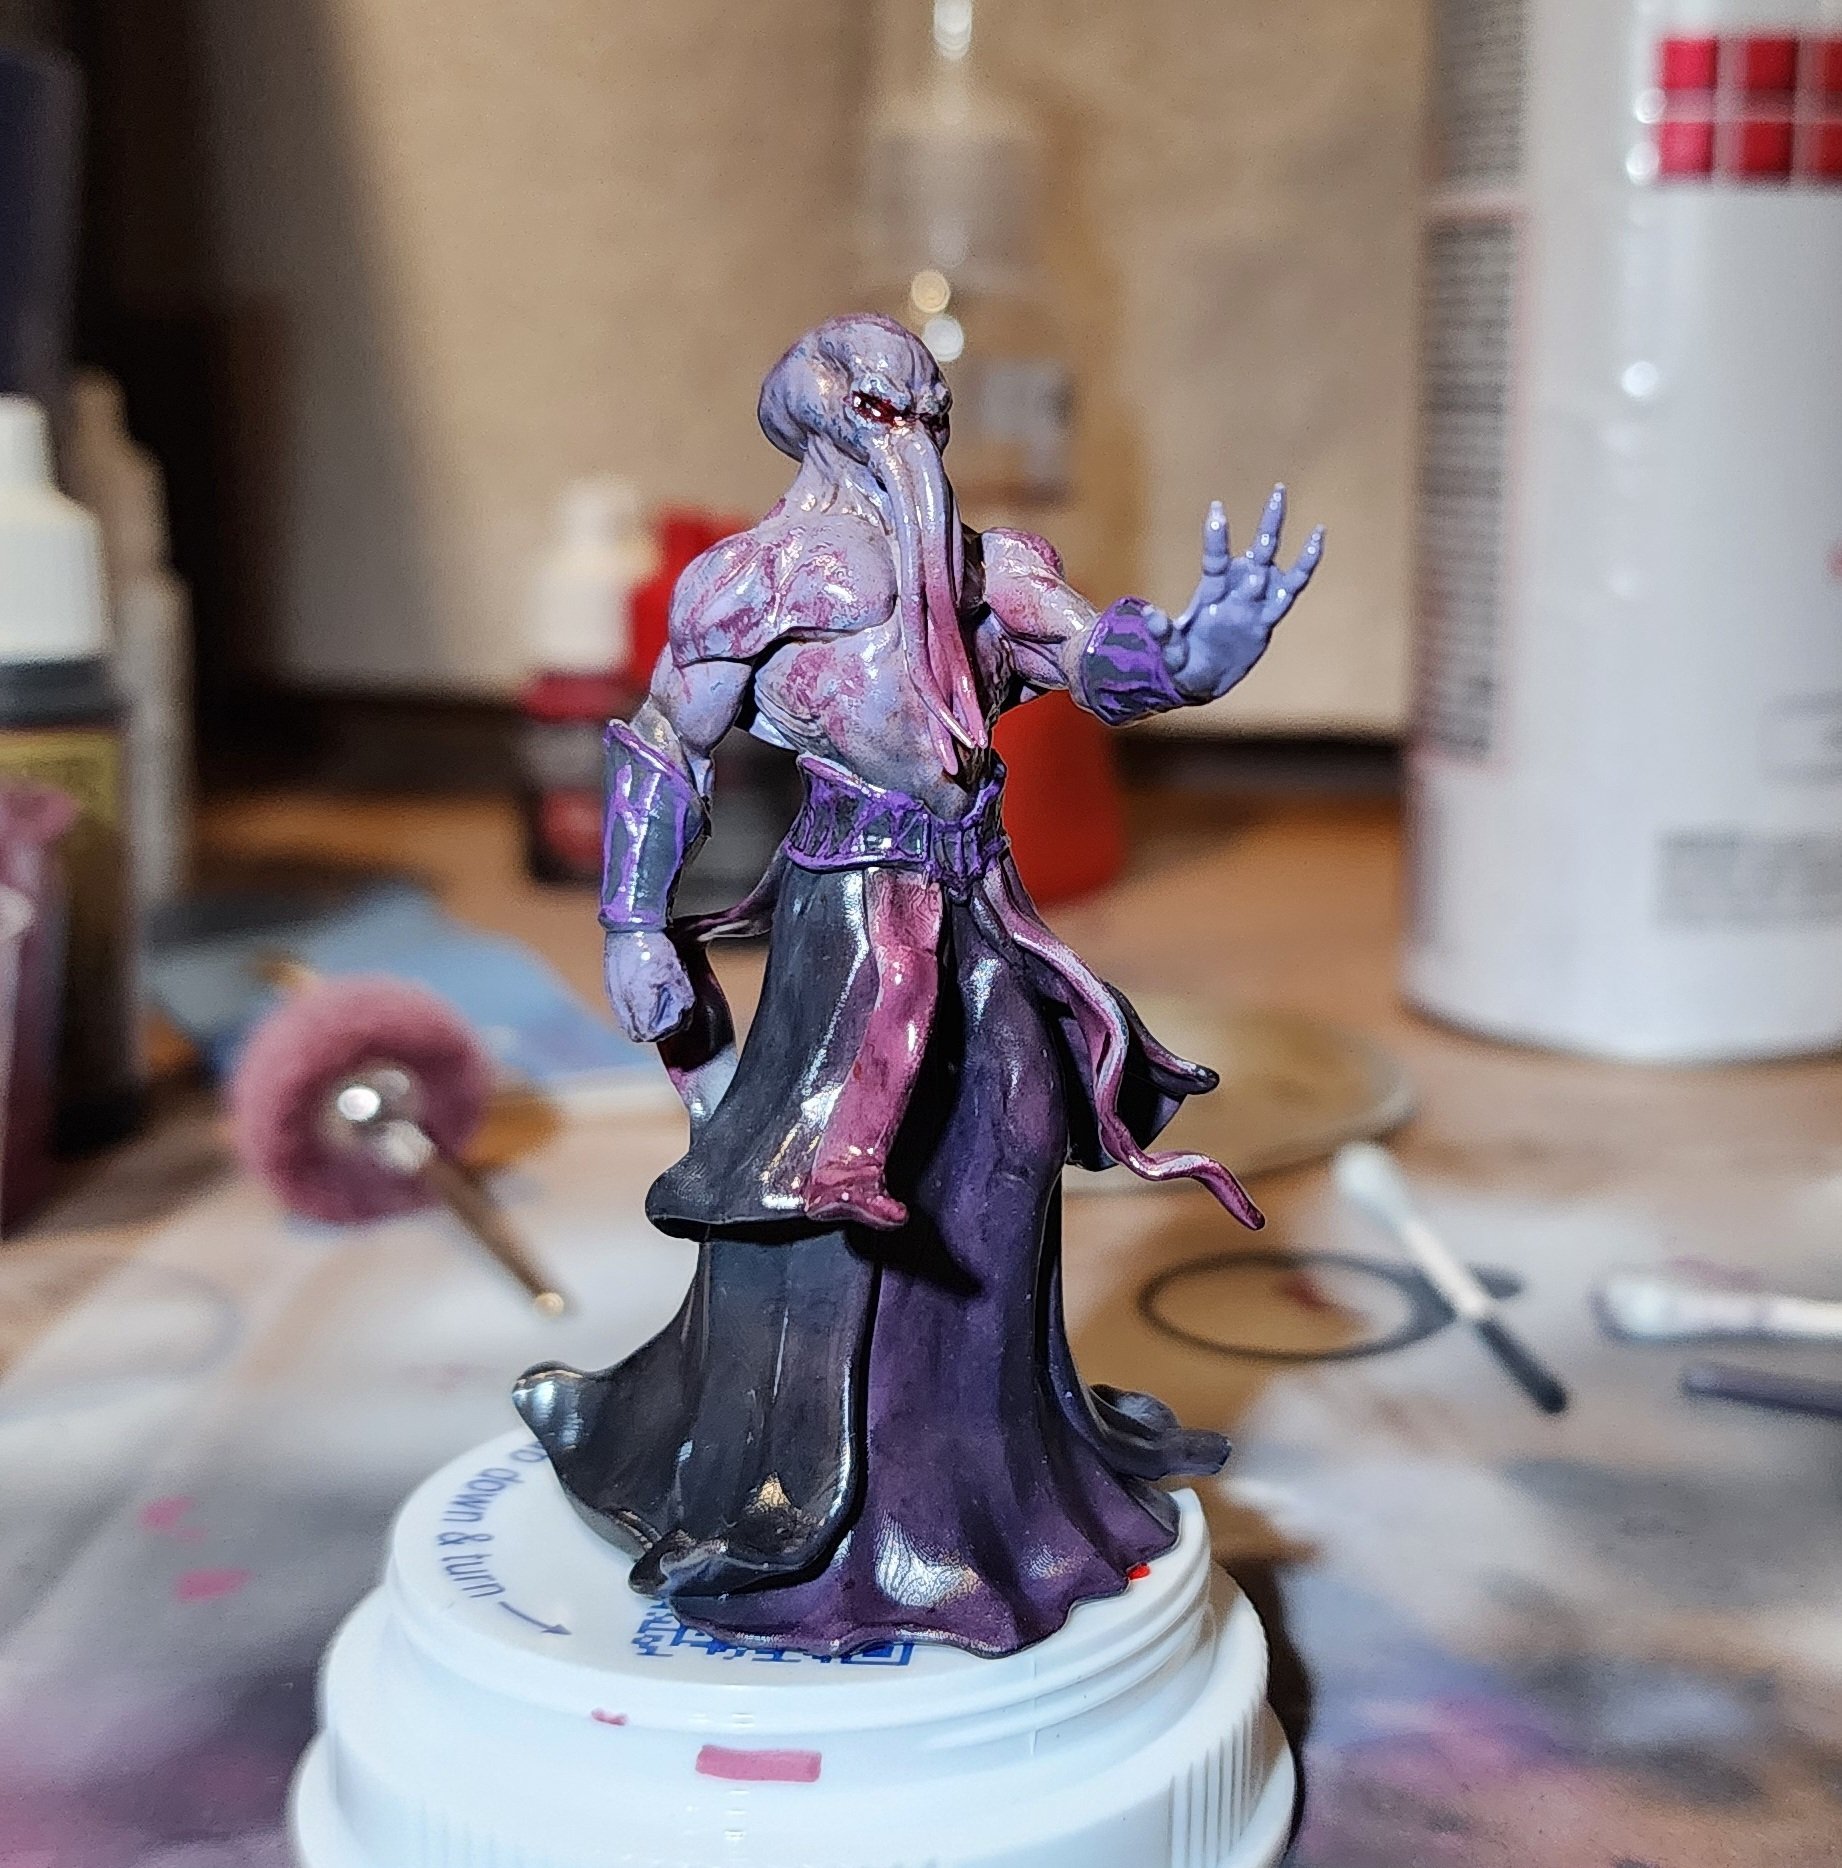
This is my paint job on Yasashii's "Mind Flayer / Illithid Tabletop Miniature" from Thingiverse.
This was one of the first prints off of my resin printer, and the first piece I attempted air brushing; to make both of these a little easier, I scaled him up a bit, so he isn't quite "tabletop minature" scale, but still much smaller than what I'd been used to painting (~70mm tall).
Everything except for the red eyes and purple highlights on the armor was done with a 0.3mm airbrush.
Here are a couple different angles:
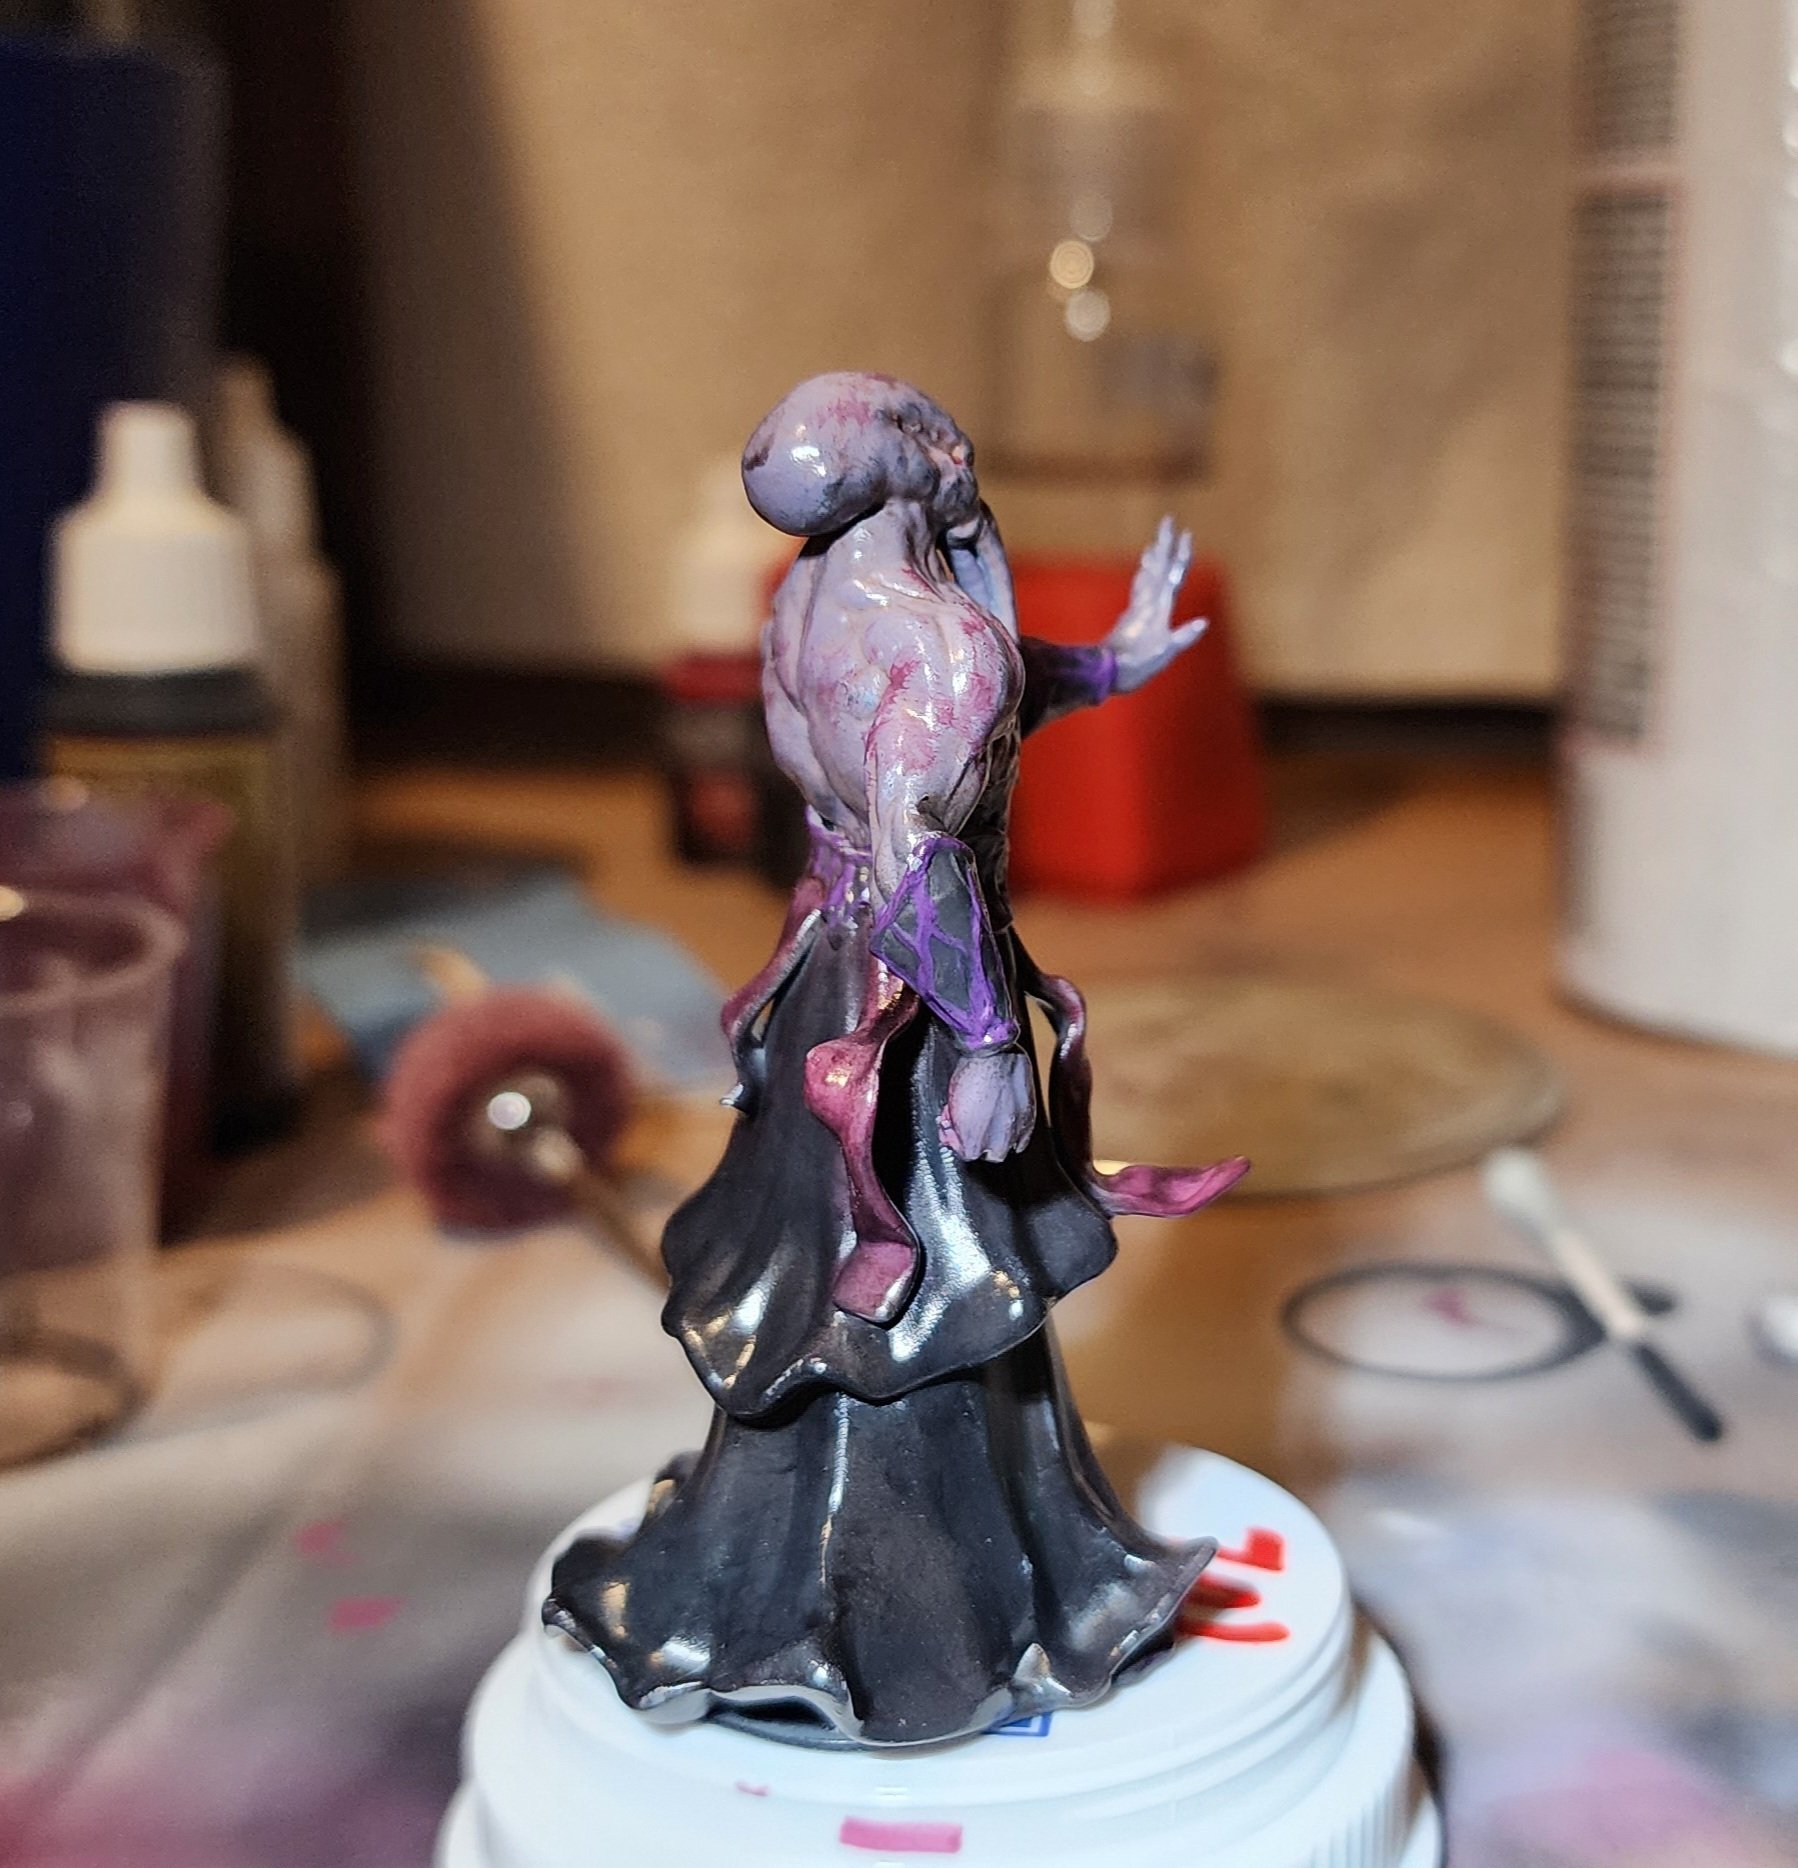
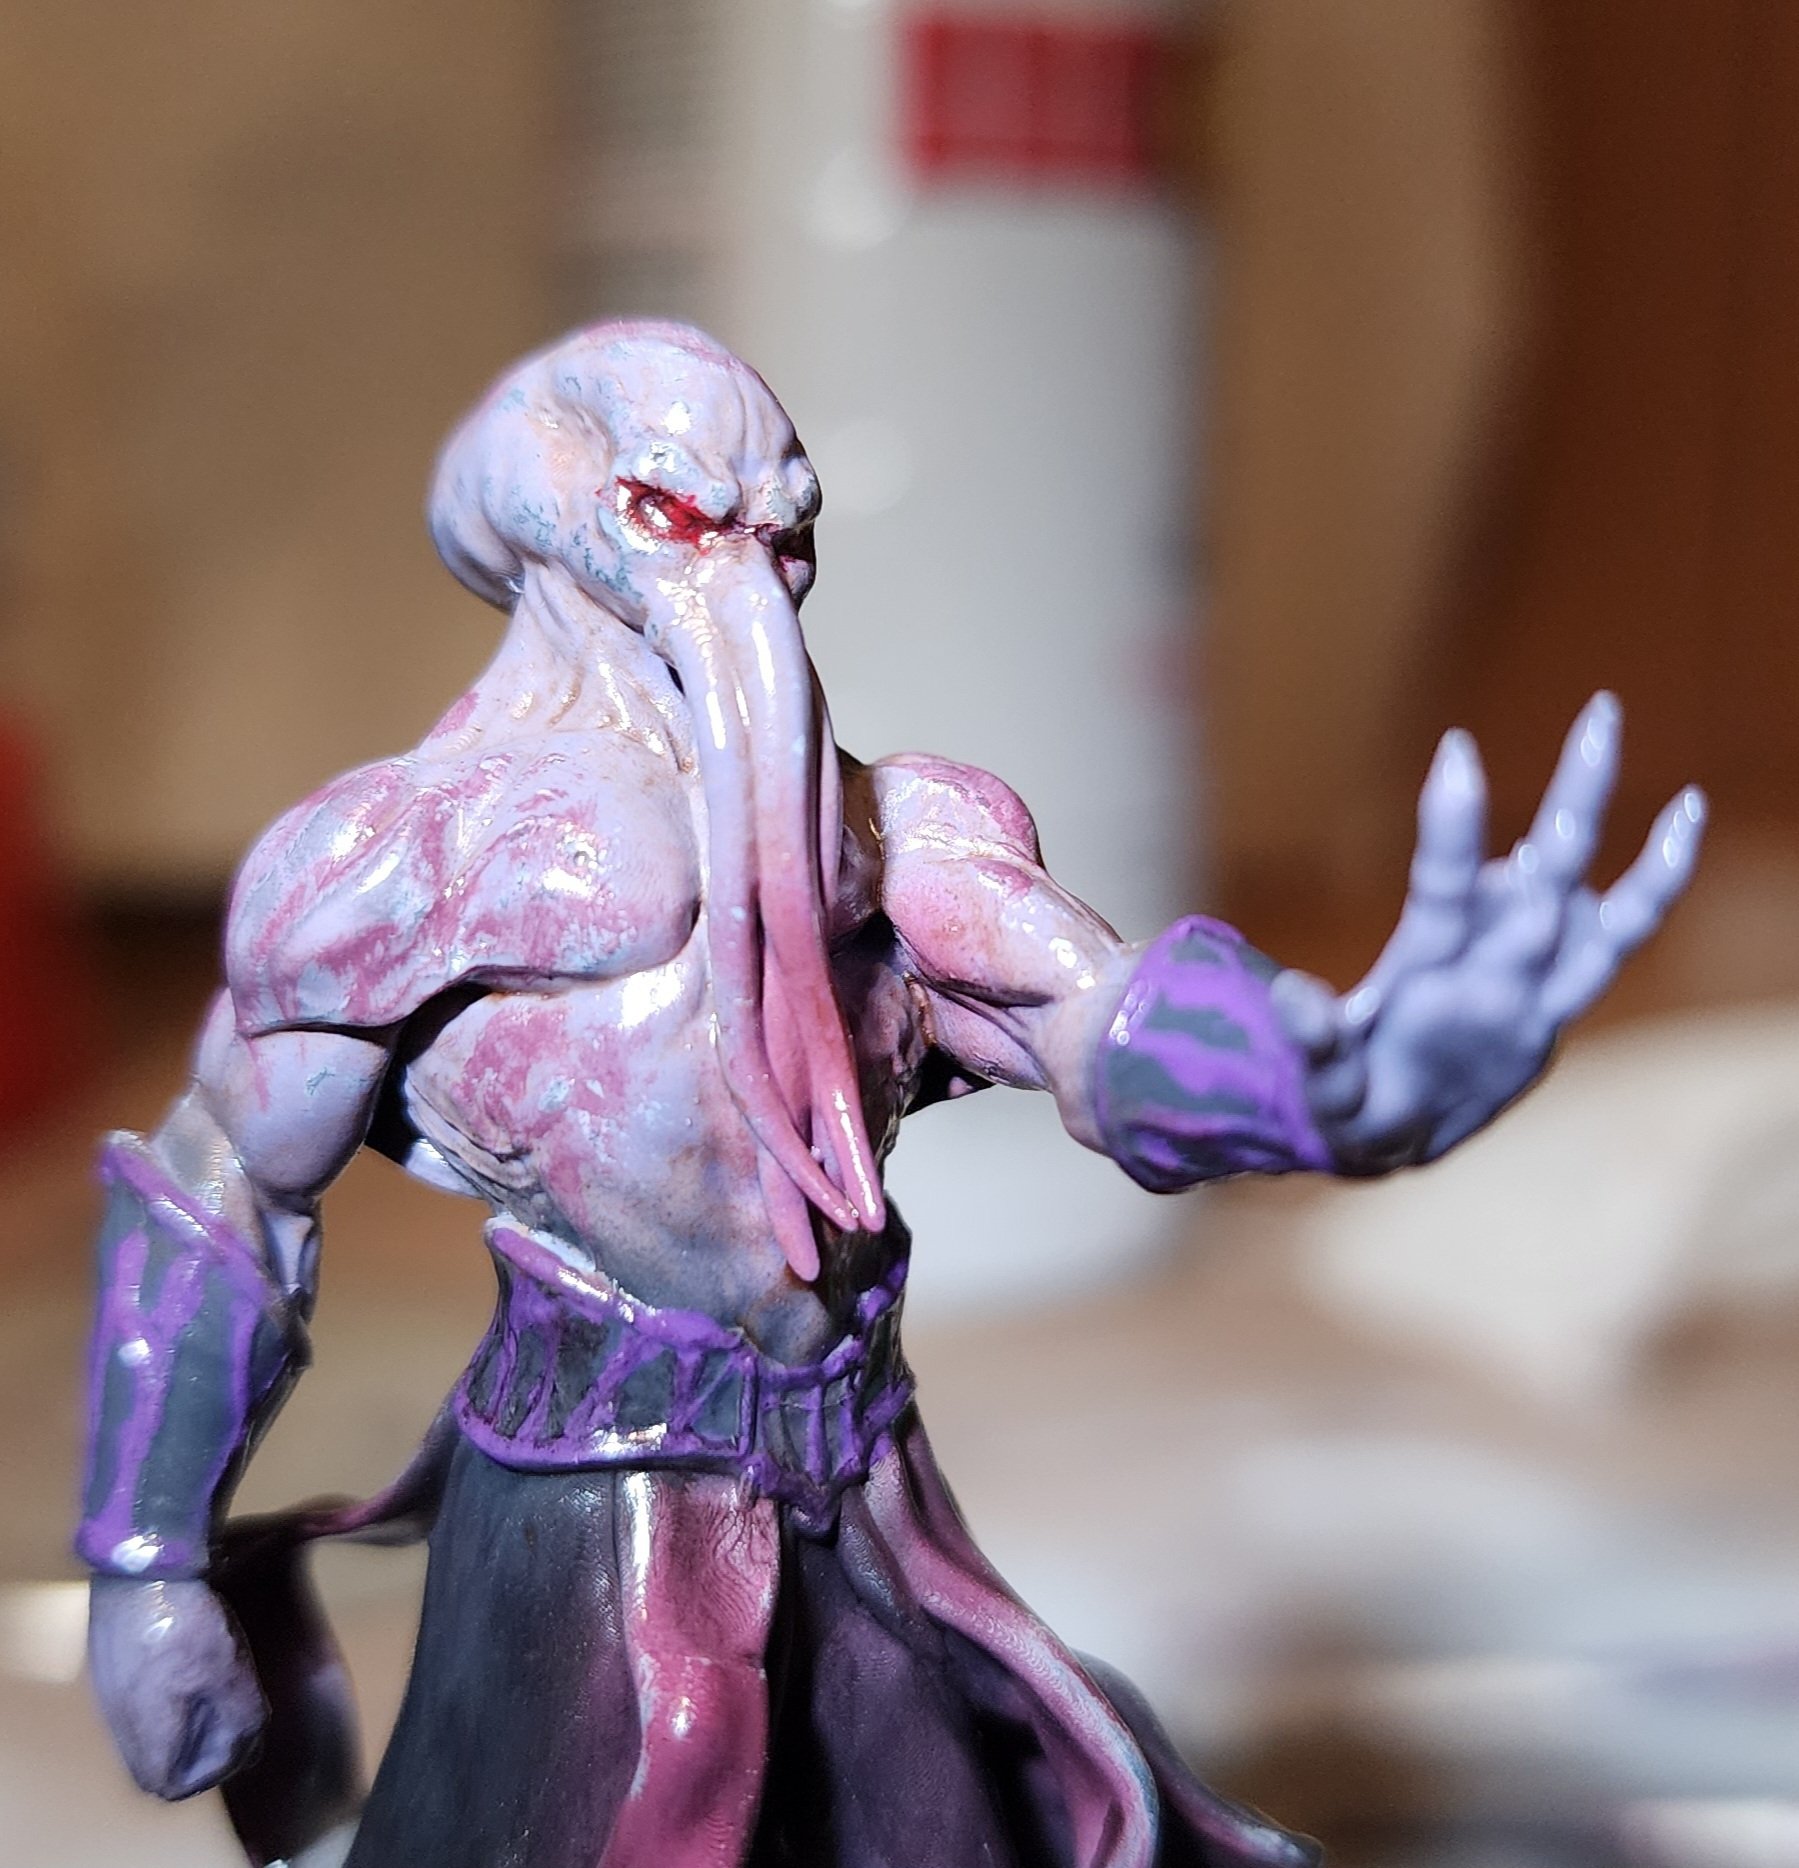
Unfortunately one of the robe dangly bits snapped off the back before I could start painting. I didn't expect the paint job to turn out this decent so I didn't bother reprinting, kinda wish I had.
This is a miniature from TitanCraft's "RPG Mini Starter Kit" on thingiverse. I painted him up just to get some practice painting minis as I'm just starting out on the small scale stuff.
Here he is from a couple of different angles:
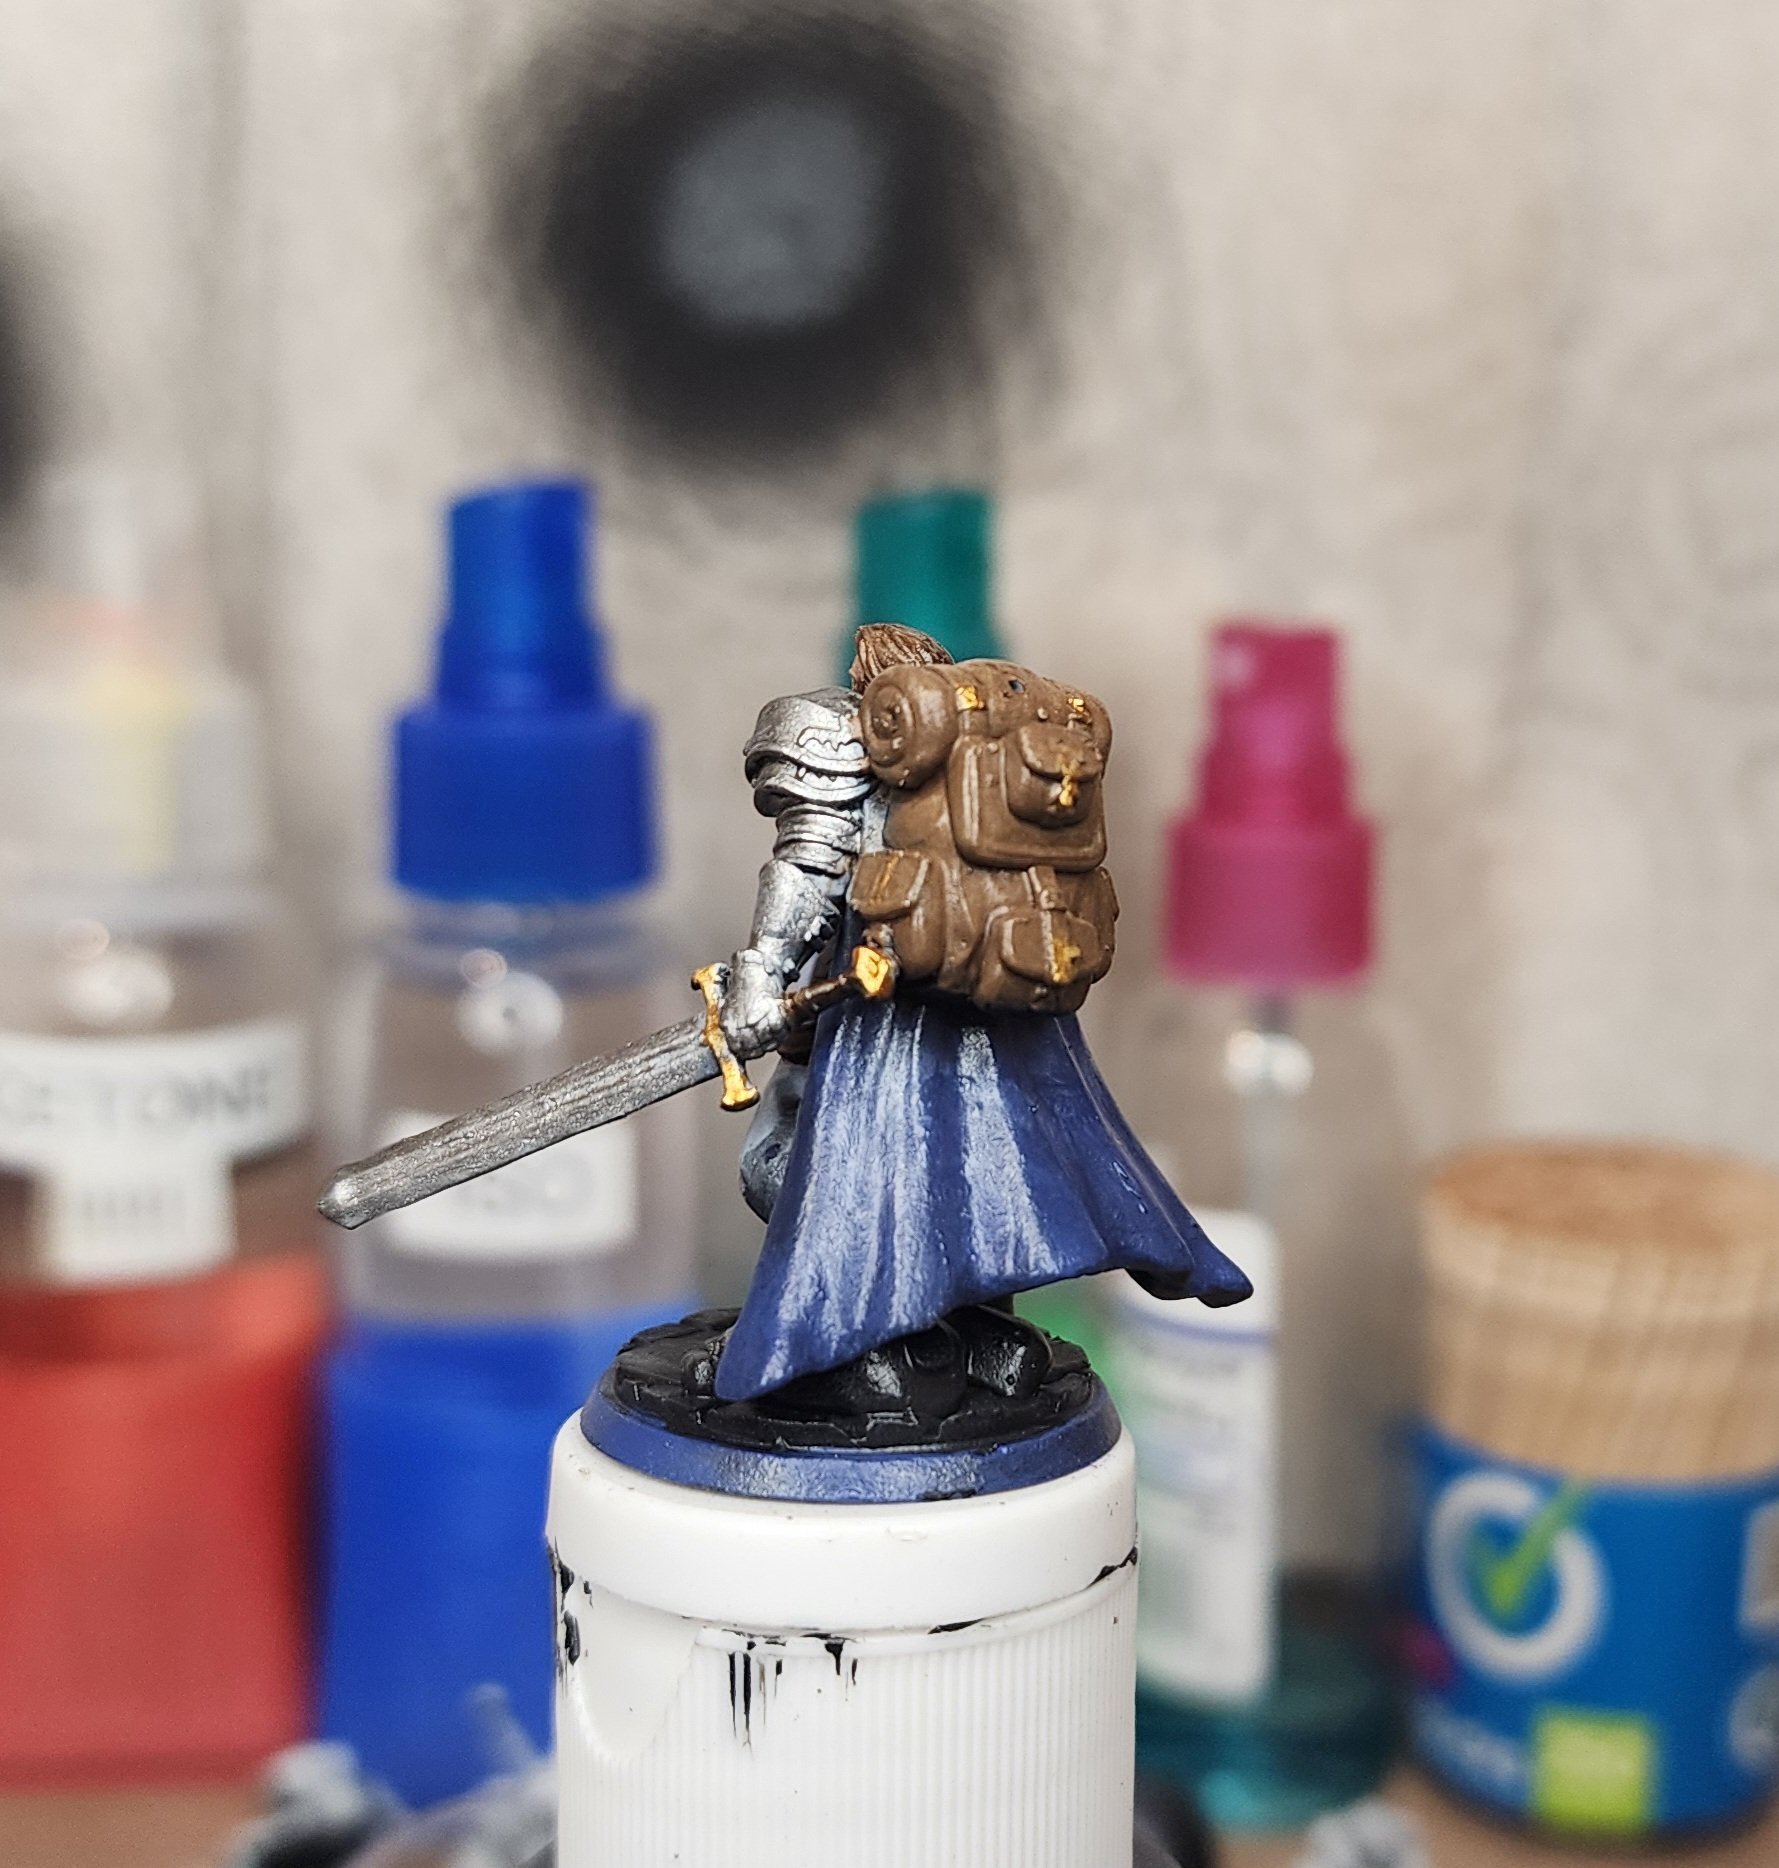
I wish that the paint on his face came out a little better, it's something I've always struggled with.
I may be preaching to the choir here, but if you haven't already heard of it, check out TitanCraft. It's another mini maker website, but you can actually download minis that you make for free (they have paid and free assets, but there's a ton of free ones and you don't have to pay anything to download an all-free model). I'm not affiliated with them in any way, but I've been showing it to all my DnD friends and a few of them are sending me minis to print out for them, and it costs us nothing but the $0.25 of resin.
I'm still running my 1080 (non-TI), I've wanted to upgrade since the 30x0 series but couldn't justify the cost... Definitely not gonna get any better.