MapleEngineer

joined 2 years ago
MODERATOR OF
[–] MapleEngineer@lemmy.ca 16 points 2 years ago

Just to be clear, these are not Trudeau's laws. Canadian anti-hate speech laws have been on the books for decades.

[–] MapleEngineer@lemmy.ca 16 points 2 years ago

That's exactly it. It's always hate speech that those who are braying about free speech are trying to protect.

[–] MapleEngineer@lemmy.ca 15 points 2 years ago (2 children)

The funny thing is that Americans think that guns and hate speech make them the freest country in the world.

[–] MapleEngineer@lemmy.ca 12 points 2 years ago

Danielle Smith is working her way through those who have been charged for violating Covid restrictions.

[–] MapleEngineer@lemmy.ca 3 points 2 years ago

The National Post newsroom has the slightest hint of residual journalistic integrity. Their Opinion Pieces are straight up right wing propaganda.

[–] MapleEngineer@lemmy.ca 22 points 2 years ago

"Free speech" is a right wing dog whistle for hate speech.

[–] MapleEngineer@lemmy.ca 8 points 2 years ago

They are supposed to oppose things that aren't in the best interest of Canadians, to stop government abuse they absolutely can support things that are in the best interest of Canadians.

[–] MapleEngineer@lemmy.ca 0 points 2 years ago* (last edited 2 years ago) (1 children)

I started working full time during the summer the year I turned 13. I was working for my family's company and my safety was always the most important thing.

In the current environment of the exploration of workers I feel that it is unacceptable for children to work for any company other than a family company or a small company that will not exploit them and that will protect them.

[–] MapleEngineer@lemmy.ca 1 points 2 years ago* (last edited 2 years ago)

I mentioned taking the feet off in the scalder to my wife just now. She said, "That's weird." I find them very slippery once they're plucked and we always handle them by the feet. Our plucker is quite a bit larger so that may contribute to the issue.

Decapitated is one of several acceptable killing methods in our province. It's very fast.

[–] MapleEngineer@lemmy.ca 1 points 2 years ago* (last edited 2 years ago)

A quick note.

This post of FULLY compliant with the rules of this community. Do not report this post because that would be report abuse.

If you are not interested in the topic, go on with your day. No need to comment or downvote. Act like a grownup.

This video includes the killing of an animal and blood. Do not watch the video if you will be shocked or upset by that. OP has clearly warned you. I have clearly warned you. If you do it anyway then you're clearly an outage addict and this is not the community for you.

[–] MapleEngineer@lemmy.ca 1 points 2 years ago* (last edited 2 years ago) (2 children)

That is the exact process that we use.

I use an 8" filet knife which I got as part of a field dressing kit which I touch it up with a 1000/4000 Japanese wet stone every 9 birds. 9 is as many birds as we can process through from live to fridge efficiently.

I place the birds in the cones with their bellies facing me, place my left index finger on the back of their head and my thumb on their beak, and make a single push stroke starting just anterior to their cheek bone while pulling slightly on the head.

Professional small abattoirs including the three we regularly use use metal poultry hangers.

The knife and hanger form an electrical circuit for an electric stunner which prevents the birds from flapping. I've read many people say with great authority that preventing the birds from flapping protects the meat. That is bullshit. I have eaten hundreds of birds killed both ways and no one could possibly perceive any difference. I believe that stunning the birds is more about expedience and efficiency in the abattoir since the birds can be taken down immediately and placed in the scalder.

Save for the electric stunning they remove the heads exactly the same way I do. The old gentleman who owned the first abattoir we used to the time to show me how to do it properly. They no longer process poultry.

I take the feet off with the same knife after scalding, plucking, and initial cooling. I find that the feet make the bird easier to handle and scalding the feet makes them easy to peel for people who want to eat them. Removing the feet with the knife is much faster than the process in the video.

I remove the feet, do the neck and crop, then the gutting all on the cleaning table.

So our flow is, cone, killed, then set on a table, scalded, plucked, then into a garbage can filled with ice and water. They rest there until I'm ready to start cleaning. They come out of the water into the cleaning table, feet, neck and crop, gut and clean up, then into a second garbage can filled with ice and water where they rest and cool until my wife bags them and puts them in the fridge.

The next day I do the cutting. We make some spatchcocks but mostly do boneless skinless breasts and thighs, wing parts, and legs. The bones, skin, and carcasses go into a roasting pan and get roasted then my wife adds water and puts them in the oven overnight to make bone broth.

[–] MapleEngineer@lemmy.ca 1 points 2 years ago

He's a very good student and his teachers like him. I made sure that he wasn't missing anything important. I think it's a good thing to get some experience with difficult jobs with your father.


When I first started using AVRs I bought a couple of UNOs. I needed something smaller that I could use inside controllers for my machines. I moved to the ProMini and it served me well for two or three years. I got a couple of Nanos in Hacker Boxes and really liked them. I like the built in voltage regulators, the USB port, and the ICP port. I used Nanos for a couple of years then needed something bigger. Now I'm using the ATMEGA2560 Pro Mini. It's got enough IO to run my entire room.

I've recently switched from Bascom AVR to Great Cow Basic. I'm thinking that I may need to mode to a PIC based MCU.

Does anyone have a favorite PIC based MCU board similar to the ATMEGA2560 Pro Mini?

1
submitted 2 years ago* (last edited 2 years ago) by MapleEngineer@lemmy.ca to c/arduino@lemmy.ca
 

This little power supply board plugs into a ProMini shield stack or the ProMini Backplane boards that I designed. It's basic but it has a couple of nice features.
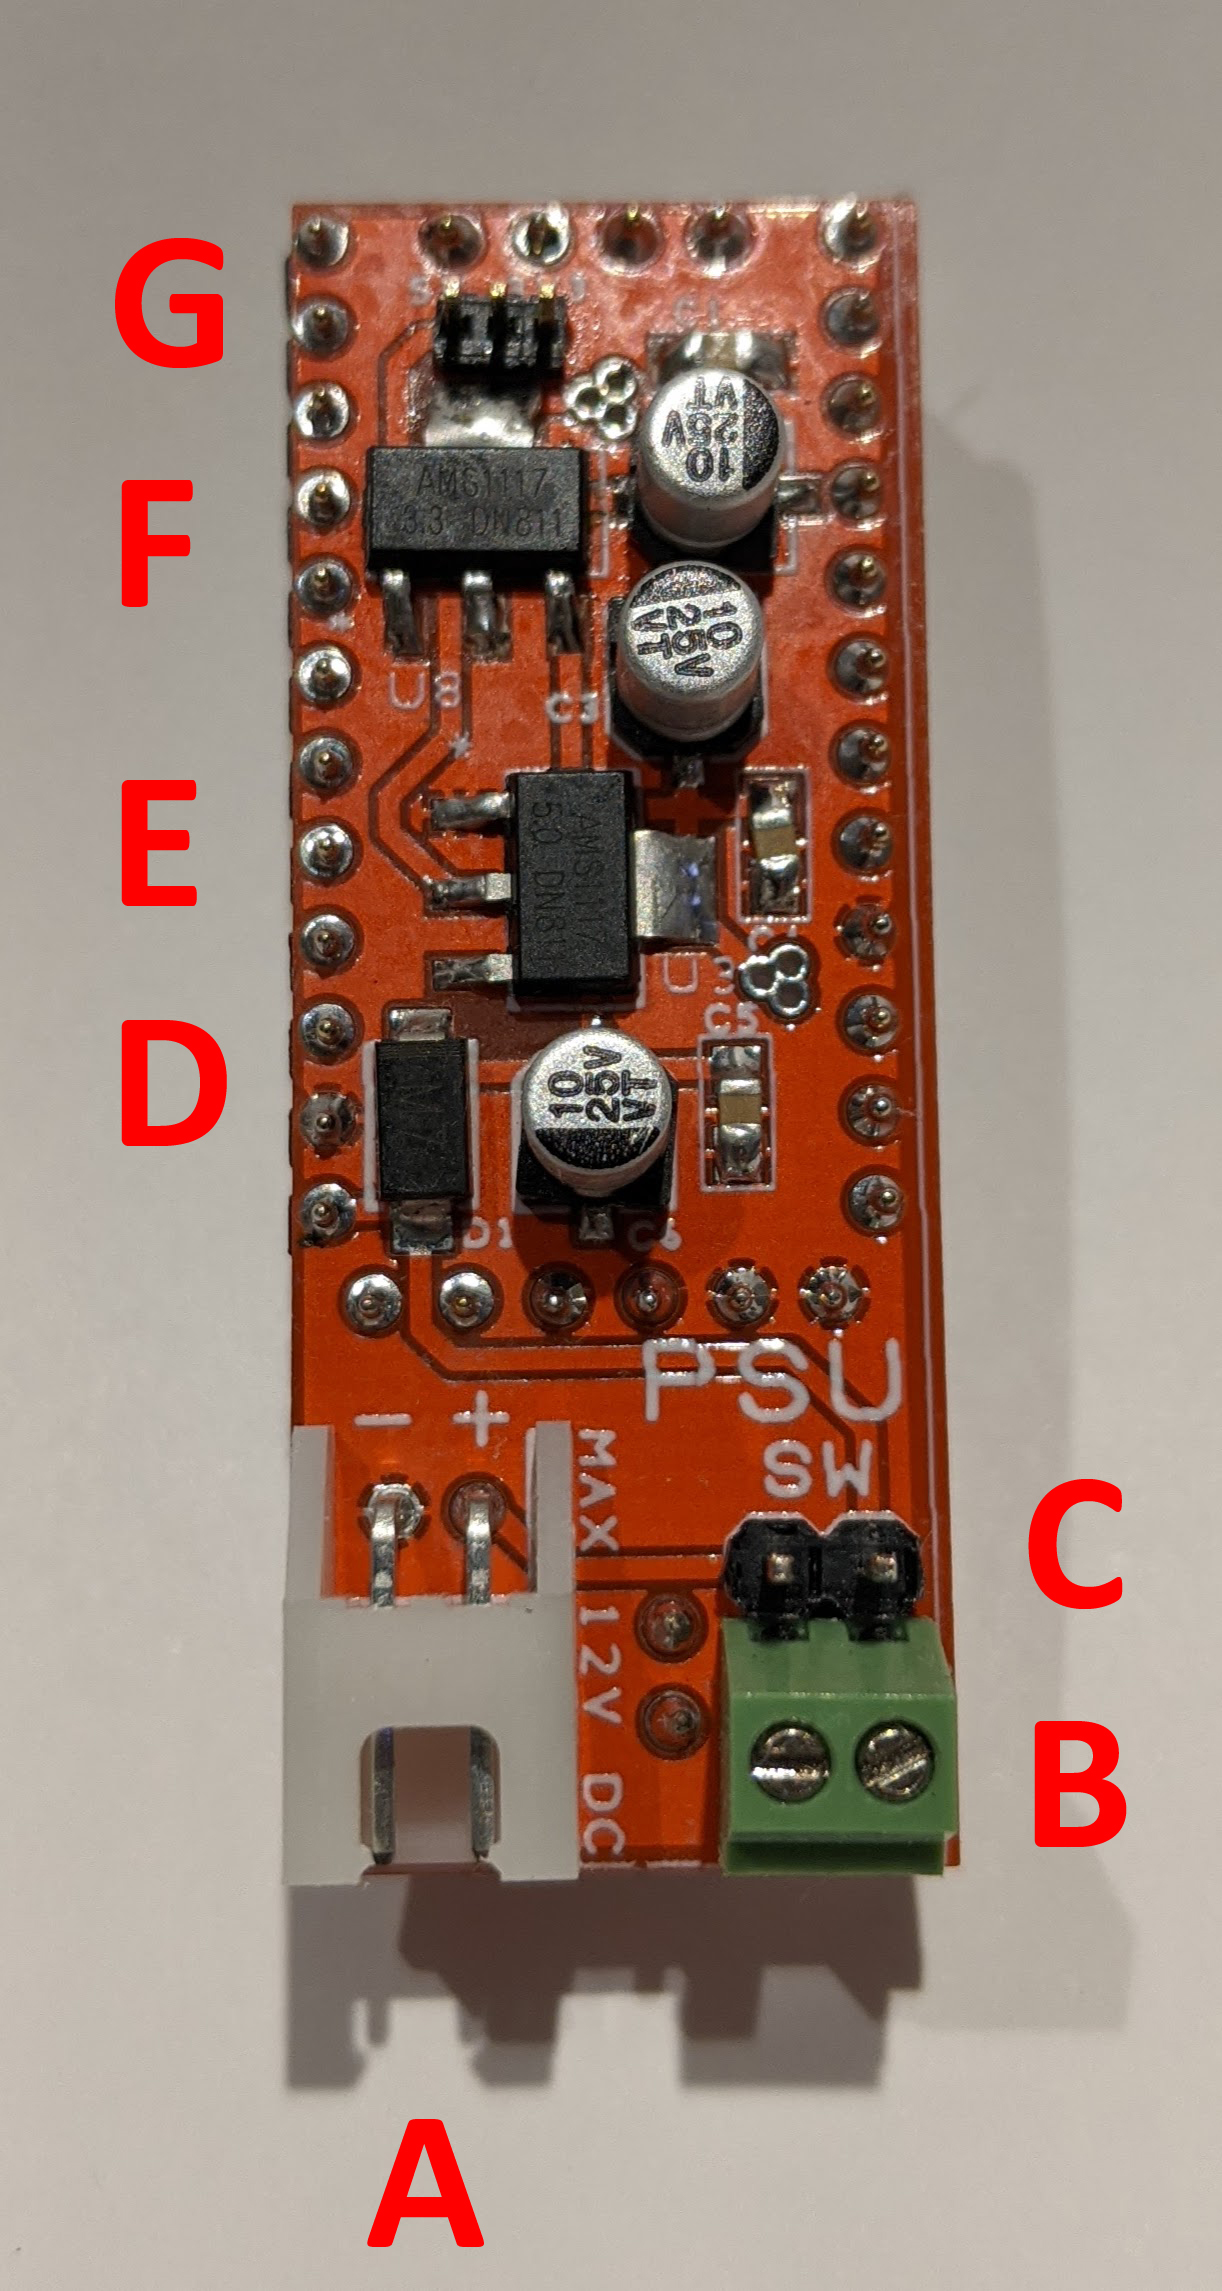
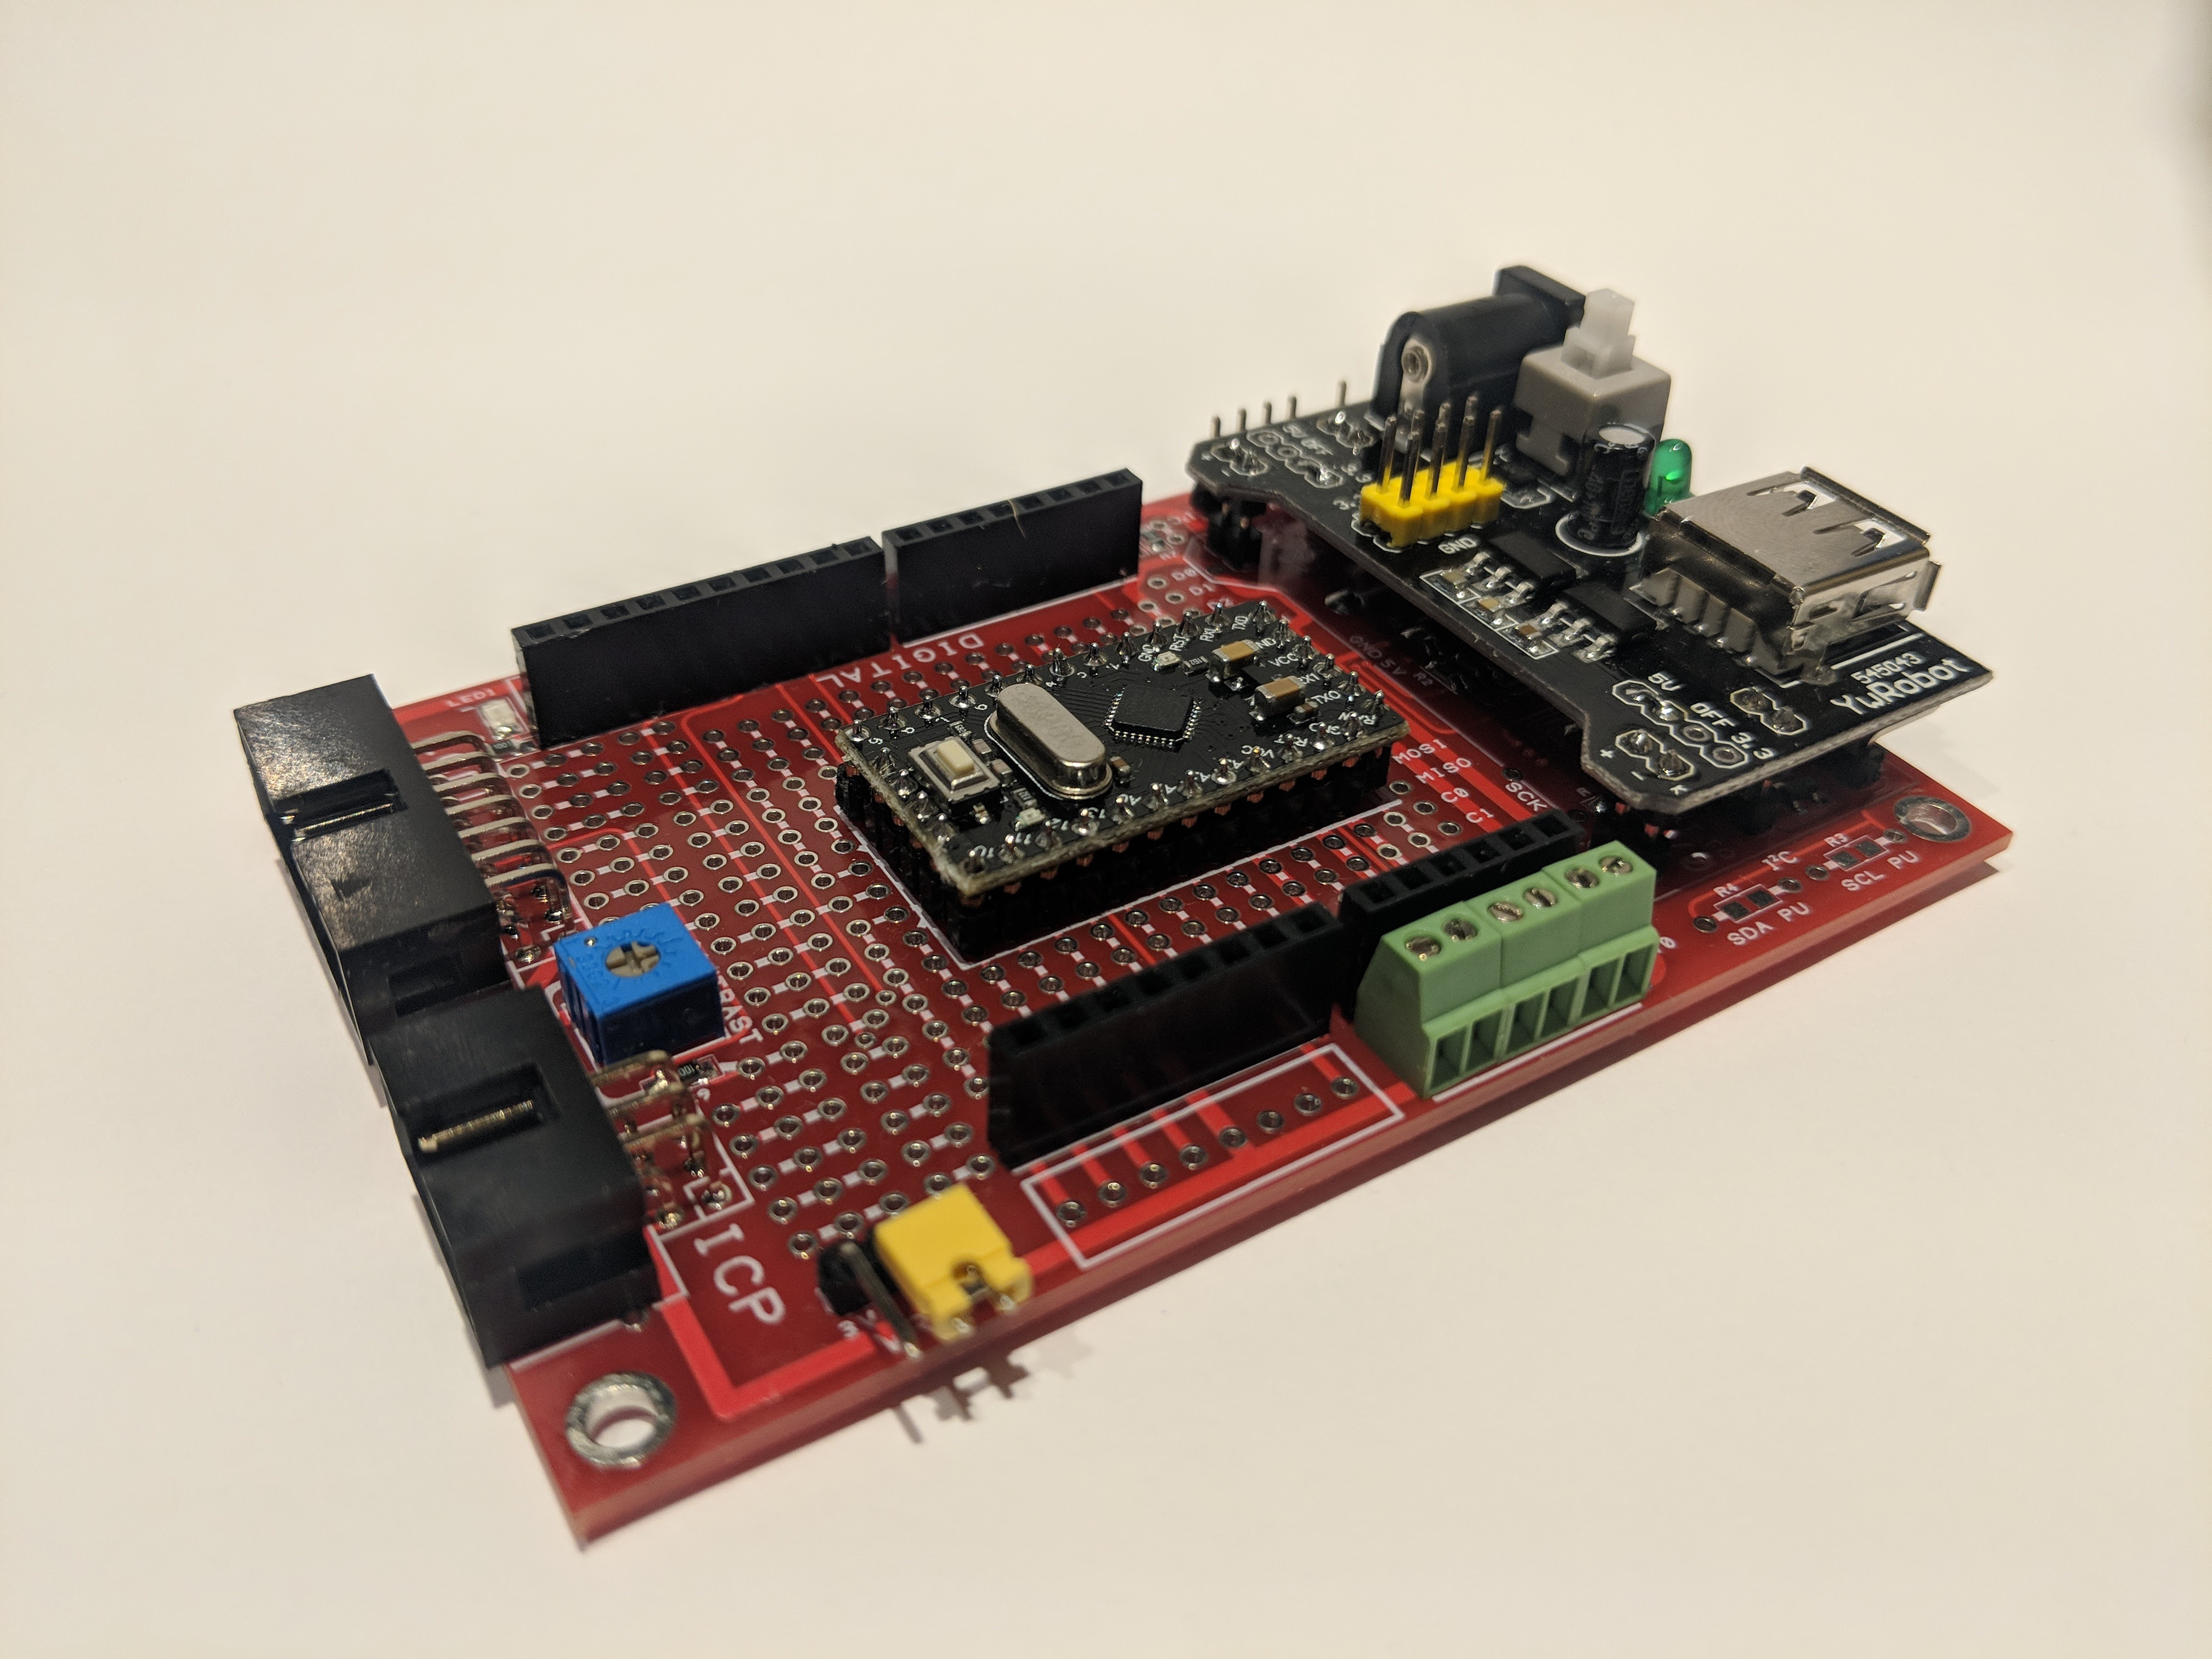
In this top view:

A - Power inlet

B - Screw terminals for offboard switch

C - Jumper across switch screw terminals

D - Reverse current protection diode

E - 5V regulator

F - 3.3V regulator

G - 3.3V/5V on Vcc rail jumper

The switch screw terminals let me use an external switch to turn the power supply on and off. If I'm not using an external switch I can use the adjacent jumper to tie the power supply on or I can put the jumper on and take it off to turn the power supply on and off.

The power supply puts the supply voltage from the power connector onto the Vin rail on the ProMini Backplane board. There is a jumper on the next slot over to allow me to take Vin off that socket so that I can put the ProMini in there and not have it powered all the time.

You can see two round pads between the white power inlet connector and the green screw terminals. This is an optional 2-pin header that sends regulated 3.3V and 5V from the power supply board down to the ProMini Backplane board to supply screw terminals to allow me to power offboard sensors or other devices easily.

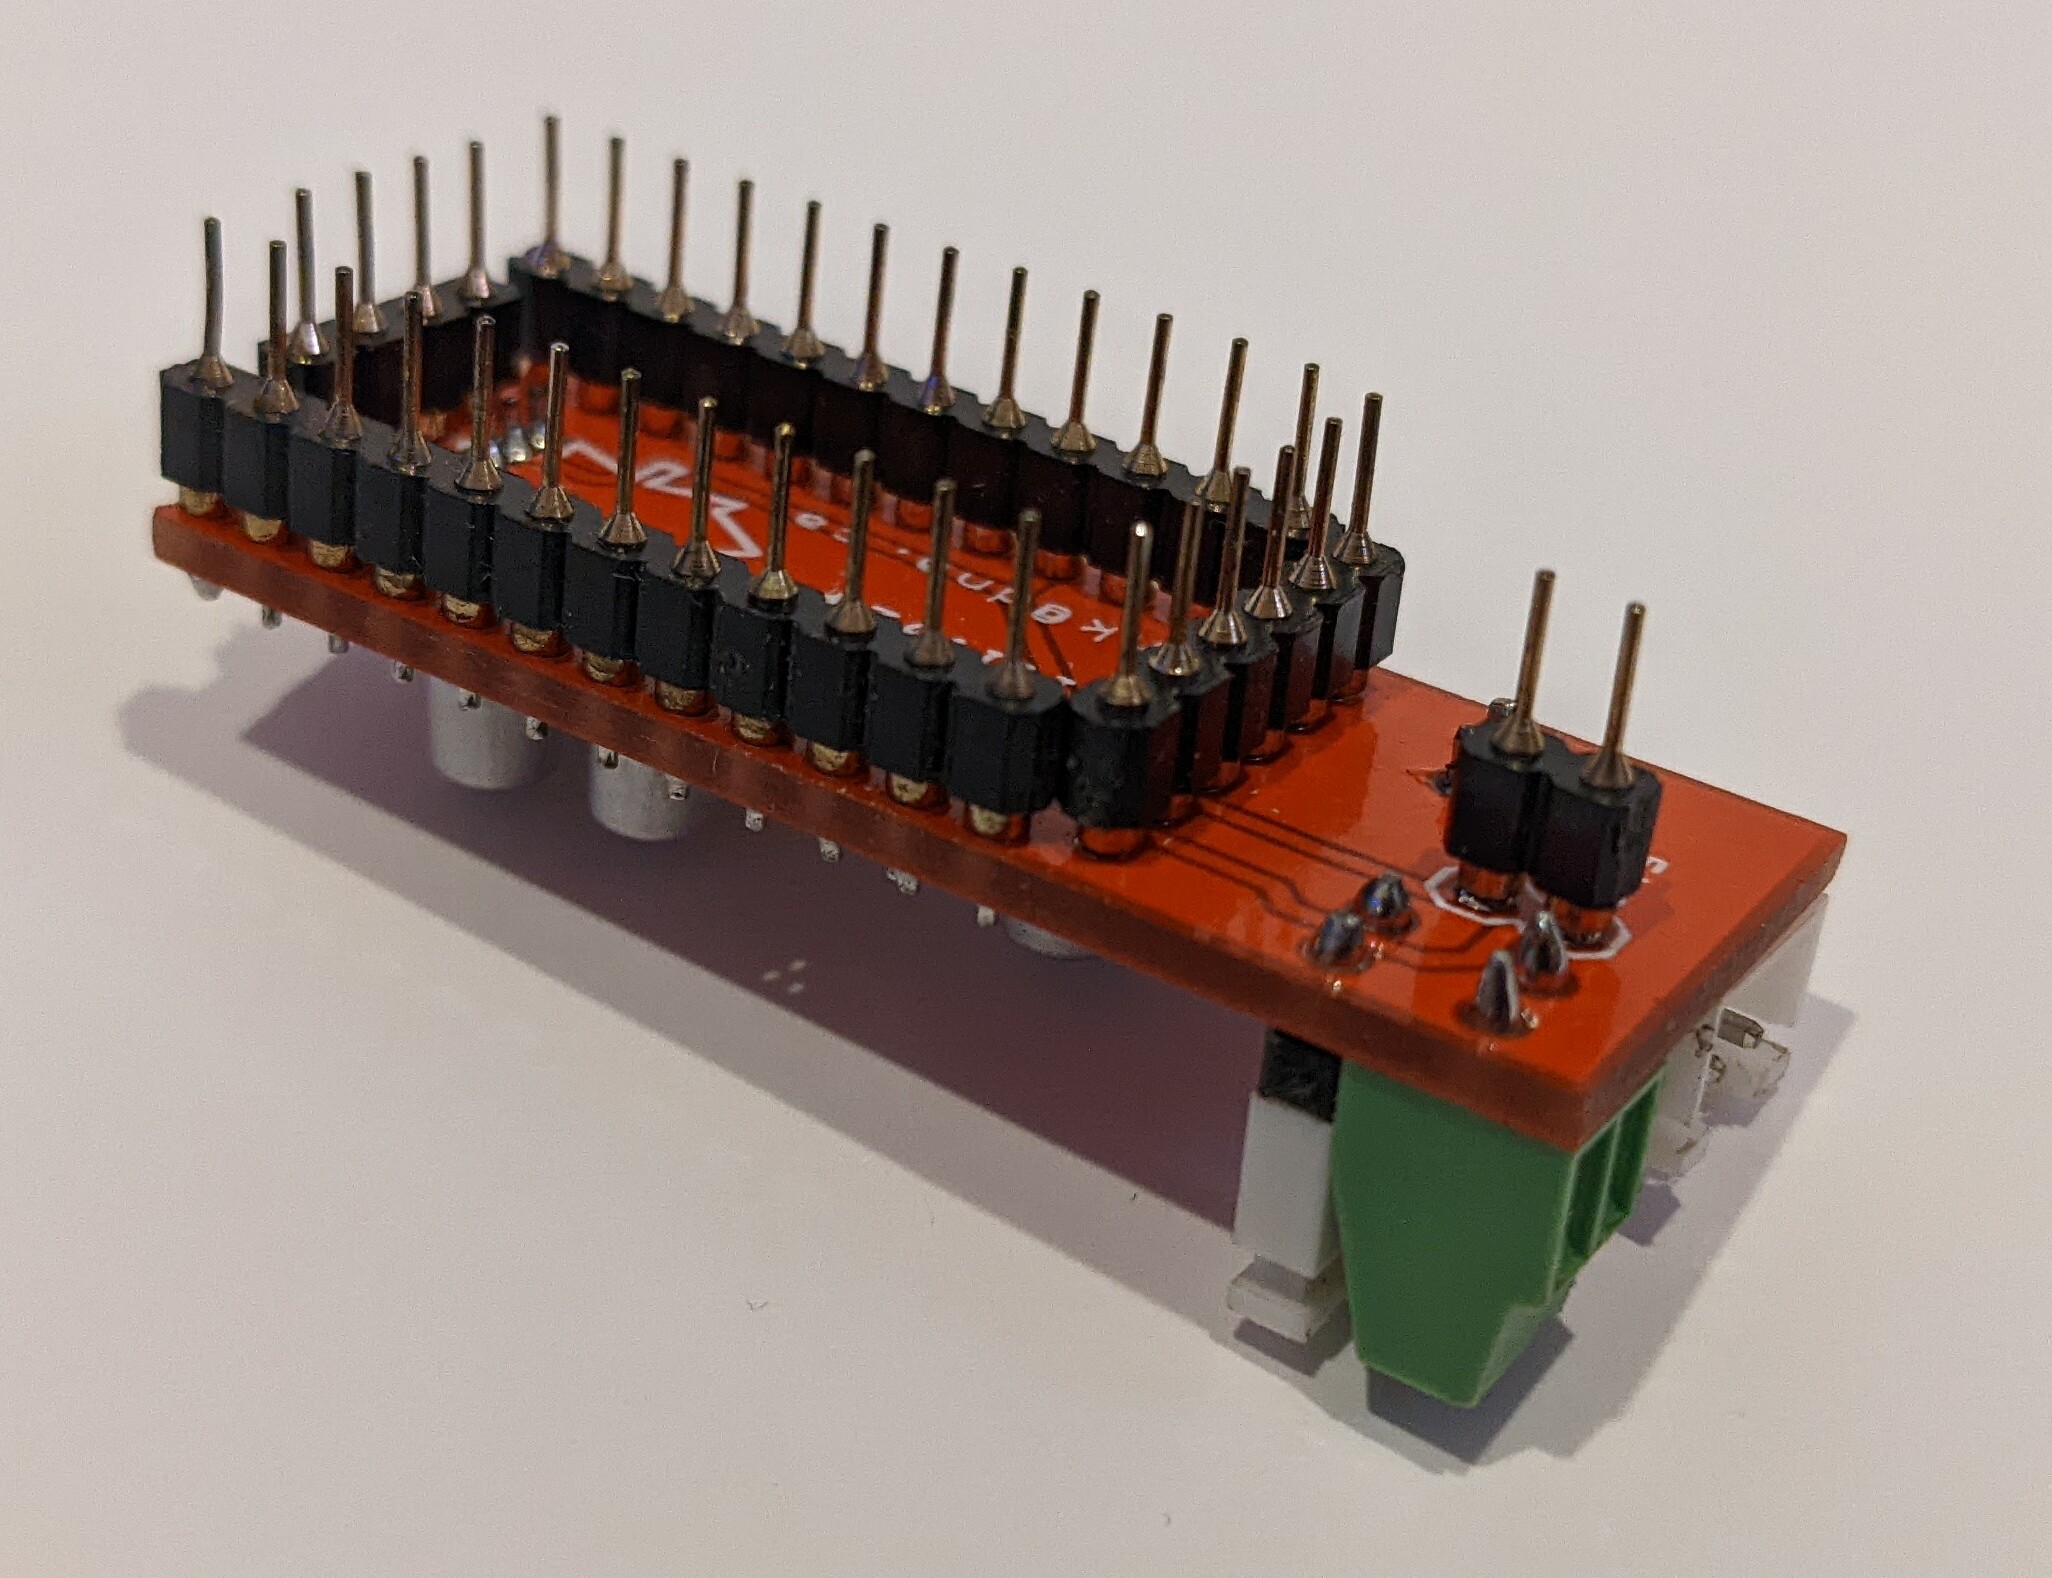
You can clearly see the extra 2-pin connector in this bottom shot.

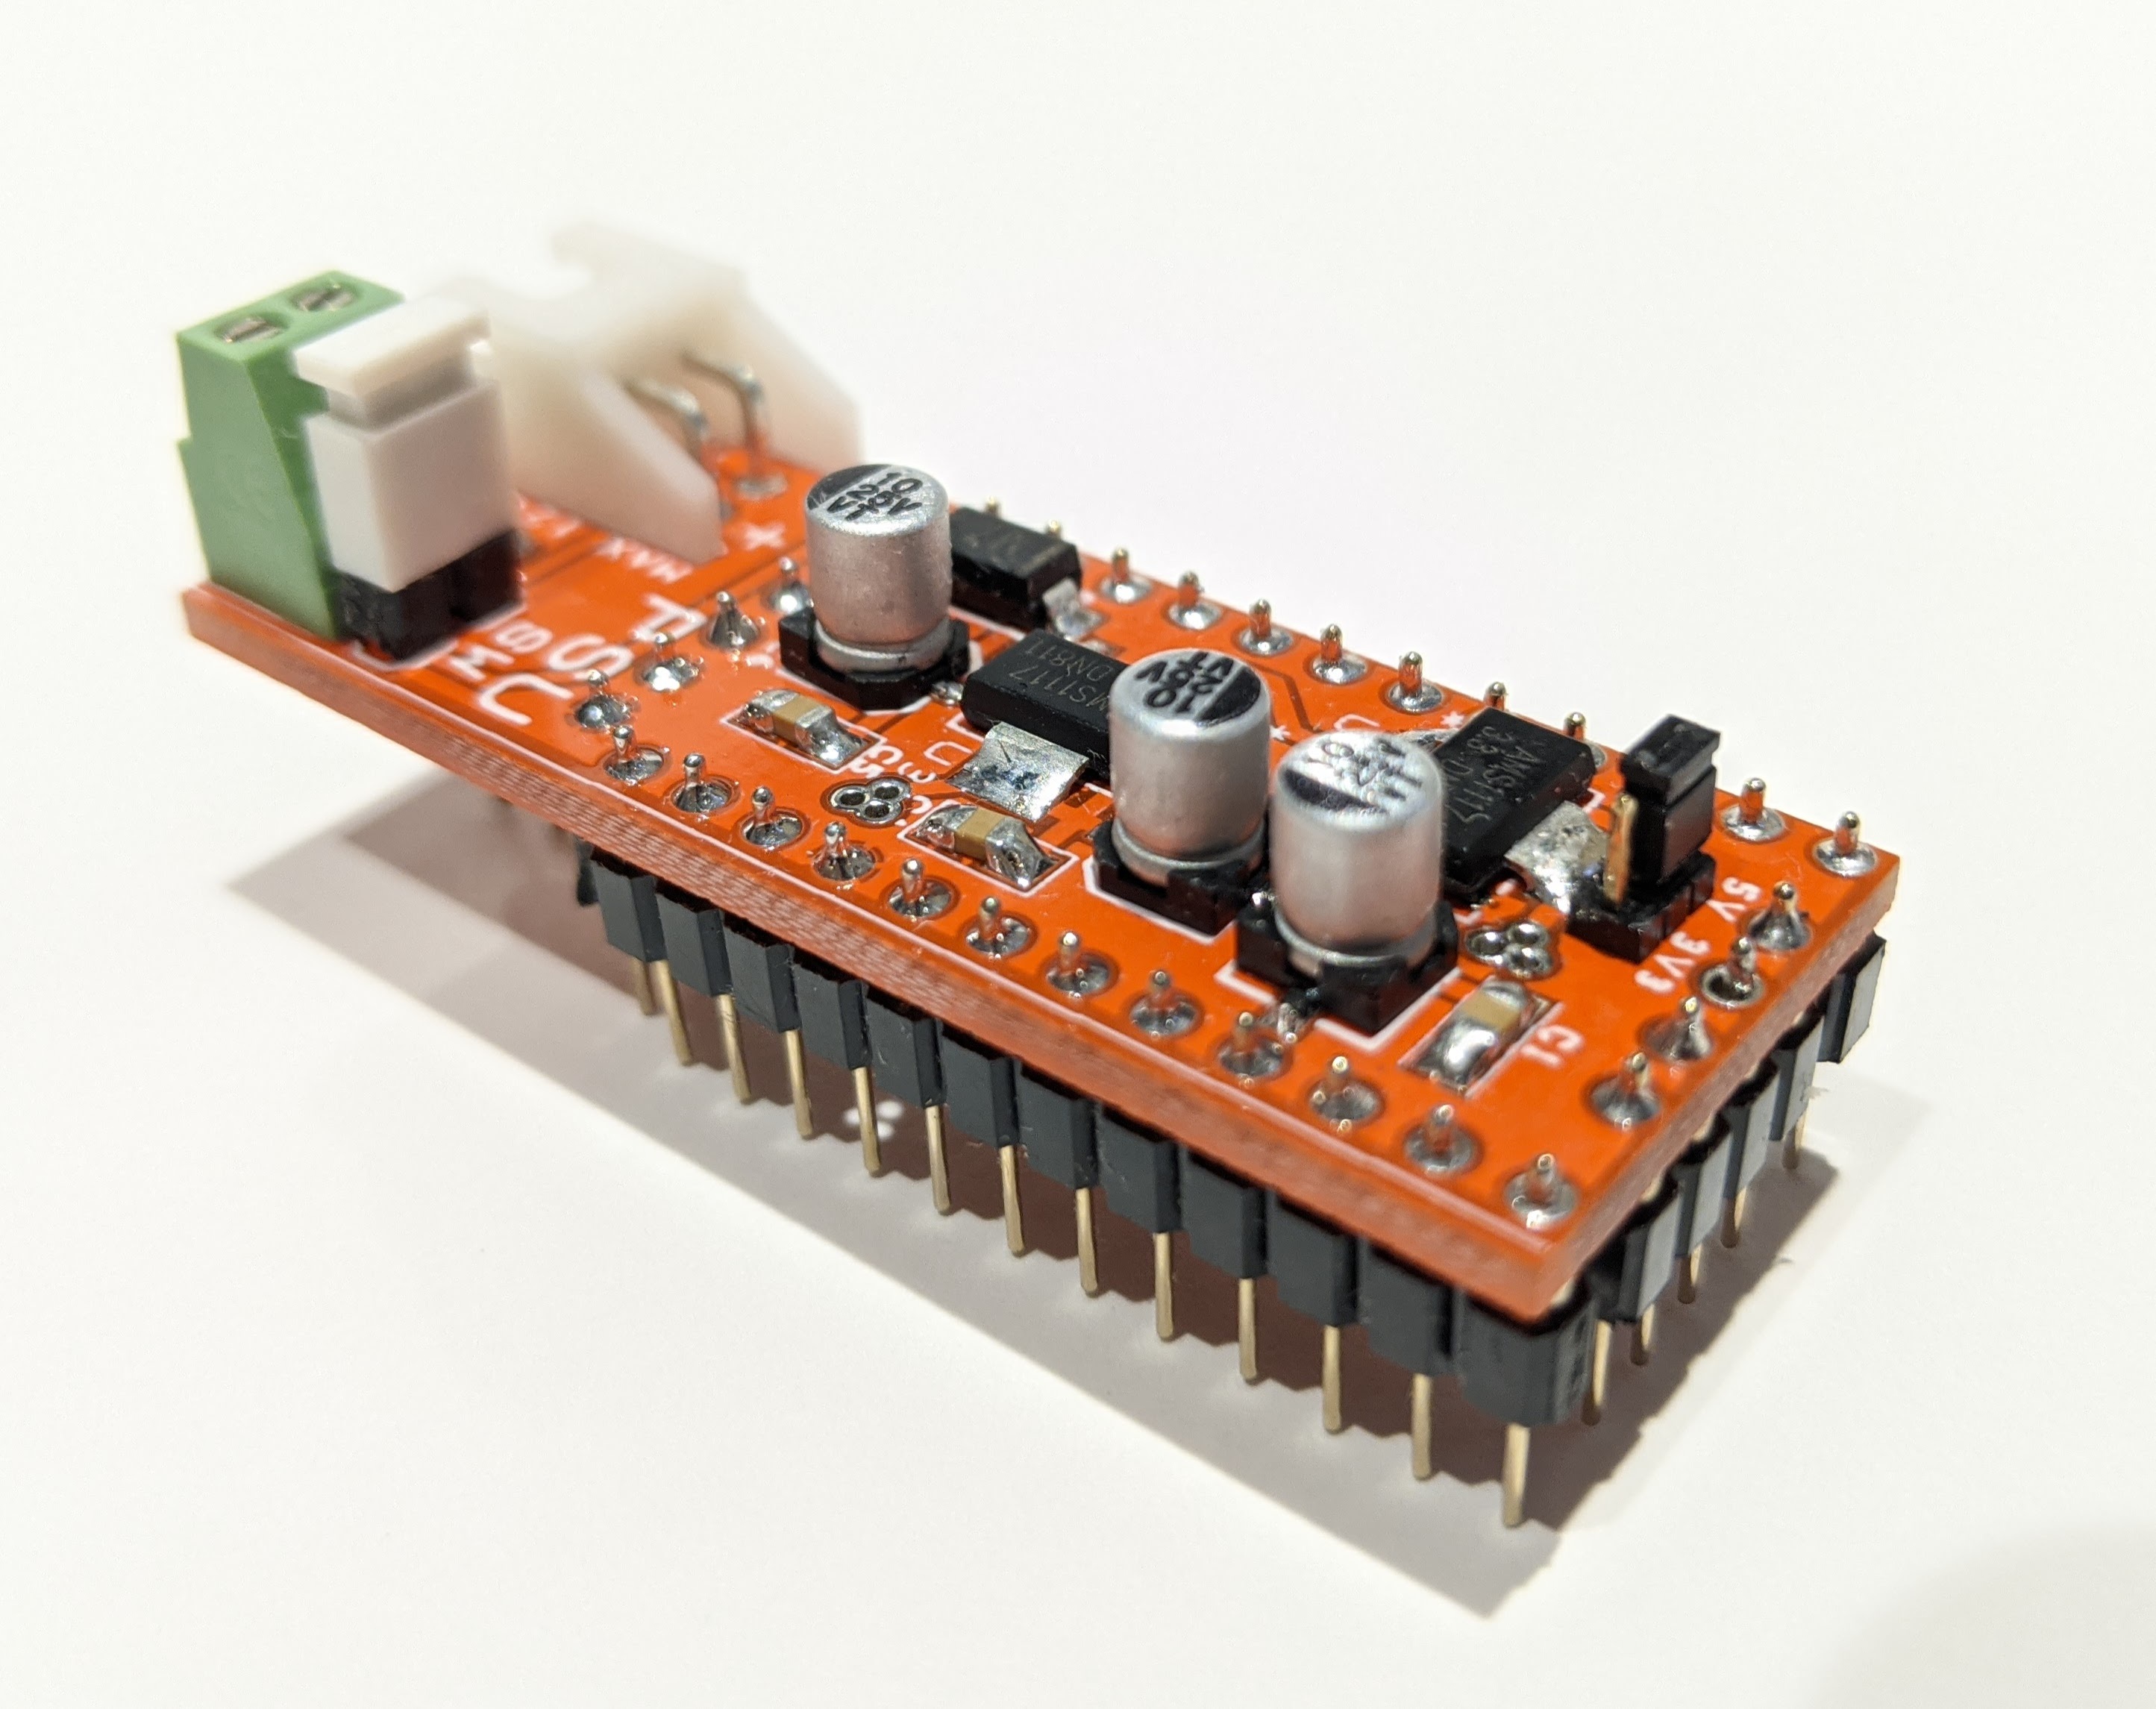
This board was designed in DS PCB before I switched to Pulsonix. I had them made by All PCB and assembled them by hand. This was a fun little project and I use these little boards quite often.

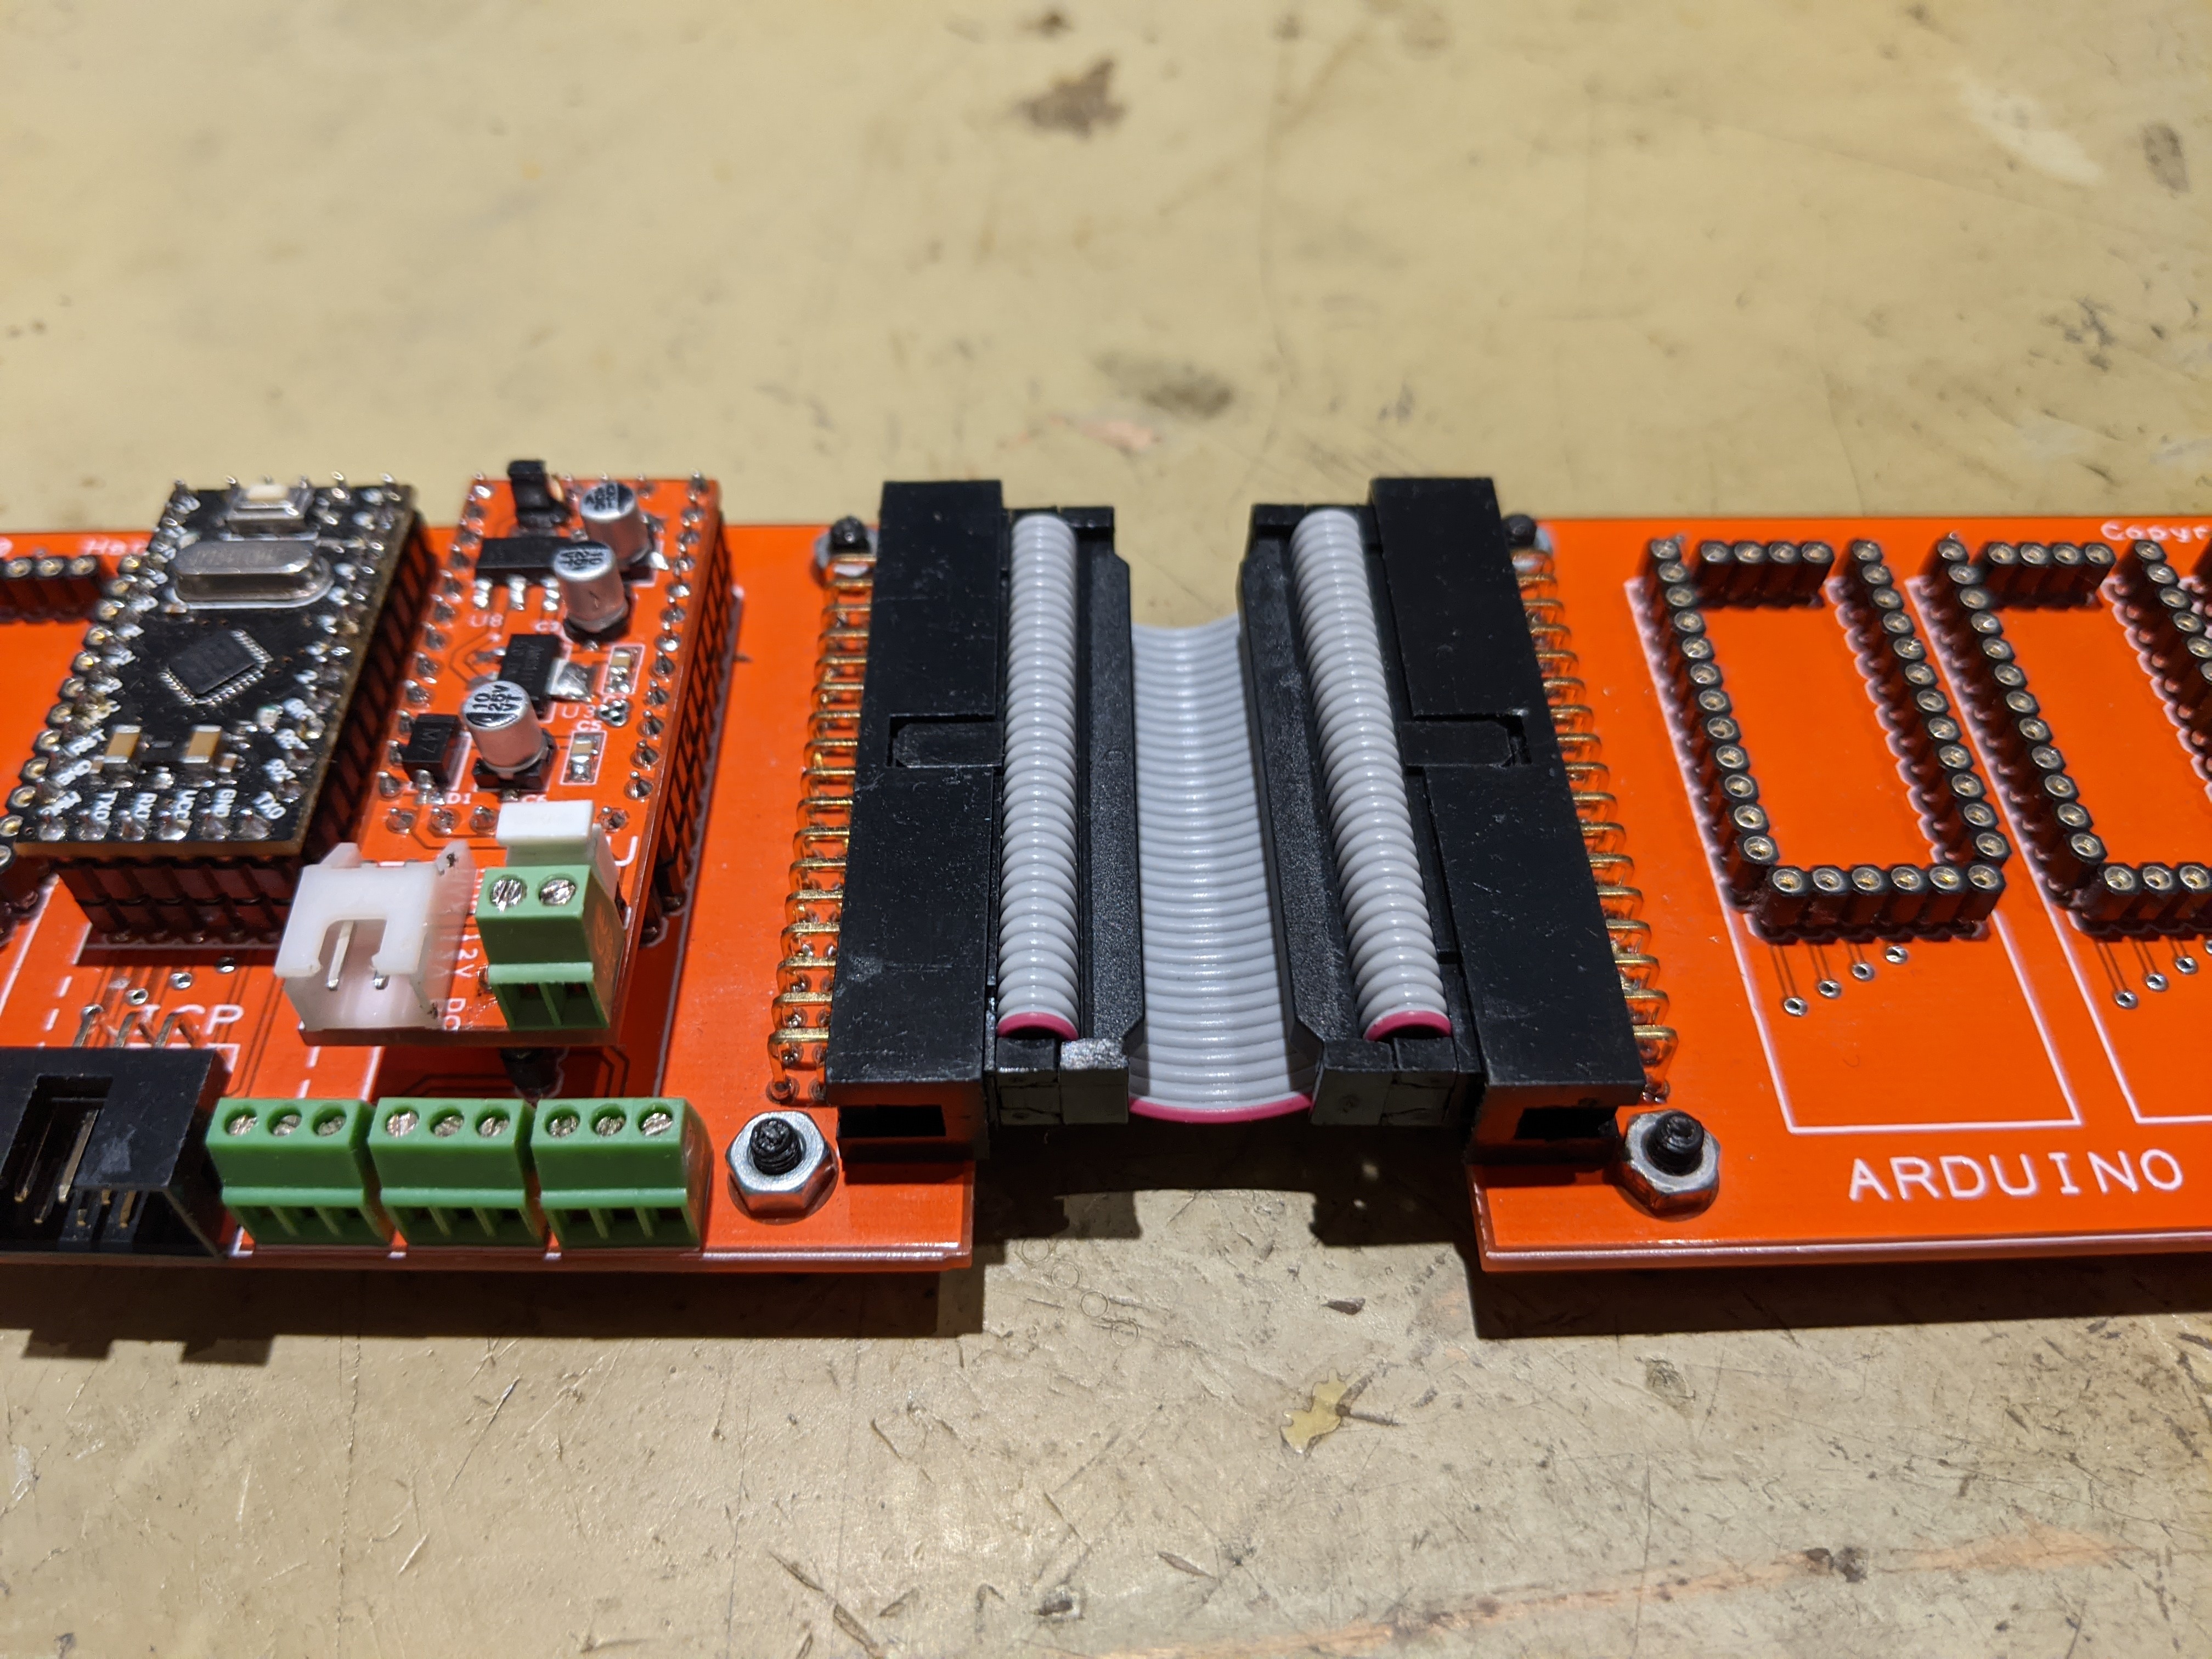
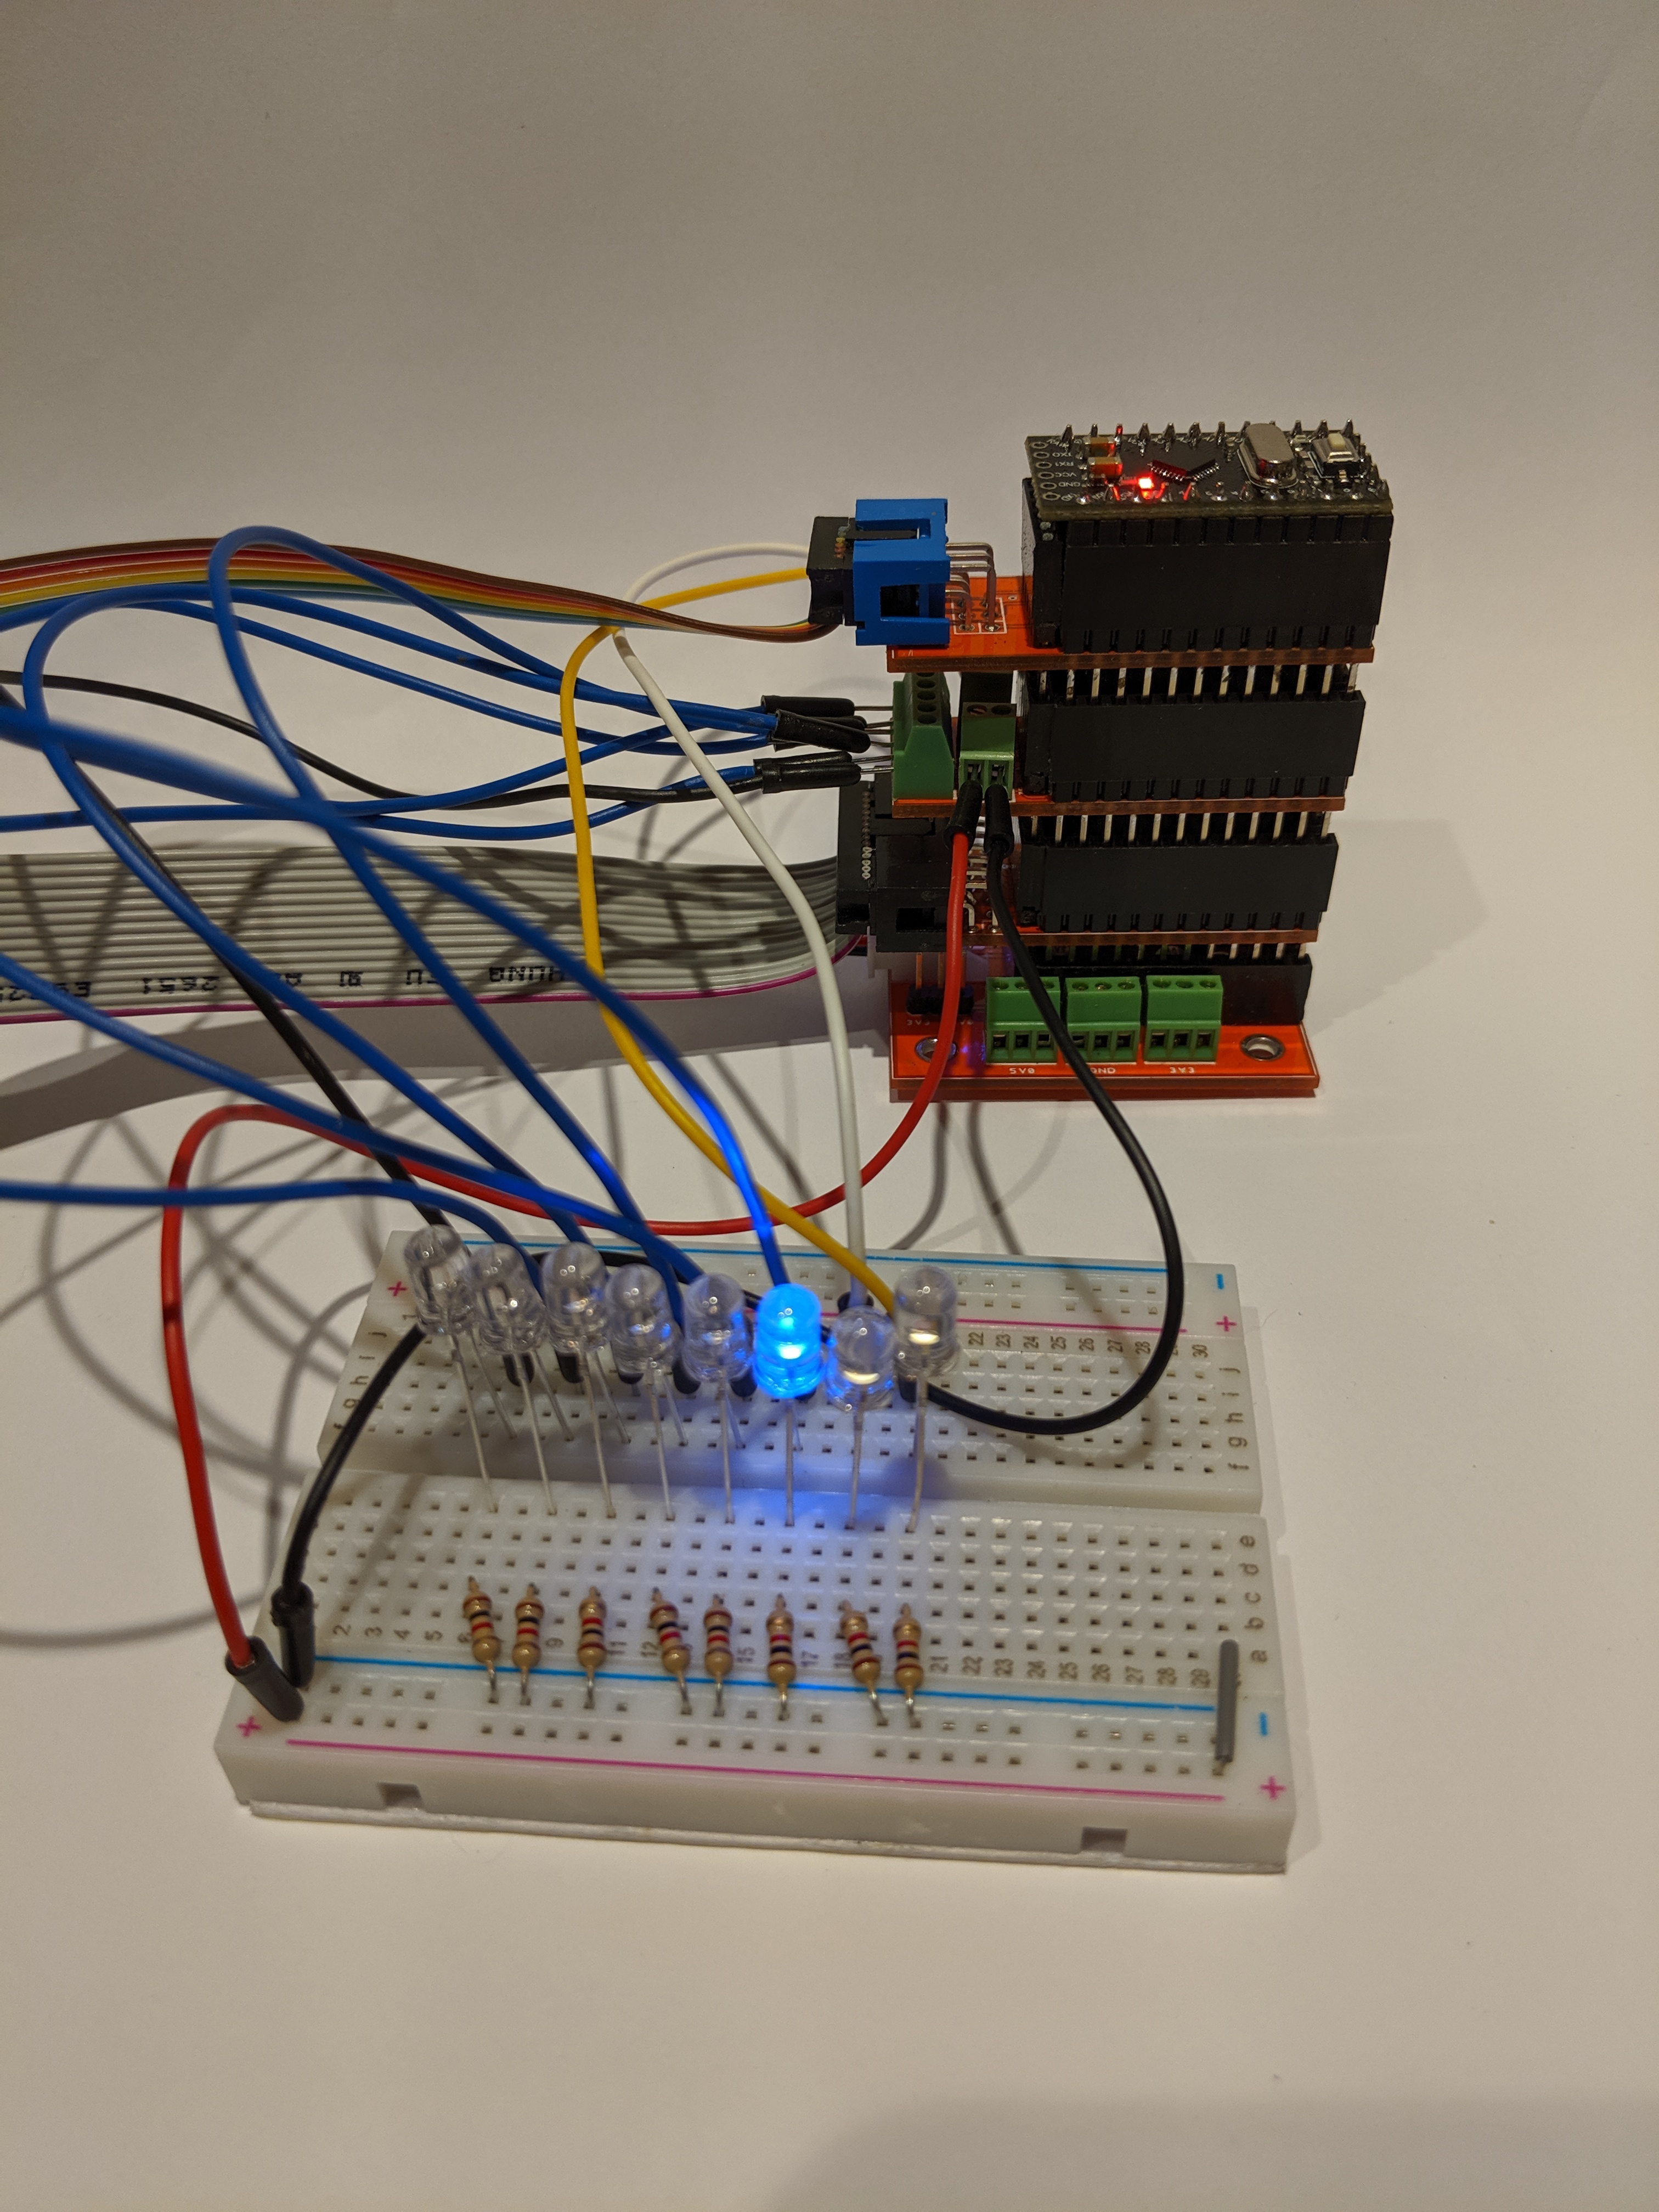
Here it is in action. The PSU board and a ProMini installed on the left ProMini Backplane board. You can see the 5V, GND, and 3V3 screw terminals to supply offboard power. I've also got two Backplane boards daisy chained together. You can also just see the 6-pin ICP port to the left of the screw terminals.


I needed some LEDs so that I could track what my data lines were doing. I started with a bunch of LEDs and resistors on a breadboard.

From there I made up a small block of SMD LEDs and resistors on a piece of proto board.

Then I moved to an actual prototype on a dedicated protoboard.

Finally, I produced the finished product. BLINKY LIGHTS!

The friend who I work with can design a board entirely in software, we use Pulsonix, without every making a prototype, send it for manufacture, and get working boards back. Even when I build multiple prototypes I often end up with boards that need FECs to make them work.

1
submitted 2 years ago* (last edited 2 years ago) by MapleEngineer@lemmy.ca to c/soldering@lemmy.ca
 

When I started soldering everything was big and had leads that went through holes in the board. You inserted the leads, bent them over to hold the component, flipped the board over, soldered everything, and trimmed off the excess leads.

Now I'm soldering things down to 0402 SMDs (1/4 the size of the smallest component in the picture) using a needle point soldering tip and a microscope.

A pair of 2N2222 transistors, one SOT23 and one TO-92.


This is the setup I used to calibrate the vacuum sensor. The vacuum line connects on the right. The right T is the vacuum sensor. The left T is a vacuum gauge. The ball valve allows me to easily release the vacuum.

I use the vacuum transducers to monitor the vacuum level on the pump side and the collection (tree) side of the vacuum releaser.


This is the breadboard prototype of the first iteration of the industrial controller that I use to make maple syrup and that I call the SapMaster.

The Arduino Nano version ended up in a PVC project box from Turkey.

The Arduino boards is on the left in this photo.


I built these a few years ago to let me use UNO shields with Pro Minis to speed up prototyping. This was an early version. Later versions had more and more features added until I didn't need the shields anymore. That's when my Pro Mini Backplane was born.


One of the more than 120 varieties of dailies planted around our house and gardens.


My wife ran off the London and left me in charge for 3 weeks. I didn't kill her tomatoes.


A couple of farts yesterday.

When I saw these I started talking out loud about my recent efforts to prefect a homemade naan recipe to go with my favorite butter chicken recipe. We'll see whether that had any impact today.

The naan is coming along nicely. I'm going to make another batch today.


I'm working on making decent naan at home. My Indian coworkers are trying to help. It was better the second day after fermenting overnight. I hope that bread flour and a new recipe will improve it even more.

view more: ‹ prev next ›