Lemmy Plugins and Userscripts
3061 readers
1 users here now
A general repository for user scripts and plugins used to enhance the Lemmy browsing experience.
Post (or cross-post) your favorite Lemmy enhancements here!
General posting suggestions:
- Preface the submission with the type of enhancement - ex: [UserScript].
- Include a screenshot of the enhancement in use (where possible)
- Indicate the requirements for use (eg, greasemonkey, stylus, etc.)
Thanks!
founded 2 years ago
MODERATORS
1
2
3
4
Similar to my last submission but not specific to YouTube, this is a very basic bookmarklet that does nothing but create a submission to Lemmy of the currently open website. It does not fill out the thumbnail and hopes that Lemmy will generate a proper one on its own.
You may need to replace "lemmy.world" in the script with the domain of the Lemmy instance that you use.

Source: https://pastefy.app/kKChBKoK
How you add a bookmarklet is by creating a new web browser bookmark and pasting the JavaScript code where the URL would go. Something like this:

The way Lemmy works, you may be prompted to login again. Lemmy can do weird things like ignore your session when referrer isn't sent. Still easier than filling out the video title yourself.
There is also the "hidden" feature that you may enter a community ID as a URL parameter (currently empty). I think the ID for a specific community varies depending on your home instance. On Lemmy.World this community here is 7133, for example. You can find out the ID when you're on the Create Post page and have a look at the address bar:

This may be useful, should you want to submit to a specific communtiy directly.
Code is public domain.
5
Apparently YouTube blocked the IPs of the several Lemmy servers such as Lemmy.World, so you cannot just conveniently post a video and get title and thumbnail filled out. Basically, these tasks need to be done locally instead of the Lemmy server. If you use a Lemmy client such as Thunder and use the share sheet from YouTube with it, the title is already filled out.
Here are two bookmarklets you can use. The way bookmarklets work is that you create a new web browser bookmark and paste the JavaScript code where the URL would go. Something like this:
The first bookmarklet is a generic one and should work for everyone regardless of browser choice. When in the YouTube browser tab, you just click on it and a new tab opens to create a new post. Title and thumbnail are filled out.
You need to replace "lemmy.world" with the domain name of your Lemmy instance.
I cannot post the code directly in code markup because stupid Cloudflare thinks I'm doing an SQL Injection. 🙄

Code: https://pastefy.app/SgP7s3Cp
The second bookmarklet is for when you use Firefox Multi-Account Containers, for example when you're logged into YouTube using a dedicated account and you don't want it to affect tabs with Google services you might use with a different account. If you don't have that requirement, just use the first script.

Code: https://pastefy.app/TKEbB7Jx
The way Lemmy works, you may be prompted to login again. Lemmy can do weird things like ignore your session when referrer isn't sent. Still easier than filling out the video title yourself, IMO.
Code is public domain.
6
7
8
9
10
11
12
13
0
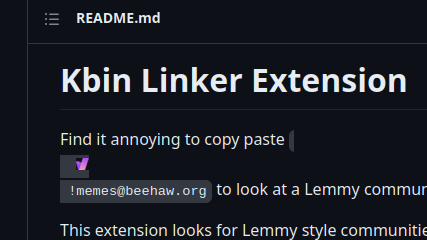
Extension [By @lixus98@kbin.social] to add clickable local links on non-local instances
(beehaw.org)
This extension helps users subscribed to Lemmy communities by adding an icon before mentions or URLs related to other communities. These mentions can be in the format “ !communityname@instance.domain !communityname@instance.domain” or through URLs like “https://lemmy.ml/c/memes%E2%80%9D.
By clicking the icon, users are directed to the kbin URL of that community. However, there’s currently a bug preventing it from working on /kbin (ironically), and I’ve already reported the issue on Git.
I’m in the process of publishing the extension on Firefox and Chrome extension stores, along with making the source code available.
I would appreciate your input on whether you find this extension useful.
github link: https://github.com/driccio98/kbin-link
Works on lemmy instances. You specify your lemmy host in the preferences and it automatically adds a small icon before all addresses, both on communities and in threads/posts

Already a firefox extension https://addons.mozilla.org/en-US/firefox/addon/kbin-link/
it even added the icon to an address on github
14
0
[Userstyle] Add hearts to users from your homeserver/other designated servers (Frend Detector) v1.6
(pawb.social)
Edit: @redyoshi49q@furry.engineer has designed a better solution using only CSS, and this should be used instead of the old script! If you're reading this page for the first time, ignore this message.
This userstyle adds a red heart next to people that are from your home server, and any other servers that you manually define. Spot your server buddies out in the wild!
Instructions:
-
Install Stylus extension for firefox/chrome
-
"Write new style" in the addon settings
-
Copy paste the CSS code below in
-
Modify the code around line ~11 in order to reflect your homeserver and any additional frendservers that you want to highlight
-
Modify the code around line ~19 to reflect your homeserver
-
(Optional) If you’d like your homeserver buddies to have a different marker, uncomment the various sections around line ~27 through ~50 by removing the /* and */ bits
-
(Optional) Play around with different markers and colors!
CSS/Userstyle: https://gist.github.com/redyoshi49q/f1b2d1da0a8f7536aba1f8c3110d2dd8
15
16